When the power goes out or disaster strikes, knowing how to cook with solar energy becomes a lifesaving skill. Solar ovens have grown in popularity among people who want to be ready for emergencies. These simple devices turn sunlight into cooking heat without needing electricity or gas.
A solar oven works like a magic box. It captures the sun’s rays and traps them inside a dark chamber. The ultraviolet light rays convert to infrared rays that cannot escape. This trapped heat makes water, fat, and protein molecules in your food vibrate and warm up. The result is cooked meals using only free sunshine.
Solar oven cooking basics are easier to learn than you might think. You do not need fancy equipment or special skills. Even people with zero cooking experience can master how to cook with solar energy. The best part is that solar ovens work year-round. People have cooked successful meals on top of four feet of snow in winter.
Learning solar oven cooking basics now means you will be ready when conventional power sources fail. This skill saves money on your electric bill and gives you freedom from grid-based cooking methods. A complete guide to solar cooking fundamentals can help you understand every step of the process.
Solar cooking is not just practical. It is an enjoyable skill that brings families together outdoors. You will discover that slower cooking actually preserves flavor and nutrients better than fast conventional methods. This article will teach you everything you need to know about solar oven cooking basics and how to cook with solar energy for any situation.
Table of Contents
Understanding How Solar Ovens Work
Solar ovens turn the sun’s energy into cooking power. It’s not complicated. They use basic physics to trap heat and cook food. Knowing how they work helps you cook better and prepares you for emergencies.
Converting Sunlight Into Cooking Heat
The magic begins when ultraviolet light rays from the sun hit your solar oven. These rays pass through a glass cover and hit dark surfaces inside. The sun’s energy turns into infrared rays that can’t escape.
This creates a greenhouse effect for cooking. The trapped infrared heat makes food molecules vibrate fast. Water, fats, and proteins heat up, creating the perfect cooking environment. It’s free, clean energy cooking for you.
Temperature Ranges and Cooking Capabilities
Different solar ovens can cook different things. Knowing what each can do helps you cook better.
| Temperature Range | Cooking Capability | What You Can Prepare |
|---|---|---|
| 150°F | Pasteurization | Kill germs in water and milk |
| 180°F | Cooking | Prepare most foods, vegetables, grains |
| 212°F | Boiling Water | Boil water for pasta, rice, tea |
| 250°F–400°F | Roasting and Baking | Bake bread, roast meats and vegetables |
Basic solar ovens usually get to 200°F on a clear day. Commercial ones can go up to 250°F–400°F. This lets you roast and bake like a traditional oven.
- Start cooking at 180°F for reliable results
- Use 212°F for boiling water and making hot beverages
- Try roasting at 300°F or higher in commercial units
You don’t need to be a scientist to use solar cooking. Just point your oven at the sun and let nature do the rest. The sun’s free energy becomes your cooking fuel, ready to prepare healthy meals whenever you need them.
Types of Solar Cookers for Emergency Preparedness
When getting ready for emergencies, knowing about solar cooker designs is key. Each type has its own benefits based on your needs and space. Let’s look at the three main solar cooker models that are great for beginners and reliable for emergencies.
Solar box cookers are a top pick for new solar cooks. They have a reflective lid that focuses sunlight on a pot inside an insulated box. This design is easy to aim and keeps food warm, even when it’s cloudy. Box cookers are perfect for beginners who want simple, reliable results.
Solar parabolic cookers look like satellite dishes and cook food the fastest. They concentrate heat at a point where you hang the pot. These cookers get very hot but need more attention to position and monitor.
Solar panel cookers use panels around a pot to capture sunlight. They offer a balance between simplicity and performance. Panel cookers are great for emergencies because they’re portable and affordable. They’re easy to carry and store, but don’t get as hot as parabolic models.
| Cooker Type | Best For | Heat Output | Portability | Ease of Use |
|---|---|---|---|---|
| Box Cooker | Beginners seeking stability | Medium | Moderate | Easy |
| Parabolic Cooker | Fast cooking needs | High | Low | Challenging |
| Panel Cooker | Mobile emergencies | Medium | High | Moderate |
Think about your emergency needs when picking a cooker. Box cookers are good for home use where you have space. Panel cookers are better for on-the-go situations. Parabolic models are for those who need fast cooking in a fixed spot. The best solar ovens for beginners offer easy use and reliable performance.
Your choice depends on your storage space, emergency scenarios, and comfort with solar cooking. Each type has its own role in emergency preparedness.
Solar Oven Cooking Basics
Starting with solar oven cooking is easy. You don’t need fancy or expensive tools. Just learn about the basics of equipment and cookware preparation. Then, you can cook tasty meals using the sun’s power.
Essential Equipment and Materials
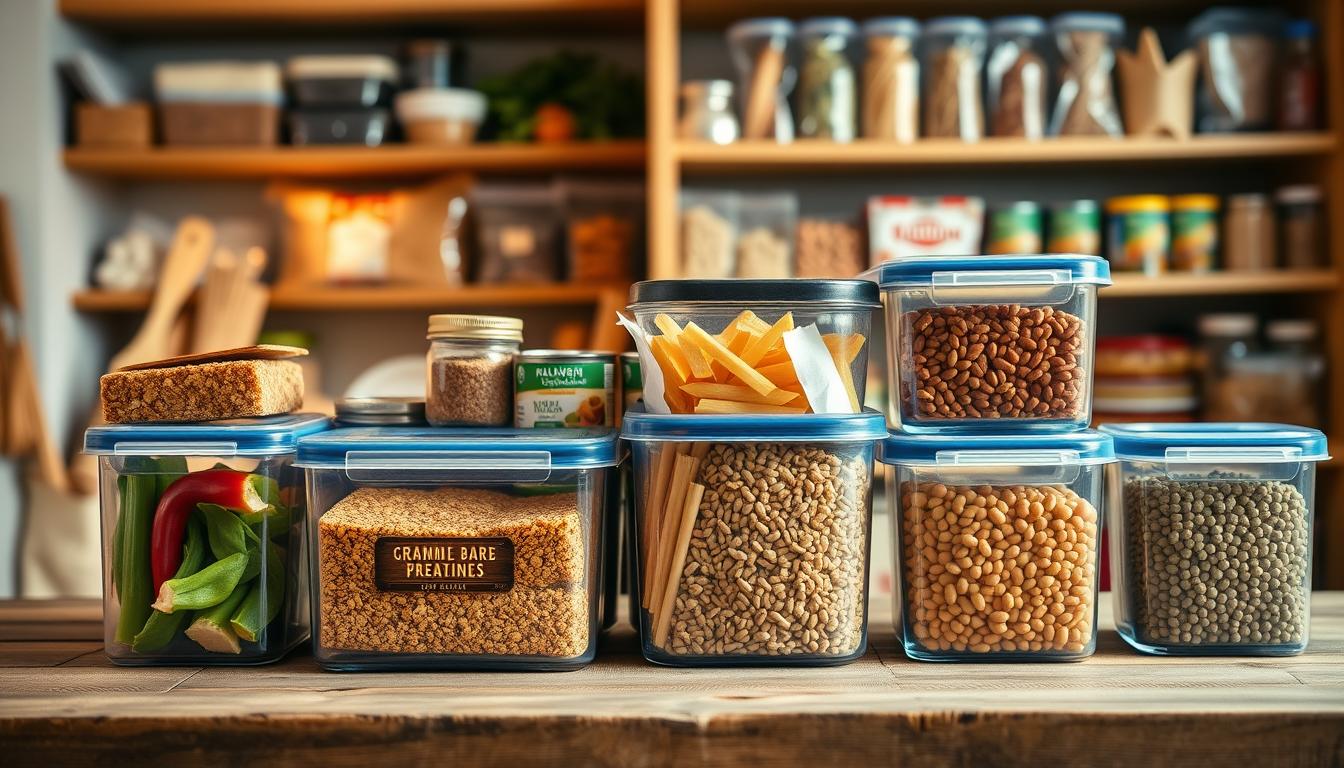
First, gather the right tools. You’ll need a solar oven, cookware, covers, and basic accessories. Use potholders because metal handles get very hot. A thermometer helps you check temperatures without opening the oven too often.
For heat-trapping covers, try creative solutions. A large clear glass bowl works great. Turkey roasting bags are also good and cost little. Use canning jars with loose lids to avoid pressure buildup.
- Clear glass bowls for heat retention
- Turkey roasting bags as transparent covers
- Canning jars with loose-fitting lids
- Kitchen thermometers
- Heat-resistant potholders
Choosing the Right Cookware for Solar Cooking
Choosing the right cookware is key. Dark-colored pots absorb heat, while shiny or light-colored pans reflect it. Cast iron cookware heats slowly but keeps warmth well for even cooking. Granite ware heats quickly and is light, perfect for beginners.
Dark glass pans let you see your food cooking. If you have light-colored cookware, paint it with BBQ paint. This makes ordinary pans ready for solar cooking. Wide, shallow pans cook better than deep ones because they expose more to heat.
| Cookware Type | Heat-Up Speed | Heat Retention | Best For |
|---|---|---|---|
| Cast Iron | Slow | Excellent | Even cooking, stews, and roasted vegetables |
| Granite Ware | Quick | Good | Beginners, quick meals |
| Dark Glass | Moderate | Good | Visibility, baking, casseroles |
| Enameled Steel | Moderate | Good | Versatile cooking, roasting |
Use pots with tight-fitting lids to keep heat in. Put food in dark pots like cast iron or enameled pans. Then, cover with a clear glass bowl or turkey roasting bag to trap more heat.
Paint viewing windows on black-coated jars for solar cooking. Leave a stripe unpainted to check food without lifting the cover. This keeps heat in and lets you see your food’s progress.
Setting Up Your Solar Oven for Optimal Performance
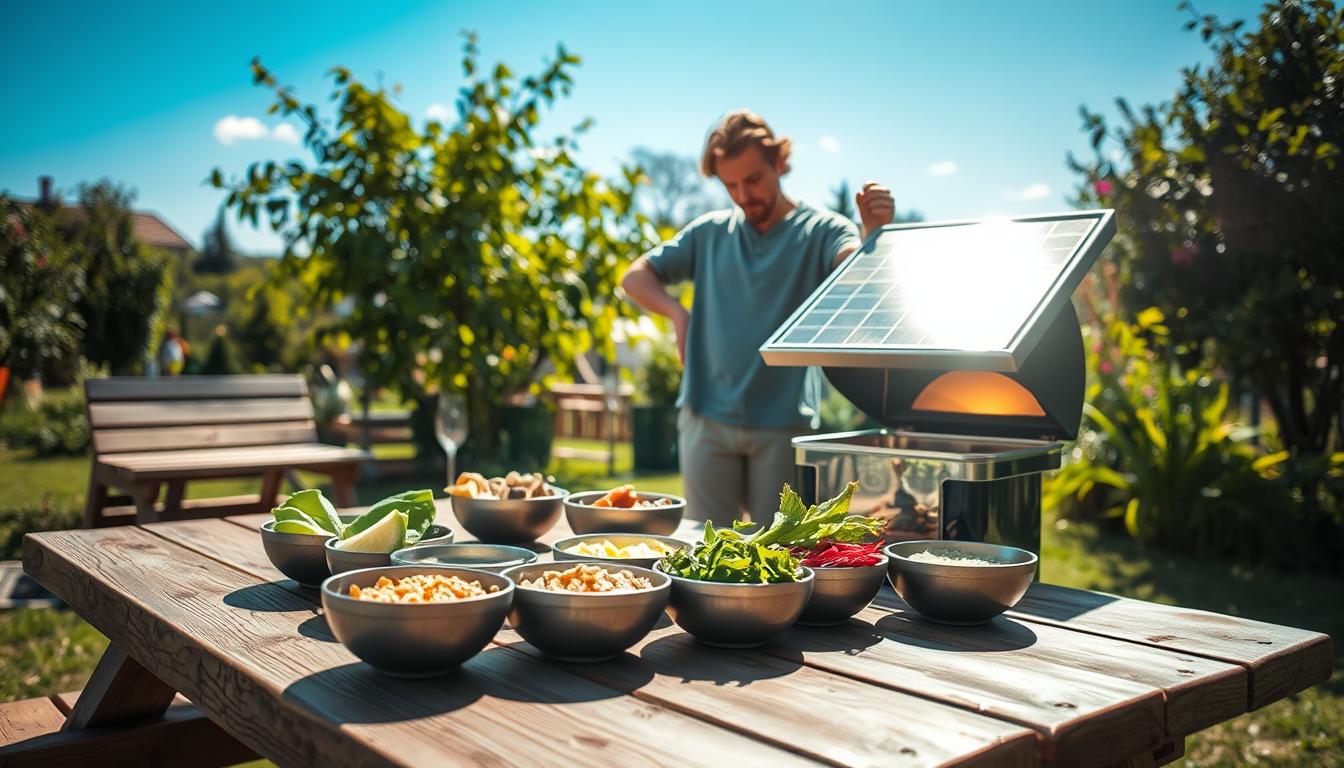
Getting your solar oven ready for cooking requires careful planning. The right setup is key to a successful meal. Choosing the right spot is critical for solar cooking.
Find a sunny spot with little shadow. Your oven needs 30 to 45 minutes of sunlight each hour. Wind can be a problem, so choose a sheltered spot that gets full sun all day.

Location and Orientation Tips
Place your oven facing the sun with minimal shadow. Move it every 30 to 45 minutes to follow the sun. Aim for due south to catch morning sunlight.
Use a compass app on your phone to find true south. This helps your oven get the best sunlight.
- Select a level, stable surface for your oven
- Clear away nearby objects that cast shadows
- Use landmarks or buildings as reference points for sun tracking
- Check the ground for soft spots that might cause tipping
- Create a wind barrier using natural features or portable shields
Timing Your Cooking Sessions
Summer is the best time to cook between 10 am and 4 pm. If you’re away, position your oven south early morning. It will cook your food as the sun moves.
| Season | Best Cooking Hours | Sun Strength | Repositioning Frequency |
|---|---|---|---|
| Summer | 10 am to 4 pm | Very Strong | Every 30-45 minutes |
| Spring/Fall | 11 am to 3 pm | Moderate to Strong | Every 45-60 minutes |
| Winter | 12 pm to 2 pm | Weak to Moderate | Every 60-90 minutes |
Mastering solar cooking takes practice, but it’s simple. Watch shadows to know when to move your oven. An early start helps your oven cook better. Solar cooking is rewarding, giving you delicious meals without fuel.
Solar Cooking Techniques and Time Management
Cooking with solar energy is different from using your kitchen stove. Once you learn the basics, making sun oven recipes is easy. Solar cooking makes food tender and flavorful because it’s gentler and slower.
Learning how to adapt your favorite meals for solar cooking is key. Solar ovens work like slow cookers. They turn simple ingredients into tasty meals with steady, patient heat. Foods cook about twice as long as in regular ovens.
Adjusting Recipes for Solar Oven Use
Changing recipes for solar cooking is simple but important. The main change is reducing liquids because water doesn’t evaporate the same way. Cut liquid amounts by one-quarter to one-half cup from traditional recipes.
Here are essential recipe modifications:
- Cut ingredients into smaller pieces for faster, even cooking
- Start with food at room temperature
- Bake breads, biscuits, cakes, and cookies without lids
- Cover all other foods with lids to retain heat
- Use clean soup cans for baking bread loaves
- Leave empty space in pie tins when making rolls or biscuits
Managing Cooking Times and Temperature Fluctuations
Temperature changes affect your solar baking. Morning cooking takes longer because the sun is lower. Plan your cooking times and check food regularly, but don’t worry about burning. Most foods become more tender and flavorful with longer cooking times.
Foods with high sugar content, like cookies, need closer watching. They can brown quickly. Everything else has a wide window between done and overdone. If weather clouds over, you can refrigerate food and finish it the next sunny day. This makes solar cooking great for emergencies.
| Food Type | Cooking Time vs. Regular Oven | Lid Position |
|---|---|---|
| Breads and Biscuits | 2-3 times longer | Uncovered |
| Cakes and Cookies | 2-3 times longer | Uncovered |
| Meats and Vegetables | 2-3 times longer | Covered |
| Soups and Stews | 2-3 times longer | Covered |
The longer cooking time is actually a benefit. Unlike rushing meals in a traditional oven, solar cooking is slow and gentle. It tenderizes tough cuts of meat and blends flavors beautifully. Embrace this natural rhythm, and you’ll see why solar cooking enthusiasts love it.
Safety Tips and Best Practices for Solar Cooking
Solar cooking is a great way to make meals when there’s no power. It can get as hot as 250°F to 400°F. So, it’s important to know how to use it safely.
Protect yourself first. The heat and glare from the reflectors are intense. Always wear sunglasses or sunshades to protect your eyes. Pots get very hot, so use thick potholders. Never touch the oven without protection.
Keep your solar oven in good shape for the best results. Clean the reflectors and glass covers often. This lets more sunlight in. A clean surface is key for good heat.
Don’t open your solar oven while it’s cooking. Each time you open it, the temperature drops a lot. This makes cooking take longer. Only open it if you see steam inside. To avoid steam, place a twig or matchstick between the cover and box.
Food safety matters most. Preheat your oven before adding food. Don’t put perishable items in before sunrise or on cloudy days. Bacteria grows fast in certain temperatures. A hot solar cooker ensures food is cooked safely and quickly.
- Wear sunglasses or sunshades at all times
- Use thick potholders when handling hot cookware
- Keep reflectors and covers clean weekly
- Avoid opening the oven during cooking
- Preheat before adding perishable foods
- Only cook on sunny days with adequate light
- Wipe steam from covers when necessary
- Use venting tricks to prevent condensation
Following these simple tips makes solar cooking safe. Your solar cooker temperature will stay right, your food will cook well, and you can enjoy meals without worry.
Building a Homemade Solar Oven for Emergencies
Making your own solar oven is a great project. It lets you cook with the sun’s power easily. You can use items from home or buy them locally. This makes you independent and cuts down on power use.
Materials and Construction Methods
Start with simple materials to build a solar oven. First, make an insulated box to keep heat in. You can use cardboard, wood, or plastic containers.
Here’s how to build it:
- Line the inside with newspaper, straw, or foam to keep heat in
- Paint the inside black to catch more sunlight
- Put a clear glass or plastic on top for a greenhouse effect
- Place a dark pot or pan inside
- Put your oven in the sun to cook
This design is easy to make in a few hours. You can use cardboard, foil, and paint. It’s simple and doesn’t need special tools.
Using Reflective Surfaces and Fresnel Lenses
Adding reflective surfaces makes your oven better. Shiny things like aluminum foil or mirrors work well. They bounce sunlight onto your food.
| Reflective Material | Benefits | Best Uses |
|---|---|---|
| Aluminum Foil | Inexpensive, easy to attach, readily available | Basic homemade solar oven designs |
| Mirror Panels | Excellent reflection quality, durable long-term | Enhanced performance builds |
| Buffed Tin or Sheet Metal | Sturdy, adjustable, professional appearance | Permanent installations |
Fresnel lenses are great for advanced projects. They were made for lighthouses and focus sunlight intensely. A big lens needs a strong stand to focus on your pot.
Critical safety note: Fresnel lenses get very hot. Use thick pads and wooden spoons to avoid burns. They can boil water fast and even fry food.
Using these tools makes your emergency kit better. They provide steady heat for many cooking tasks.
Conclusion
Solar cooking is a great way to cook meals using free, renewable energy. It’s a reliable backup when you need it most. Learning solar cooking takes time, but you can start today.
Hands-on experience is the best way to learn solar cooking tips. Don’t wait for an emergency to learn your solar oven. Start now by experimenting with different positions in your yard for sunlight. Try various recipes to see how fast your oven cooks.
Solar cooking is not just for emergencies. It can save energy bills and make meals more flavorful. It’s a fun way for kids to learn about renewable energy. Every sunny day is a chance to cook delicious food and build self-reliance.
FAQ
What exactly is solar cooking and how does it work for emergency preparedness?
Solar cooking uses the sun’s energy to cook food. It works by trapping infrared heat in a special oven. This method is great for emergencies because it doesn’t need electricity or fuel.
It’s also good for saving money and using free energy. People have even cooked on snow!
What temperatures can I expect to achieve with a solar cooker?
Solar ovens can get quite hot. Basic ones reach 200°F, while advanced ones can go up to 400°F. This lets you cook a variety of foods.
Knowing these temperatures helps you cook food properly. You can roast, cook grains, and even bake bread in a solar oven.
What are the three main types of solar cookers and which is best for beginners?
There are three main types of solar cookers. The solar box cooker is great for beginners. It’s easy to use and holds heat well.
The solar parabolic cooker is for those who want high temperatures. It needs careful positioning but can cook fast. The solar panel cooker is lightweight and portable, but it may not get as hot.
Choosing the right cooker depends on your needs. Beginners should start with a solar box cooker.
What essential equipment and materials do I need to start solar cooking?
You’ll need a solar oven, cookware, and covers for heat retention. You can find these items easily. Turkey roasting bags and canning jars work well too.
Don’t forget sunglasses or sunshades to protect your eyes. You might already have what you need in your kitchen.
How should I choose cookware for my solar oven?
Choose dark-colored cookware for better heat absorption. You can use BBQ paint on light-colored pans. Granite ware and cast iron are good options.
Dark glass is also great for seeing your food. Use wide, shallow pans for better heat distribution. Clear glass bowls help trap heat.
How do I position and set up my solar oven for optimal cooking performance?
Choose a sunny spot with minimal shadow. Use landmarks or a compass app to find true south. Move your oven every 30-45 minutes to follow the sun.
For all-day cooking, set it up early in the morning. Even a few clouds won’t ruin your meal. Winter cooking times may be shorter, but it’s possible.
What modifications do I need to make when cooking recipes in a solar oven?
Reduce liquid by ¼ to ½ cup. Cut ingredients into smaller pieces for faster cooking. Bring food to room temperature before cooking.
For baking, use creative techniques like clean soup cans. Cook uncovered for breads and biscuits. These tips help you cook great meals in your solar oven.
How much longer does food take to cook in a solar oven compared to conventional ovens?
Solar cooking takes 1.5 to 3 times longer than conventional ovens. This slow cooking tenderizes meats and blends flavors well. High-sugar items need monitoring to prevent burning.
Partially cooked food can be finished indoors or refrigerated for later. This flexibility makes solar cooking liberating.
What are the critical safety considerations when using a solar oven?
Safety is key with solar cooking. Use potholders and sunglasses or sunshades to protect yourself. Keep reflectors and glass covers clean for better cooking.
Don’t open the oven often to avoid temperature drops. If steam blocks sunlight, create a gap with a twig or matchstick. Always pre-heat before adding food to ensure safe cooking temperatures.
Can I build my own homemade solar oven if I don’t want to purchase commercial equipment?
Yes, you can build your own solar oven. You’ll need materials like cardboard boxes, aluminum foil, and black paint. Reflective materials like mirrors or tin work well.
Follow basic construction principles to create a box with insulation and a clear cover. This project is accessible for beginners. Start simple and improve as you gain experience.
What are Fresnel lenses and how can they enhance solar cooking performance?
Fresnel lenses are glass structures that magnify sunlight. They can reach high temperatures, ideal for frying or boiling water. Use them to pre-heat pots for faster cooking.
Be careful as they make pots extremely hot. Use hot pads and wooden utensils. Fresnel lenses are for advanced users who want higher performance.
Why is it important to practice solar cooking before an emergency occurs?
Practicing solar cooking before emergencies is essential. It helps you understand your oven’s performance and your yard’s sunlight patterns. This way, you can plan meals confidently.
It also builds confidence and ensures you can cook when needed. Solar cooking is a valuable skill for emergencies and everyday use.
What food safety concerns should I know about when using a solar oven in emergency situations?
Food safety is critical with solar cooking. Avoid placing perishable foods in the oven before it’s hot enough. Pre-heating is key to ensure safe cooking temperatures.
Always follow these guidelines to cook safely. This knowledge gives you peace of mind during emergencies.
How do seasonal variations affect solar cooking and can I cook year-round?
Solar cooking is possible year-round, but seasons affect cooking times. Summer offers the best conditions, while winter requires more careful tracking.
Even a few clouds won’t ruin your meal if you get enough sun. Understanding your location’s sunlight patterns is key to successful solar cooking.
What makes solar cooking an ideal backup method during power outages or emergencies?
Solar cooking is perfect for emergencies because it doesn’t need electricity or fuel. It’s reliable and independent from infrastructure failures.
Practicing before emergencies is important. Once you master it, you’ll have genuine food security. Solar cooking is a sustainable and self-sufficient option.