Most people today use electric stoves and gas ranges. Cooking over an open flame seems like a lost skill. But, this traditional knowledge is more valuable than ever, during emergencies when modern conveniences fail.
Imagine a hurricane knocking out power for two weeks. Families without wood fire cooking skills face a big problem. They can’t prepare hot meals for their kids. Learning wood fire cooking basics gives you peace of mind. It lets you feed your family no matter what.
Outdoor wood fire preparation doesn’t need expensive equipment. Cast iron cookware like Lodge works on your kitchen stove and over open flames. You can practice these skills in your backyard now. There’s no need to wait for an emergency to learn.
Cooking over a campfire is different from using your stove at home. The heat behaves differently. The timing changes. Flames move around. Learning these differences before you need them is smart planning.
This article will teach you everything about wood fire cooking basics. You’ll learn which wood to use and which to avoid. You’ll discover the right equipment for outdoor wood fire preparation. You’ll master cooking techniques that keep your food safe and delicious. Best of all, you’ll build real confidence in your ability to survive and thrive when the power goes out.
Table of Contents
Why Wood Fire Cooking Skills Matter in Emergency Situations
When disaster hits, cooking food is as vital as having a place to stay. Hurricanes, ice storms, and wildfires can leave homes without power for weeks. Electric stoves become useless, yet families need warm, nutritious meals. Knowing how to cook with open flames is a reliable backup plan when modern ways fail.
Learning to cook with live fire now means you won’t be scrambling later. These skills turn emergency situations into manageable challenges. Your family can stay fed and energized, even when everything else is uncertain.
Extended Power Outages and Natural Disasters
Hurricanes often cut power for weeks. Families across the U.S. have faced two-week blackouts, losing refrigeration and cooking options. Without electricity, gas, or fuel, people find creative ways to cook. Some survived on sandwiches and canned goods, while others roasted food in fireplaces or on makeshift grills.
Real emergencies test your skills, not just your knowledge. The families who stayed calm and well-fed knew how to cook with open flames. They could boil water, cook meals, and keep nutrition up despite chaos.
Self-Sufficiency When Modern Conveniences Fail
Modern kitchens rely on electricity, gas, or propane. Disruptions or failures in these systems can cut off cooking options instantly. Learning to cook with live fire makes you independent from these systems. You use renewable resources like wood and your own knowledge.
This self-reliance brings peace of mind. You won’t panic if stores close or delivery trucks stop. Your ability to cook safe, properly cooked food doesn’t disappear when infrastructure fails.
- Boil water for drinking and sanitation
- Cook proteins and vegetables thoroughly
- Prepare warm meals that boost morale
- Maintain family nutrition during extended outages
Building Confidence Through Practice
The best time to learn fire cooking is when there’s no emergency pressure. Camping trips and backyard fire pits are great for practice. Try cooking breakfast over a campfire or roasting dinner at a weekend gathering. Each experience teaches you about temperature, timing, and technique.
| Practice Scenario | Skills Developed | Emergency Readiness Level |
|---|---|---|
| Camping trips with family | Basic open flame cooking techniques, heat management | Moderate |
| Backyard fire pit cooking | Live fire cooking skills, equipment familiarity | High |
| Cooking multiple complete meals | Advanced techniques, adaptability, confidence | Very High |
| Cooking in different weather conditions | Problem-solving, resilience, skill flexibility | Expert |
Start with simple recipes. Master basic open flame cooking techniques before trying complex meals. Each successful cooking session boosts your confidence and skill. You’ll find what works best for your family and equipment.
Practice makes these skills develop gradually. You’ll learn to read fire behavior, adjust cooking heights, and manage heat. These abilities become second nature with repetition. When emergencies come, you’ll respond with calm confidence, not confusion.
Wood Fire Cooking Basics: Choosing the Right Firewood and Building Your Fire
Choosing the right wood is key for emergency cooking. The wood you pick affects heat, cooking time, flavor, and safety. It’s important to know which woods burn well and which can harm your food or gear.
Dry, seasoned wood with 20% moisture is best for steady flames. Wood cured for 6 months to a year works best. Green wood smokes too much, burns poorly, and lacks consistent heat.
Best Woods for Cooking Fires
Several hardwoods are trusted by pros and preppers:
- Oak – Dense and long-burning with a strong, smoky flavor perfect for grilling
- Hickory – Excellent heat output and wonderful smoky taste for meats
- Cherry – Fruit wood that adds pleasant aroma and subtle flavor to grilled foods
- Pecan – Burns hot and long while enriching food with mild, sweet smoke
- Apple and Almond – Fruit and nut woods that create aromatic smoke for flavorful cooking
- Mesquite – A fantastic option for intense heat and distinctive taste
You can find cooking wood through several reliable sources. Amazon stocks cooking woods with convenient Prime shipping for quick delivery. Search locally using “cooking wood [your city]” to find nearby suppliers. For high-quality kiln-dried wood shipped nationwide, Cutting Edge Firewood provides excellent options year-round.
Woods to Avoid Completely
Certain woods are bad for cooking and safety. Never burn these:
- Pine, fir, and cedar – Resinous woods that produce excessive smoke and soot
- Juniper – Creates undesirable flavors and potentially toxic compounds
- Driftwood – Contains salt and harmful substances that contaminate food
- Processed lumber – Pallets, 2x4s, and plywood contain dangerous chemicals
- Soft woods like hemlock, aspen, basswood, and willow – Don’t produce adequate heat for cooking
Building Cooking Fires: The Right Way
Building cooking fires is different from campfires. Start small with kindling about 5 to 6 inches long and a couple of finger-widths thick. Light this with a long match, then add small logs around it in a teepee shape.
Let your fire establish for about 30 minutes before adding larger hardwood pieces. This creates a solid coal base. Position your fire to one side of your cooking area, then move coals beneath or near your cookware for better temperature control. The ultimate goal is an even bed of coals without active flames—this prevents burnt exteriors and ensures steady, manageable heat.
Wood piece size matters too. Aim for logs about 3 inches in diameter and 12 to 16 inches long. If buying by the cord, request double-split pieces that meet these dimensions. Properly sized wood burns more efficiently and gives you better control over your cooking temperature.
For detailed guidance on managing your fire once it’s burning, wood selection and fire management techniques provide complete instruction on maintaining optimal cooking temperatures throughout your meal preparation.
| Wood Type | Burn Quality | Heat Output | Flavor Profile | Best For |
|---|---|---|---|---|
| Oak | Excellent | Very High | Strong Smoky | Grilling Meats |
| Hickory | Excellent | Very High | Rich Smoky | Long Cook Times |
| Cherry | Very Good | High | Sweet Aromatic | Poultry and Fish |
| Pecan | Very Good | High | Mild Sweet | Vegetables |
| Apple | Good | Medium-High | Subtle Fruity | Grilling |
| Pine | Poor | Low | Unpleasant Resinous | Avoid for Cooking |
Mastering these basics of choosing firewood and building fires is key for reliable emergency cooking. Your ability to pick the right wood and build an efficient fire determines whether you’ll enjoy hot, delicious meals or struggle with temperature control and poor results.
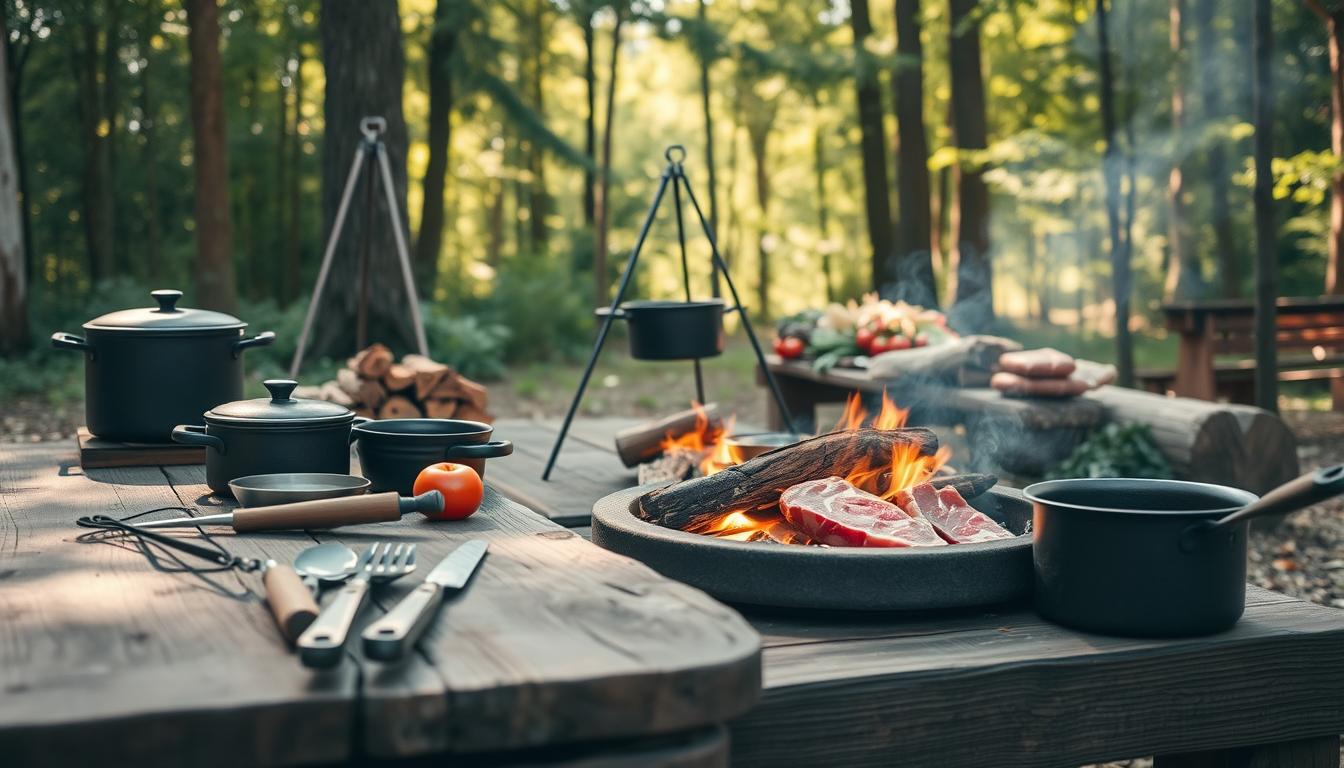
Essential Equipment and Cookware for Open Flame Cooking
Standard kitchen tools won’t survive the intense heat of a campfire. You need specialized equipment designed for open flames. Most gear is affordable, built to last for decades, and can even be passed down through generations. Learning about the right campfire cooking methods and wood-fired grilling fundamentals starts with understanding what tools work best over hot coals and open fire.

Cast Iron Skillets and Dutch Ovens
Cast iron is the backbone of outdoor cooking. These pans retain heat evenly and distribute warmth across the cooking surface. They work on hot coals, over grates, or buried in embers for slow-cooking meals. For most families, an 8-inch and 12-inch skillet cover your basic needs.
Camp Chef offers pre-seasoned cast iron at budget-friendly prices. Their 8-inch skillet runs about $12, while the 12-inch version costs around $21. Lodge provides another affordable option, though some cooks notice rougher surfaces on their cookware.
Want superior quality? Look for vintage cast iron from the 1920s-1930s, like Griswold brand pieces. These antiques feature machined surfaces that are incredibly smooth and naturally non-stick. You’ll find excellent selections on eBay, and these pans often outlast modern cookware by decades.
Dutch ovens serve as all-in-one cooking vessels. Use them for stews, baked goods, roasted vegetables, and simmering soups. Their tight-fitting lids allow you to pile hot coals on top for even baking—a game-changer for campfire bread and desserts.
Campfire Grills and Grate Systems
Stainless steel grates hold your food directly over coals. Brands like Redcamp, Expedition Research, and DZRZVD offer reliable options that won’t rust or warp. The Redcamp Folding Grate measures 13.6 inches by 9 inches with folding legs for easy transport and setup flexibility.
For larger groups, the Camp Chef Lumberjack Over Fire Grill delivers impressive cooking space. This grill comes in two sizes: an 18-by-36-inch model for serious feeding or a 16-by-24-inch version for smaller gatherings. Both feature high-temperature black paint that withstands intense heat.
| Equipment Type | Best For | Price Range | Key Advantage |
|---|---|---|---|
| 8″ Cast Iron Skillet | Small meals and individual cooking | $12-$25 | Lightweight and versatile |
| 12″ Cast Iron Skillet | Family meals and larger dishes | $21-$35 | More cooking surface area |
| Dutch Oven | Baking, slow-cooking, stews | $30-$60 | Even heat distribution with lid coals |
| Redcamp Folding Grate | Direct coal grilling | $25-$40 | Portable and space-saving |
| Camp Chef Lumberjack Grill | Group cooking | $60-$100 | Large cooking area |
Tripod and Stake Style Cooking Setups
When ground stakes won’t work in rocky terrain, tripod systems shine. The Camp Chef Lumberjack Tripod costs just $31 and lets you hang pots and kettles over flames. A chain system lets you raise or lower your cookware to control temperature—perfect for simmering soups or warming water.
Stake-style grills, like the Camp Chef Mountain Man Grill ($150), hammer into the ground and offer multiple cooking configurations. These versatile setups support skillets, grates, and hanging cookware all in one system.
One small tool makes everything easier: the Pocket Bellows. This collapsible metal tube blows concentrated air into your, raising temperatures and starting flames much faster. At just $4-$12, this pocket-sized tool becomes essential for managing wood-fired grilling fundamentals.
- Start with basics: An 8-inch skillet and simple grate cover most campfire cooking methods
- Add specialty gear: Dutch ovens and tripods expand your cooking options over time
- Invest in a Pocket Bellows: Makes fire management dramatically easier
- Buy quality once: Good cast iron lasts generations with minimal care
Place your cookware on stable surfaces like flat rocks or makeshift grates over coals. With these tools in your arsenal, you’ll master wood-fired grilling fundamentals and handle any campfire cooking challenge that comes your way.
Fundamental Cooking Techniques Over Wood Fire
Learning how to cook with embers is key to making tasty meals over an open fire. A big lesson for beginners is that you don’t cook directly over flames. Flames can burn the outside of food while leaving the inside raw.
Coals, on the other hand, provide the steady heat needed for even cooking. This avoids charring or making food tough.
Start your fire 30 to 45 minutes before cooking. Let it burn down to a solid bed of hot coals. Spread these coals where you want to cook, and you’re ready to start. This foundation is essential for good ember cooking.
Main Cooking Methods for Wood Fire Meals
There are several effective ways to cook over a wood fire:
- Skewering and roasting — Thread food onto greenwood sticks and hold over coals for even cooking. This method works for vegetables, meat chunks, and fish.
- Direct coal cooking — Lay potatoes, squash, garlic, onion, and corn straight on hot coals or bury them in ash. Aluminum foil packets work too for added protection.
- Stone surface cooking — Heat flat, dry rocks beside your fire, then use them as a griddle for vegetables and meat. Avoid porous or cracked rocks that might explode.
- Pit cooking — Dig a shallow pit, line it with fire-heated coals and stones, place food on top, cover it, and let it slow-cook for hours. Dutch ovens shine in this method.
- Suspended cookpots — Use tripods or stakes to hold pots over flames or coals for boiling, stewing, and heating water.
Ember cooking needs planning. Prepare all ingredients beforehand—wash and cut vegetables, assemble foil packets, and organize your workspace. This keeps your focus on cooking and prevents burning.
| Cooking Method | Best Foods | Heat Type | Cook Time |
|---|---|---|---|
| Skewering | Vegetables, small meat pieces, fish | Direct coals | 10-20 minutes |
| Direct coal burial | Potatoes, corn, squash, onions | Hot coals and ash | 20-45 minutes |
| Stone surface | Thin vegetables, flatbreads, meat | Heated rocks | 5-15 minutes |
| Pit cooking | Large meat cuts, root vegetables | Buried coals | 2-6 hours |
| Suspended cookpots | Soups, stews, boiled vegetables | Flames or coals | 15-60 minutes |
Temperature Control and Finishing Touches
Grade your coals from high heat at the back to low heat at the front. This creates zones similar to your kitchen stove settings—high, medium, and low. Move food between zones to control cooking speed.
Remember that meat continues cooking after you remove it from heat. Larger cuts can rise 5 to 10 degrees in temperature while resting. Remove meat slightly before it reaches your target doneness, then let it rest for several minutes. Use a meat thermometer while you’re learning to avoid overcooking. These ember cooking techniques take practice, but soon they’ll feel natural and rewarding.
Common Mistakes to Avoid and Safety Considerations
Cooking over wood fire is fun and tasty, but it needs careful attention. Many learn from mistakes, but some can be dangerous. Knowing the dangers and safety rules keeps you safe and your food delicious.
Woods to Avoid for Cooking
Not all wood is good for cooking. Some types can be dangerous or make your food taste bad. Pine and juniper have heavy resins that make toxic smoke and odd tastes.
Driftwood has salt that can spread and contaminate everything. Processed materials like wooden pallets and treated lumber have harmful chemicals. Never burn these near food. Hemlock and soft woods like aspen and willow burn poorly and make too much smoke.
| Wood Type | Why Avoid | Primary Issue |
|---|---|---|
| Pine | Resinous, toxic smoke | Food flavor contamination |
| Juniper | Heavy resin content | Undesirable tastes, quick burn |
| Driftwood | Salt deposits | Smoke contamination |
| Wooden Pallets | Chemical treatments | Toxic fumes near food |
| Hemlock | Poor burning quality | Excessive smoke |
| Aspen | Soft, weak wood | Poor coal production |
Use hardwoods like oak, hickory, or maple for your fire. They burn hot and make great coals for cooking. Learn to start a fire in any condition with trusted wood sources.
Fire Location and Wind Hazards
Where you place your fire is very important. Make sure it’s at least eight feet away from anything that can burn. Check above for branches that could catch fire.
Build your fire on bare mineral soil, not on leaves or grass. This prevents underground fires. Use fire pits when you can to protect the environment.
Wind can be dangerous. It carries sparks that can start forest fires. It also cools coals, making cooking harder. Don’t cook in windy conditions without shelter.
Use rocks or logs to make a U-shaped fire pit. This keeps the fire away from the wind. Place a flat rock at the back to help smoke go up. Always have water nearby.
Proper Coal Management and Temperature Control
Don’t put too much wood on your fire at once. This makes it too hot and takes away direct flame control. Start with small kindling and thin logs.
Spread and grade your coals for different heat zones. Use hot coals for intense cooking and cooler coals for gentle warmth. Bank your coals to keep the fire going longer.
Cook over flames only for thin cuts that need quick searing. Most foods cook better with steady, moderate heat. Meat keeps cooking after you take it off the fire. Pull it slightly before it seems done.
- Place cookware on stable surfaces to prevent spills and burns
- Use caution with heated stones, as moisture inside may cause explosions
- Keep your water bucket accessible for emergencies
- Thoroughly extinguish fires before sleeping or leaving the area
- Turn rocks inward toward the fire bed when finished
- Never leave a fire unattended while cooking
Fire bans and restrictions are common due to air quality and wood shortages. Always follow these rules. Never cut green wood from living trees—it harms the environment. Treat your fire with care to keep everyone safe and protect nature for the future.
Conclusion
Learning to cook over wood fire is more than just emergency prep. It connects you to ancient cooking methods. With each practice, you grow more confident and skilled.
Begin your wood fire cooking journey in relaxed settings. Use a fire pit during camping trips instead of a propane grill. If you have space, create a practice fire pit in your backyard. These settings help you learn without stress.
Balance old-school fire cooking with smart modern choices. Keep reliable backup options like freeze-dried meals from Mountain House. Pair these with your wood fire skills. Visit resources on building a 30-day survival meal to enhance your food storage strategy. Mastery takes time, but each practice brings you closer to self-sufficiency.
The peace of mind you gain is priceless. Knowing you can cook for your family without power or gas is secure. Start today, practice often, and enjoy the journey toward becoming more capable and ready for whatever comes your way.
FAQ
What is wood fire cooking and why should I learn it?
Wood fire cooking means making meals over an open flame or hot coals. It’s a key survival skill when modern conveniences fail. Unlike electric or gas appliances, wood-fired grilling gives you independence to cook nutritious meals anytime.
Why is emergency preparedness through wood fire cooking important?
Real families have survived two-week power outages by cooking over fires. When supply chains break down, those who know how to cook over fires can prepare hot meals. This skill is not just for camping; it’s a practical way to stay self-reliant during emergencies.
What’s the best way to start learning these skills?
Start in low-stress situations where mistakes don’t matter. Try cooking over a fire pit during camping trips instead of using propane grills. Each session builds your skills and confidence, and you’ll have fun doing it.
Which hardwoods are best for cooking fires?
The best hardwoods for cooking include oak, hickory, mesquite, cherry, and pecan. These woods provide the steady heat and flavor that make wood fire cooking better than cooking over softwoods. Oak is versatile, while hickory and mesquite add strong smoke flavors.
What woods should I absolutely avoid for cooking?
Avoid cooking over resinous pine or juniper because they impart bad flavors and toxins. Also, avoid driftwood, processed lumber, and softwoods like hemlock and willow. Stick to seasoned hardwoods for safety and quality.
Where can I source quality cooking wood?
Amazon offers pre-packaged cooking wood with Prime shipping. Cutting Edge Firewood provides kiln-dried hardwoods nationwide. Search locally for regional suppliers to find wood with moisture content below 20%.
How long does it take to build a proper cooking fire?
Plan to build a cooking fire 30-45 minutes before cooking. Start with kindling and small logs, then add larger hardwood pieces. Aim for a controlled heat source that burns down into coals.
What’s the difference between a recreational campfire and a cooking fire?
A recreational campfire burns with visible flames for ambiance. A cooking fire is built to create an even bed of coals for steady heat. Cooking fires are built with flames on one side and coals in a cooking area for better temperature control.
Why is cast iron the best cookware choice for wood fire cooking?
Cast iron retains heat well and distributes it evenly. It withstands extreme temperatures and gets better with use. Start with an 8-inch and 12-inch skillet for most family cooking needs.
What size Dutch oven should I get for camping and emergency cooking?
Start with a 4-quart or 5-quart Dutch oven for family meals. Larger sizes are good for groups or bulk meal prep. Dutch ovens can cook directly on coals or with coals on top for versatility.
What are the best grill grate options for open flame cooking?
Stainless steel grates from brands like Expedition Research are reliable. The Redcamp Folding Grate is portable and versatile. Choose grates that are sturdy, stable, and easy to clean.
Are tripod grills or stake-style grills better for wood fire cooking?
Both have advantages. Tripod grills are portable, while stake-style grills are good for established fire sites. Choose based on your cooking needs and location.
What’s this “Pocket Bellows” tool I keep hearing about?
The Pocket Bellows is a collapsible tube that blows air into your fire. It’s a game-changer for fire starting and maintenance. It’s a valuable investment for better fire control.
Should I cook directly over flames or over coals?
Cook over coals for steady, even heat. Active flames are only for quick searing or advanced techniques. Build your fire 30-45 minutes before cooking to create a cooking surface.
What are the main cooking methods for wood fire preparation?
There are several methods: skewering, roasting, cooking directly on coals, pit cooking, and boiling. Each suits different foods and situations. Potatoes and squash cook well directly on coals, while stews benefit from Dutch oven treatment.
How do I know when food is properly cooked over a wood fire?
Use a meat thermometer to confirm doneness. Remember that meat continues cooking after removal from heat. Start observing cooking times at different coal temperatures to develop intuition.
How do I create temperature zones in my cooking fire?
Grade your coals from high to low by concentrating them in some areas. This creates zones for different cooking temperatures. Move food between zones for temperature control without adjusting flames.
What preparation should I do before starting to cook?
Prepare all ingredients beforehand so you can focus on cooking. Chop vegetables, portion meat, and gather equipment before the fire reaches cooking temperature. This ensures you can manage heat and timing effectively.
What’s the most important safety rule for wood fire cooking?
Build your fire at least 8 feet from vegetation and combustibles. Choose established fire pits to minimize environmental impact. Never build a fire in strong winds that could spread sparks.
How do I properly extinguish my cooking fire?
Soak coals with water until they’re completely cold and no smoke rises. Stir the ashes and add more water. Many fires that seem extinguished can reignite hours later, causing wildfires. Always keep a water bucket near your fire.
What basic equipment should I keep near my cooking fire for safety?
Always have a water bucket nearby. Use long-handled tools to manage coals and food. Wear closed-toe shoes and long pants to protect against sparks and hot coals. These precautions prevent injuries and ensure a safe cooking experience.
Can I balance traditional wood fire cooking with modern emergency prep?
Absolutely. Learning wood fire cooking skills is valuable, but also keep modern emergency supplies on hand. This balanced approach ensures you’re prepared for any situation.
How much practice do I need before I’m truly competent?
Plan for 10-15 cooking sessions before skills become intuitive. Each session teaches you how to manage your fire and cook different foods. You’ll enjoy the process and become proficient in no time.
What’s the connection between wood fire cooking and long-term self-reliance?
Self-reliance means knowing you can meet your family’s needs, even without modern conveniences. Wood fire cooking is a key skill for food security. It makes you capable and confident, transforming you from dependent to self-sufficient.
Should I practice wood fire cooking even if I’ve never camped before?
Yes, absolutely. You don’t need camping experience to learn these skills. Your backyard is a great place to practice. Success in backyard cooking translates to emergency situations.