Dehydrating food at home is a simple way to keep meals fresh for months or years. It removes moisture from food using heat and airflow. This method stops bacteria and mold from growing, keeping your food safe.
Many people, from home cooks to preppers, find dehydrating food easy. It might seem hard at first, but it’s really simple. With basic tools and some tips, anyone can start dehydrating food at home.
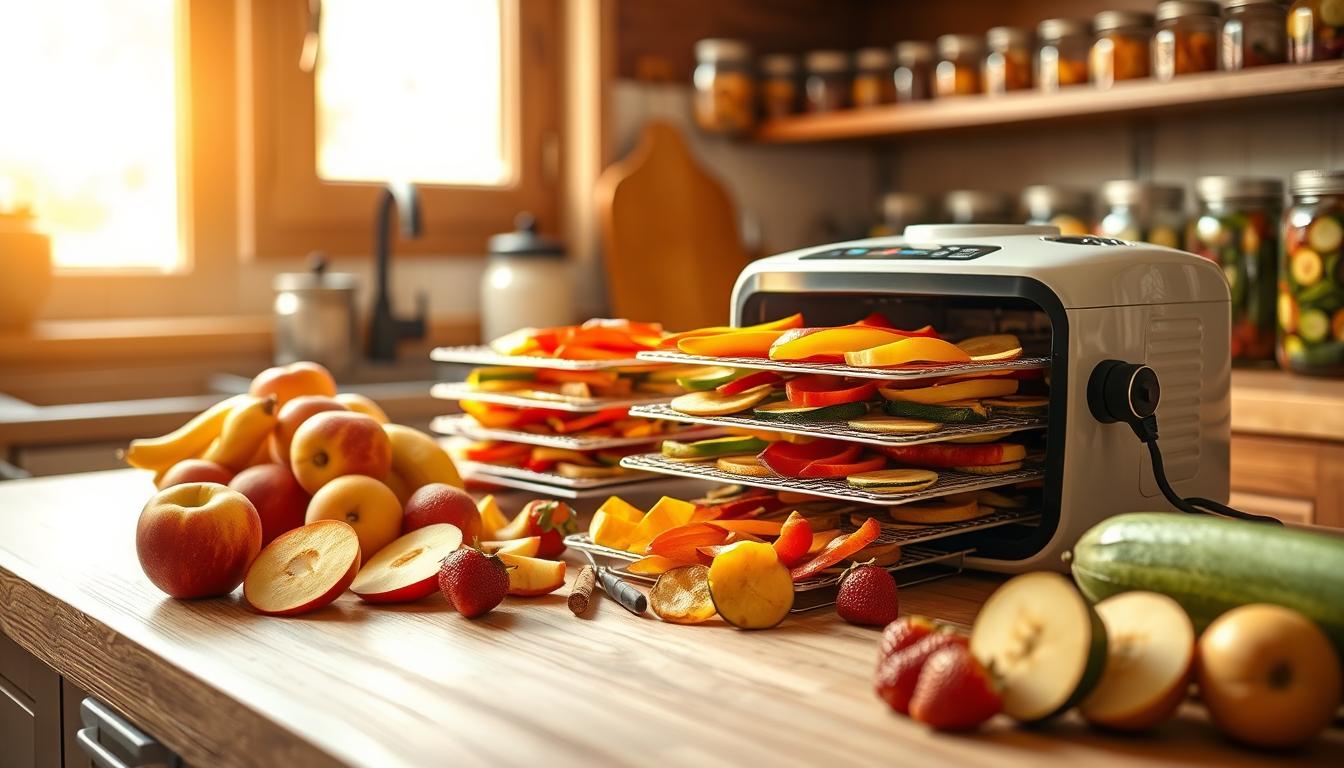
There are many ways to dry food, like sun drying or using an oven. But electric dehydrators are the best choice. They use low heat and airflow to preserve nutrients in your food.
Dehydrating food opens up new possibilities in your kitchen. You can dry fruits, veggies, meats, and herbs. This makes great snacks, meal ingredients, and emergency food. It’s perfect for saving money or preparing for emergencies.
This guide will show you how to dehydrate food step by step. You’ll learn what tools you need, which foods are best, and how to store your dried food. By the end, you’ll see how easy and rewarding dehydrating can be.
Table of Contents
Why Dehydrate Food at Home
Dehydrating food at home opens up a world of possibilities. It’s great for outdoor enthusiasts, emergency prep, or reducing waste. This method offers benefits that store-bought options can’t match. Let’s look at why it’s a smart choice for homes today.
Cost Savings and Meal Customization
Freeze-dried meals from stores can be expensive, fast. Dehydrating your own food saves money over time. You control what goes into your meals, making them healthier and tailored to your needs.
- Create gluten-free options tailored to your needs
- Reduce sodium levels compared to commercial products
- Customize protein content for your fitness goals
- Choose organic or locally-sourced ingredients
- Eliminate preservatives and additives
Nutritional Benefits and Weight Reduction
Dehydrating food keeps most nutrients intact. It removes 85-95% of moisture but keeps vitamins and minerals. This is better than canning, which loses 60-80% of nutrients.
Dehydrated food is also very light. This makes it perfect for backpacking trips. A pound of fresh veggies becomes just ounces, making storage and travel easier.
Extended Shelf Life Without Refrigeration
Dehydrated food lasts a long time without needing the fridge. It has very little moisture, which stops bacteria and mold. This makes it great for storing food for emergencies or long-term use.
| Storage Condition | Shelf Life | Best Use |
|---|---|---|
| Room Temperature (60-70°F) | 4 months to 1 year | Regular household use |
| Cool, Dark Pantry | 1-2 years | Daily cooking and meals |
| Vacuum Sealed, Cool Storage | 5-10 years | Emergency supplies |
| Freezer Storage | 10+ years | Extended backup reserves |
Home food preservation through dehydration gives you peace of mind knowing your food supply stays fresh without constant refrigeration. This method is simple and reliable, perfect for anyone serious about being self-sufficient.
Choosing the Right Food Dehydrator
Choosing a food dehydrator can seem daunting with so many options. But, focusing on key features makes it easier. Your dehydrator is key to preserving food, so knowing what to look for is important.
Adjustable temperature settings are a must. They let you dry food safely at the right temperature. You can go from 95°F for herbs to 165°F for poultry. Without this, drying food safely is hard.
- Horizontal flow models have a fan at the back for even drying. They need less tray rotation.
- Vertical flow stackable models are cheaper and save space. But, you might need to rotate trays.
Think about how much food you’ll dehydrate at once. Budget models like the Nesco Snackmaster FD-75A start with a few trays and can expand. The COSORI Premium Dehydrator has six trays and a clear door for watching food dry.
Also, consider the materials. BPA-free plastic is affordable, while metal lasts longer. Make sure trays are dishwasher-safe to save time.
| Feature | Why It Matters | What to Look For |
|---|---|---|
| Temperature Range | Drying food safely depends on hitting the right heat for each food type | 95°F to 160°F minimum |
| Fan Position | Affects how evenly your food dries | Horizontal flow for even drying |
| Capacity | Determines how much you dehydrate per batch | 6–12 trays depending on your needs |
| Materials | Impacts durability and ease of cleaning | BPA-free plastic or metal construction |
| Timer | Convenient but not essential | Automatic shut-off after set time |
The temperature guide in your dehydrator is key to success. Too low and bacteria grow, too high and moisture gets trapped. The right dehydrator lets you control this, making food drying safe and reliable.
How to Dehydrate Food at Home
Learning to dehydrate food at home opens up a world of possibilities. It requires attention to detail at every step. From washing your hands to testing for doneness, each stage is important. It helps create safe, delicious meals that last for months.
Preparing Food for Dehydration
Start in a clean kitchen. Wash your hands often and sanitize your work surface. Clean all produce well under running water to remove dirt and bacteria.
The secret to even drying is uniform thickness. Cut foods into pieces that are roughly ¼ to ½ inch thick. A mandoline slicer helps create consistent slices quickly. For delicate items like mushrooms or strawberries, an egg slicer works wonderfully.
Pretreatment methods protect your food and improve results:
- Soak fruits in an ascorbic acid solution (1 teaspoon in 2 cups water for 3-5 minutes) to prevent browning
- Use natural citrus juice dips as a simple alternative
- Blanch or steam vegetables like carrots, broccoli, green beans, and potatoes before dehydrating fruits and vegetables
- Take advantage of frozen vegetables, which are already blanched and ready to use

Temperature Settings for Different Foods
Temperature control is key to quality. Different foods need different heat levels. The right temperature prevents case hardening, which can cause mold growth.
| Food Type | Temperature | What to Expect |
|---|---|---|
| Herbs | 95°F | Delicate and aromatic |
| Vegetables | 125°F | Crisp and hard |
| Beans and Lentils | 125°F | Completely dried |
| Fruits | 135°F | Leathery texture |
| Grains and Cooked Meats | 145°F | Hard and preserved |
| Raw Meat and Seafood | 160°F | Completely dry |
| Poultry | 165°F | Fully preserved |
Drying Times and Testing for Doneness
Drying times vary based on humidity, dehydrator load, and food thickness. These ranges are a starting point, but it’s done when it’s done.
- Vegetables: 4-12+ hours until crisp or hard
- Dehydrating fruits and vegetables takes 6-36 hours until leathery and not sticky
- Cooked grains and rice: 6-12 hours until completely hard
- Meat: 6-12 hours until thoroughly dry
Testing for doneness is simple. Cut a piece in half and squeeze it gently. No moisture should press out. Vegetables should snap when bent. Fruits should bend without sticking. Grains and meat should be rock hard.
A reassuring fact: you cannot over-dehydrate food at the proper temperature. You can only scorch it at temperatures that are too high. This means you have room for error while learning how to dehydrate food at home successfully.
Best Foods to Dehydrate and What to Avoid
Choosing the right foods for dehydration is key to successful food preservation at home. Look for foods with low moisture and little fat. These dry evenly and keep well for a long time, keeping their nutrients intact. Knowing which foods dehydrate well helps plan meals and snacks for camping, emergencies, or daily use.
Top Foods That Dehydrate Beautifully
Many foods are great for dehydration when you know their properties. Fruits like apples, bananas, and strawberries make tasty snacks. Berries, like blueberries, take a few days to dry, so freeze-dried is better.
Vegetables such as carrots and mushrooms dry well for soups and meals. Frozen veggies save time because they’re already cut and blanched.
Legumes and grains like beans and rice dry well, cutting cooking time. Lean meats and seafood work if prepared right. Fresh herbs dry fast and add flavor to dishes. Fat-free sauces are also good for dehydration.
| Food Category | Best Options | Storage Life | Best Use |
|---|---|---|---|
| Fruits | Apples, bananas, strawberries, apricots | 6-12 months | Snacks, breakfast toppers |
| Vegetables | Carrots, mushrooms, peppers, tomatoes | 6-12 months | Soups, stews, complete meals |
| Legumes | Canned beans, lentils | 12+ months | Trail meals, meal prep |
| Lean Meats | Ground beef with breadcrumbs, cooked chicken | 2-4 weeks (refrigerate) | Backpacking, emergency meals |
| Herbs | Basil, oregano, thyme, parsley | 12+ months | Seasoning, flavoring |
Foods You Should Never Dehydrate
Some foods are not safe for dehydration. High-fat foods spoil because fats and oils don’t evaporate. This means avoiding avocados, olives, and fatty meats.
Dairy products are risky because dehydration temperatures can grow harmful bacteria. Eggs, even cooked, are not safe for dehydration at home. Store-bought condiments with oils or dairy should also be avoided.
For more on what not to dehydrate, check out the complete do-not-dehydrate list. It offers detailed safety tips and explanations.
Creating Complete Meals Through Dehydration
Dehydrating meals is possible with careful planning. All ingredients must dry at similar temperatures. The dish should be low-fat for safe storage. Add cheese, oils, and butter later for flavor and safety.
- Combine rice with dehydrated vegetables and lean meat for complete one-pot meals
- Mix beans with herbs for portable protein-rich sides
- Layer fruits with grains for instant breakfast options
- Prepare vegetable powders for soup bases and seasonings
Knowing which foods dehydrate well lets you make nutritious meals for any situation. This knowledge ensures your food preservation is successful, keeping your family healthy and ready for anything.
Storing and Rehydrating Your Dehydrated Food
After dehydrating your food, you need to store it right. Choosing the right containers and conditions is key. This helps your food stay good for months or even years.
Proper Storage Methods for Maximum Shelf Life
How you store your food affects its freshness. Mason jars are good for home use because you can see inside. Vacuum-sealed bags save space and are great for portion control. Mylar bags are best for long-term storage but aren’t good for the environment.
Moisture is the biggest enemy of dehydrated food. Cool your dried fruits completely before storing. Fill jars two-thirds full and shake daily for a week. This helps prevent mold. Use silica gel packets in humid places for extra protection.
Keep your containers in cool, dark, and dry places. A pantry, basement, or closet is perfect. Most foods last 4 months to 1 year. With airtight containers and cool temperatures, they can last 5 to 10 years.
| Storage Method | Best For | Shelf Life | Space Efficiency |
|---|---|---|---|
| Mason Jars | Home storage and visibility | 4-12 months | Medium |
| Vacuum-Sealed Bags | Portion control and organization | 6-18 months | High |
| Mylar Bags with Oxygen Absorbers | Long-term food storage | 5-10 years | High |
| Biodegradable Food Bags | Eco-conscious storage | 4-8 months | High |
How to Rehydrate Meals on the Trail or at Home
Rehydrating your meals is easy and quick. Just put your dehydrated food in a pot, add enough water, and boil. Then, turn off the heat, cover, and wait 5 minutes. Check for dry bits and add more water if needed. Most meals rehydrate in 5 to 15 minutes.
Pureed soups rehydrate fast when you add hot water. Some meals, like vegetable mixes and grains, can soak overnight for no-cook meals. Pre-cooked foods rehydrate faster because they’ve already been partially cooked.
- Pour dehydrated meal into pot or bowl
- Add water to cover the food completely
- Bring to a boil for hot meals
- Remove from heat and cover for 5 minutes
- Check texture and add more water if too dry
- Taste and season as desired
Make your rehydrated meals taste like restaurant food with fresh toppings. Add herbs, cheese, hot sauce, or nuts. Turn chili into tacos or quesadillas. With a little creativity, your long-term food storage can be delicious.
Conclusion
You now have all the tools you need to start your home food preservation journey. Dehydrating food is one of the oldest and simplest ways to preserve what you grow or buy. This ancient practice has fed people for thousands of years. You can feel confident knowing you’re using a time-tested method that really works.
The benefits of dehydrating at home are clear and powerful. You save money compared to buying freeze-dried meals from stores. You control every ingredient that goes into your food. You cut the weight of your meals for backpacking trips. Your food stays fresh without a refrigerator for months. Best of all, you create meals that match your taste and dietary needs exactly. Home food preservation through dehydration gives you power over what you eat.
Start small if you’re new to this. Try making apple chips or drying fresh herbs first. Get comfortable with your dehydrator. Learn how different foods behave when you remove the water. Build your skills step by step. Soon you’ll be making complex trail meals and gourmet snacks. There’s real joy in turning fresh ingredients into lightweight, shelf-stable food. Knowing you made it yourself feels amazing.
Don’t wait any longer to begin. You have the knowledge about choosing the right dehydrator, preparing foods safely, and storing your finished products correctly. Dehydrating is fun and easier than you might think. Pick up a dehydrator this week. Buy some fresh produce this weekend. Experience the satisfaction of home food preservation yourself. Your future meals—and your adventures—are waiting for you.
FAQ
What exactly is food dehydration and how does it work?
Food dehydration removes moisture to preserve food for long storage. It uses low heat and airflow to dry food. This method has been used for thousands of years.
By removing moisture, food becomes shelf-stable without refrigeration. Electric dehydrators are the best for home use. Sun and oven drying are also options.
Why should I invest time and money into dehydrating food at home?
Dehydrating food at home saves money and offers control over ingredients. It preserves more nutrients than canning. Dehydrated food is also lighter and lasts longer.
It’s perfect for those with dietary restrictions. Dehydrated food can last 4 months to 1 year, and up to 5-10 years under ideal conditions.
What temperature should I use when dehydrating different foods?
Temperature is key for safe drying. Use a guide for each food type. Delicate herbs dry at 95°F, fruits at 135°F, and vegetables at 125-135°F.
Grains and legumes dry at 130°F, and meats at 160°F or higher. Always use adjustable temperature settings for safe drying.
How do I prepare food for dehydration?
Clean workspace and wash hands for safety. Use mandolines for even thickness. Pretreat fruits and vegetables as needed.
Use ascorbic acid or citrus juice to prevent browning. Blanch or steam some vegetables before dehydration.
How long does it take to dehydrate food?
Drying times vary based on humidity, dehydrator load, and food thickness. Herbs take 1-4 hours, fruits 12-24 hours, and vegetables 4-12 hours.
Grains and legumes take 6-12 hours, and lean meats 4-8 hours. Testing for doneness is more reliable than timing.
What are the best foods to dehydrate?
Many foods dehydrate well. Fruits like apples and bananas are great for snacking. Vegetables like carrots and broccoli are good for meals.
Legumes and grains reduce cooking time. Lean meats like ground beef and chicken rehydrate well. Fresh herbs add flavor.
What foods should I avoid dehydrating at home?
Avoid high-fat foods like avocados and fatty meats. Dairy and eggs are also risky due to salmonella. Cheese, butter, and oils should be added during rehydration.
How should I store my dehydrated food for long-term preservation?
Use mason jars, vacuum-sealed bags, or mylar bags for storage. Silica gel packets control moisture. Store in cool, dark places.
Most dehydrated foods last 4 months to 1 year. Ideal conditions can extend shelf life to 5-10 years.
How do I rehydrate my dehydrated meals?
Rehydrating is simple. Add dehydrated food to a pot, cover with water, and heat. Wait 5-15 minutes, adding more water if needed.
Pureed soups rehydrate quickly. Chunkier meals may need soaking. Garnish with fresh herbs and toppings for flavor.
What’s the difference between front-loading and stackable dehydrators?
Front-loading dehydrators dry more evenly. Stackable dehydrators are cheaper but may not dry as well. Choose based on budget and needs.
The Nesco Snackmaster FD-75A is a budget-friendly option. The COSORI Premium Dehydrator offers mid-range quality. Adjustable temperature settings are essential.
Can I use my regular kitchen oven instead of an electric dehydrator?
Ovens are not ideal for dehydration. They can’t maintain low temperatures and lack airflow. Electric dehydrators are more reliable and efficient.
What’s case hardening and how do I prevent it?
Case hardening happens when the outside dries too fast. This seals moisture inside. Use proper temperatures to prevent it.
Start at lower temperatures and increase slightly. Follow temperature guidelines for each food type.
How do I know when my food is properly dehydrated?
Testing is more reliable than timing. Vegetables should be crisp, fruits leathery, and grains and meats hard. You can’t over-dehydrate at the right temperature.
What’s the best way to slice foods uniformly for dehydration?
Uniform thickness is key for even drying. Use a mandoline slicer for consistent slices. Aim for 1/8 to 1/4 inch thickness.
For smaller items, an egg slicer works well. Always use safety precautions with mandolines. A sharp knife is also an option.
How much moisture should be in properly dehydrated food?
Dehydrated food should have 5-20% moisture. This prevents bacterial growth. Test moisture by checking for crispiness and dryness.
Can I use frozen vegetables for dehydration?
Yes! Frozen vegetables save time. They’re already blanched and cut. Simply thaw, pat dry, and dry at 125-135°F.
Frozen vegetables dehydrate faster. They’re perfect for beginners.
What’s the best way to condition dried fruit?
Conditioning prevents mold in dried fruit. Cool the fruit, then place it in jars two-thirds full. Seal and shake daily for a week.
After conditioning, store the fruit in airtight containers with silica gel packets.
How do I know if my dehydrated food has gone bad?
Check for visible mold, off smells, or moisture. If you see these signs, discard the food. Store in airtight containers with silica gel packets.
Keep food in cool, dark places. Check stored food occasionally for signs of spoilage.
What equipment do I need beside a dehydrator for home food preservation?
You’ll need a mandoline slicer, sharp knives, and airtight containers. Silica gel packets control moisture. A kitchen scale and label makers are also helpful.
These tools enhance your dehydration experience and ensure food safety.
Is dehydration safe for all types of food?
Dehydration is safe for most foods. But avoid high-fat foods and dairy and eggs due to safety risks. Follow temperature guidelines and drying practices for safe dehydration.
How does dehydration compare to other food preservation methods?
Dehydration preserves more nutrients than canning. It’s lighter and lasts longer than freezing. Dehydration is simpler than pressure canning and more shelf-stable than refrigeration.
Can I dehydrate complete meals or just individual ingredients?
Yes, you can dehydrate complete meals. Ensure all ingredients are compatible and the dish is low-fat. Add fats like cheese and oils separately during rehydration.
This approach creates custom trail meals tailored to your preferences.
What’s the difference between dehydrating fresh versus frozen foods?
Fresh foods often produce better results. But frozen foods save time. Fresh foods may need pretreatment, while frozen skip this step.
Frozen foods dehydrate faster and may have a different texture. Both fresh and frozen dehydrate successfully, depending on your preference.
How much dehydrated food should I make for a backpacking trip?
Calculate your needs based on trip length and caloric requirements. Most people need 1.5-2 pounds of dehydrated food daily. Dehydrated food is much lighter than fresh.
For a seven-day trip, plan for 7-14 pounds of fresh food, which becomes 2-4 pounds dehydrated. Include a variety of meals and snacks.
What’s the ideal storage temperature for dehydrated food?
Store dehydrated food below 70°F for the longest shelf life. Room temperature is acceptable if your environment is dry and dark. Warmer temperatures reduce shelf life.