When disaster hits, you need your emergency supplies ready. Most families spread their gear around the house without a plan. This makes finding what you need stressful and slow.
The Survival Mom faced this problem after moving. Her emergency stuff was in a messy “Survival Closet.” But when her daughter organized it, everything changed. Now, they can grab what they need fast.
Organizing emergency gear doesn’t need to be fancy. You just need a system that works when you’re stressed. Experts say keep your supplies in one or two containers. Place them in spots like hall closets or garages.
Some think having supplies everywhere is good. But this wastes time in real emergencies. A simple system helps everyone find what they need quickly.
This guide will teach you to organize your emergency gear effectively. You’ll learn which items are most important. You’ll find smart ways to save space and keep your supplies fresh. Whether starting from scratch or reorganizing, this approach will make your home emergency ready.
Table of Contents
Why Organizing Emergency Gear Matters in Crisis Situations
When disaster hits, every second is critical. Having your emergency supplies organized can save lives. In a crisis, your mind is racing with worry. You can’t afford to waste time searching for important items.
Organizing your emergency gear is a lifesaving habit. It helps you stay calm and focused. This is why it’s essential to keep your supplies in order.
Imagine the chaos when panic sets in. Your heart races, and your thoughts are all over the place. In those moments, knowing exactly where your supplies are can be a lifesaver. Military and police officers use organized emergency kits for a reason. It’s a method that works for anyone.
The Difference Between Chaos and Preparedness
Consider two families facing the same disaster. One family is frantically searching for supplies, while the other finds what they need quickly. The prepared family feels in control.
Real-life examples show the power of being prepared. During Hurricane Harvey, families with organized kits were able to act fast. They found their solar panels and emergency lights without delay. This gave them time to focus on safety.
Response Time Can Save Lives
Quick access to your supplies can protect your family. Here are some scenarios:
- A sudden power outage requires immediate access to light sources
- An injury needs first aid supplies within arm’s reach
- An evacuation order means grabbing your bag and leaving in minutes
- A weather emergency calls for water and shelter materials instantly
Speed is key in emergencies. Organized emergency supplies reduce panic and increase safety. Your supplies are ready when you need them most. This gives you peace of mind and keeps your loved ones safe.
Essential Categories for Organizing Emergency Gear
Organizing your emergency gear means sorting supplies into groups. These groups are based on survival needs and how we search for items in stress. Grouping supplies by purpose saves time and reduces panic. You’ll know where to find what you need quickly.
You likely have many of these items already. You just need to gather and organize them. Let’s look at the three main categories for any emergency kit.
Light Sources and Power Supplies
You can’t find anything without light. This category is first because light lets you access everything else. Redundancy is your best friend here—never rely on just one power source.
Your emergency kit should include:
- Battery-powered or hand-crank flashlights
- Headlamps for hands-free lighting
- Light sticks and candles for backup
- Extra batteries in multiple sizes
- Solar chargers and power banks
- Hand-crank emergency radios
Batteries run out. Electrical grids fail. Solar chargers work differently with weather. Having multiple power sources protects you from any failure.
Food and Water Provisions
Your body can last weeks without food but only days without water. According to guidance on building your emergency kit, you need one gallon of water per person per day. Store at least a three-day supply for evacuations.
Emergency food is different from regular food. It’s non-perishable, doesn’t need cooking, is compact, and high in calories. Examples include:
- Meals Ready to Eat (MREs)
- Energy bars and protein bars
- Freeze-dried meals
- Peanut butter and crackers
- Nuts and dried fruit
- Manual can opener for canned goods
Water purification tablets and filters belong here. They make questionable water safe to drink when bottled supplies run low.
First Aid and Medical Supplies
First aid kit essentials include basic items most people know. Bandages, antiseptic wipes, pain relievers, and antibiotic ointment are the basics. But don’t forget the items people often overlook.
| Basic Supplies | Personal Medical Items | Special Needs |
|---|---|---|
| Adhesive bandages (various sizes) | Prescription medications (7-day supply) | Hearing aid batteries |
| Gauze pads and tape | Allergy medications | Extra eyeglasses or contacts |
| Antiseptic wipes | Blood pressure medication | Inhalers and nebulizers |
| Pain relievers and fever reducers | Insulin and diabetes supplies | Medical alert identification |
| Antibiotic ointment | Medical equipment lists and instructions | Syringes or injectors |
| Elastic bandages and wraps | Copies of prescription records | Pediatric medications |
Your first aid kit should include important medical information. Write down all medications, dosages, and allergies. Include names and phone numbers of healthcare providers. This info is vital when systems fail.
These three categories—light and power, food and water, first aid and medicine—are the core of your emergency system. Mastering these categories lets you build a complete home emergency kit with confidence and clarity.
Building Your Home Emergency Kit Storage System
Starting to organize your emergency gear begins with picking the right spot in your home. It should be easy for everyone to reach but not in the way. A closet is ideal, but a garage corner or under the stairs works too. The goal is to make sure everyone knows where to find their emergency supplies fast.
If you don’t have a closet, think outside the box. Move less important items to make room. Use freestanding shelves or wall space. Remember, your emergency kit needs to work, not look good.
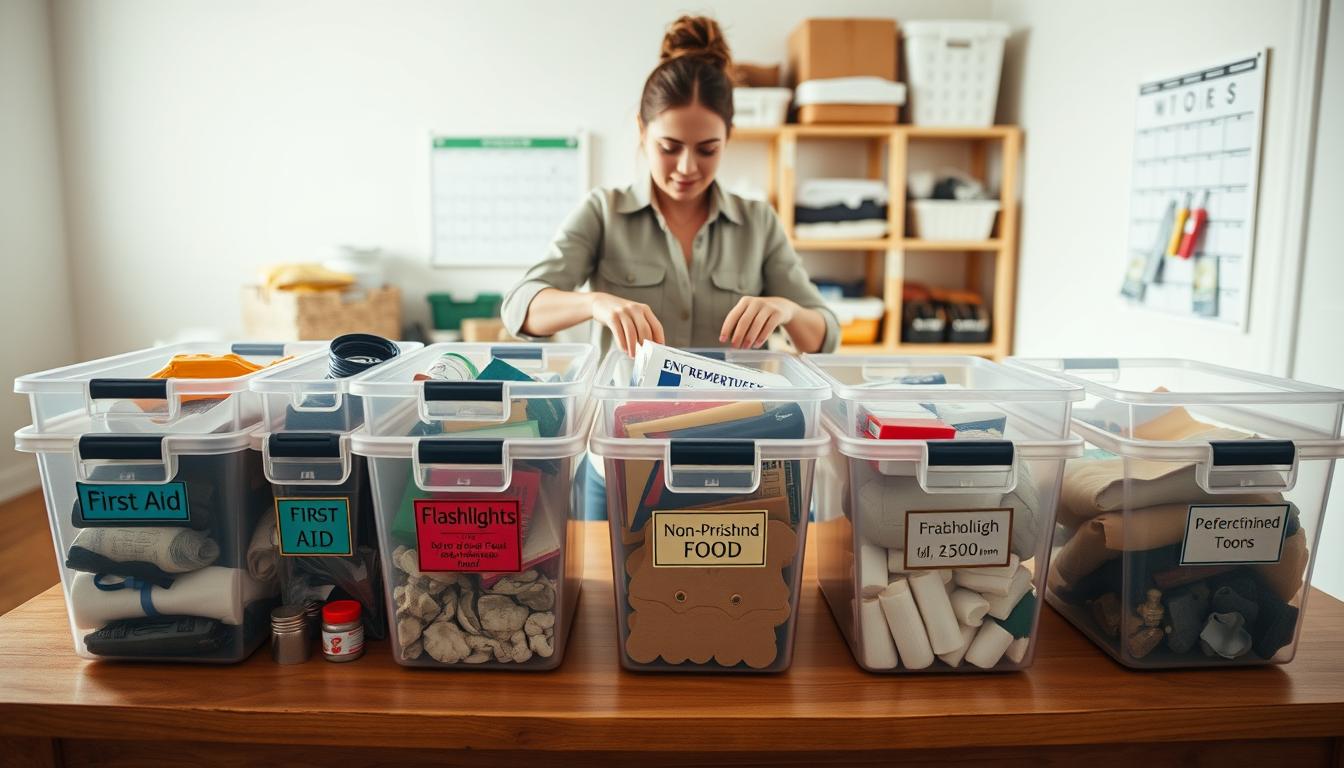
- Put all emergency supplies in one place so you can see everything at once
- Keep big items like water containers and camping stoves separate
- Sort items into categories based on what you need most
- Choose containers that fit your space, like plastic bins or duffel bags
- Fill containers and label them clearly with a marker
- Use shelves and vertical space to make the most of your area
Vertical storage is key. Hang hooks on walls or closet doors for backpacks and more. Make sure kids can reach their emergency backpacks easily. This helps them feel confident and quickens your response time.
| Storage Location | Best For | Pros | Cons |
|---|---|---|---|
| Dedicated Closet | All emergency supplies | Organized, out of sight, easy access | Requires available closet space |
| Garage Corner | Bulk water, large items | Extra space, climate controlled | May be harder to access quickly |
| Spare Room | Complete emergency system | Room to expand, organized | Requires dedicated room |
| Under Stairs | Compact supplies and bags | Uses wasted space, hidden | Limited headroom and access |
What you choose to store your emergency gear in is less important than how you organize it. You can find emergency gear storage solutions at any price. Some like matching bins, while others use free boxes. Both work if your system is clear and labeled.
This project doesn’t take a whole weekend. Even a few hours can turn scattered supplies into a useful emergency system. Your family will know where to find what they need when it matters most.
Creating Effective Grab-and-Go Bags for Different Locations
A grab-and-go bag is key in your emergency plan. It’s for quick escapes when you have only minutes. They’re best when placed in various spots, so you’re never far from what you need. Knowing what makes these bags unique helps you pack them right.
What Makes a Grab-and-Go Bag Different
Your home emergency kit might be heavy and stay in one place. A grab-and-go bag, on the other hand, is light and portable. It’s meant to last you for about three days.
Grab-and-go bags only have ready-to-eat items. You won’t have time to cook during an evacuation. They’re packed for quick access, with essentials in outer pockets.
Begin with a sturdy tactical bag of at least 50 liters. It should be waterproof and have outer pockets for easy access. Inner compartments help organize your supplies by category.
Customizing Bags for Home, Work, and Vehicle
Every situation is different. Adjust your emergency checklist for each bag’s location.
| Location | Primary Purpose | Key Items | Storage Spot |
|---|---|---|---|
| Home | Evacuation during natural disasters or emergencies | Ready-to-eat food, water, phone charger, first-aid kit, important documents, cash, local map with family meeting place, seasonal clothing, emergency blanket, flashlight, battery-powered radio | Near exit door for quick grab |
| Work | Getting home safely or reaching a safe location | Comfortable walking shoes, water bottle, snacks, phone charger, small first-aid kit, personal medications, glasses or contacts, cash, whistle, notepad, pen, seasonal clothing appropriate for your region | Office closet or under desk |
| Vehicle | Handling car breakdowns and being stranded | Extra water (cars get hot), jumper cables, basic tools, jack, tire repair kit, flashlight with extra batteries, first-aid kit, blanket, seasonal items (ice scraper or cooling towels), phone charger, cash, rope or tarp | Trunk or backseat storage |
Home bags should be near an exit door. They should have everything you need for three days away from home.
Work bags focus on comfort. You might need to walk home. Keep it small and include items for safety or returning home.
Vehicle bags are for car emergencies. They should have extra water and tools. Include seasonal items like ice scrapers or cooling towels.
Don’t worry about making all three bags at once. Start with your home bag. Then, move to your work and vehicle bags. Use packing cubes to keep things organized. This system helps you find what you need quickly, keeping you safe.
Smart Container Solutions and Labeling Strategies
Choosing the right containers for your emergency gear is smart. Clear plastic bins are best because you can see what’s inside. Opaque bins work too, as long as they have clear labels. Cardboard boxes are okay for dry items, and duffel bags are great for soft items like clothes and blankets.
Container size is key. Bins should be small enough to lift when full. They should also be big enough to hold a whole category of disaster gear. Sometimes, items like water containers or camping stoves fit better in their original packaging. Just make sure everything has a spot.
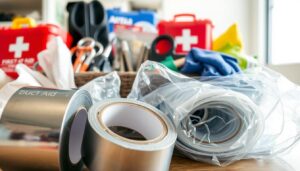
For grab-and-go bags, use tactical backpacks with many compartments. Packing cubes, zippered pouches, or plastic bags help organize small spaces. Plastic ties can seal opened food packets to keep them fresh.
Creating Effective Labels
Labels should be large, clear, and visible from multiple angles. Use a label maker, printed labels, or duct tape with permanent marker. Avoid tiny handwritten tags. Your labels should show both the category and key contents. For example, write “First Aid: bandages, medications, thermometer” instead of just “First Aid.”
For grab-and-go bags, attach a laminated contents list to the outside. Keep important documents in plastic bags to protect them from moisture. Remember, functionality is more important than looks. Masking tape and a Sharpie work just fine.
| Container Type | Best Uses | Key Benefits |
|---|---|---|
| Clear Plastic Bins | Canned goods, first aid supplies, tools | See contents without opening, stackable, durable |
| Duffel Bags | Clothing, blankets, soft items | Portable, flexible size, easy to grab |
| Tactical Backpacks | Grab-and-go emergency kits | Multiple compartments, wearable, organized |
| Original Packaging | Water containers, fuel tablets, specialty items | Designed for the product, saves space |
Your emergency gear storage solutions should help you access what you need quickly. Good labeling and smart container choices mean you won’t waste precious time searching for supplies when minutes count.
Maintaining and Updating Your Emergency Supplies
Your emergency supplies need regular care, not just when you first pack them. A well-organized kit loses its value if food spoils, batteries run out, or clothes don’t fit. Keeping your kit in top shape is key to being ready for emergencies. It’s like taking care of a car—you wouldn’t skip oil changes and expect it to run well when you need it most.

It’s best to check your emergency supplies twice a year. Many people do this around daylight saving time or on specific dates like January 1st and July 1st. This way, it’s easy to stay on track without feeling overwhelmed.
Checking Expiration Dates on Food and Water
Water in original containers lasts one to two years in cool, dark places. Never use water past the expiration date on the bottle. Check bottled water every six months to avoid using expired supplies.
Food items like energy bars, MREs, and packaged foods also have expiration dates. Medications, both over-the-counter and prescription, lose their effectiveness over time. Batteries lose charge even when unused and stored.
| Supply Type | Typical Lifespan | Check Frequency | Action When Expired |
|---|---|---|---|
| Bottled Water | 1-2 Years | Every 6 Months | Replace Immediately |
| Energy Bars & MREs | 3-5 Years | Every 6 Months | Rotate and Replace |
| Medications (OTC) | 1-3 Years | Every 6 Months | Replace Before Expiration |
| Batteries (Unused) | 5-10 Years | Every 6 Months | Test and Replace Weak Ones |
| First Aid Items | 2-3 Years | Every 6 Months | Refresh as Needed |
| Water Purification Tablets | 3-5 Years | Every 6 Months | Replace When Expired |
Items without printed dates need extra attention. Write the purchase date on containers with permanent markers. Use a rotation system—use older items first and replace them with new ones. This keeps your supplies fresh and prevents waste.
Seasonal Clothing Rotations
Seasonal clothing is part of keeping your survival kit organized. You wouldn’t wear summer clothes in winter, and winter coats are too heavy for summer bags.
- Fall swap: Replace lightweight rain ponchos with heavy winter coats
- Add hand warmers and thermal layers before cold months
- Include sun protection and lightweight clothing in spring
- Check that all clothing fits growing children and family members
- Remove items that no longer serve your family’s needs
Keep a simple checklist inside each container or bag. Note the last inspection date and what needs attention next. This small step makes future maintenance easier and ensures nothing gets overlooked. Your emergency supplies work best when they’re current, accessible, and ready for action.
Conclusion
Organizing emergency gear is something you can do today. The steps you’ve learned will make your home ready for emergencies. Don’t wait until it’s too late to find what you need.
You don’t need perfect containers or the perfect moment to start. Use what you have and organize one category at a time. Small steps can make a big difference.
When The Survival Mom organized her emergency gear before Hurricane Harvey, it paid off. Her family was ready and safe because everything was organized.
Organizing emergency gear gives you peace of mind. It means your family can act fast in emergencies. You won’t be searching for supplies when you need them most.
Creating proper shelter options is key. Knowing where they are is part of your home emergency preparedness strategy. It’s not about extreme prepping or fear. It’s about being responsible and practical.
Take control of your emergency readiness today. Start with one area of your home. Gather your supplies, sort them, and label them. Your family’s safety depends on being ready.
Begin now and build on your progress each week. Your effort today could save your family tomorrow.
FAQ
Why is organizing emergency gear so important if I already have supplies scattered around my home?
In a crisis, every second is critical. Scattered emergency supplies waste time, adding to stress. Organized gear lets you find flashlights and first aid quickly.
Studies show families with organized supplies respond faster and panic less. Military and police standards stress organized supplies for safety. They ensure you can access light, medical supplies, or evacuate quickly.
What are the main categories I should use when organizing my emergency supplies?
Organize into three main categories: Light Sources and Power Supplies, Food and Water Provisions, and First Aid and Medical Supplies. These categories are based on survival needs and how we search for items in emergencies.
You likely have many items already. You just need to gather and organize them.
I don’t have a spare closet or room for emergency gear storage. What are my options?
You can use creative spaces for emergency storage. Repurpose closets or use garage shelves. Even under stairs or pantry corners work.
The key is to pick a spot that’s easy for everyone to access. You don’t need a dedicated room for a well-organized corner.
What’s the difference between my home emergency kit and grab-and-go bags?
Home kits are for sheltering in place and have more supplies. Grab-and-go bags are for quick evacuations and are lighter.
Home kits have a week’s food, while grab-and-go bags have 72 hours’ worth. Home kits are organized for quick access, while grab-and-go bags have essentials in outer pockets.
How do I customize grab-and-go bags for different locations like work and my car?
Customize bags for each location. Your home bag should be complete and near an exit. Work bags are smaller, with essentials to get home.
Car bags focus on car emergencies, like jumper cables and extra water. Start with one bag and add more as needed. Use packing cubes for organization.
What containers should I use for organizing my emergency supplies?
Clear plastic bins are best for seeing contents. Opaque containers work with labels. Cardboard boxes are okay for dry items.
Duffel bags are good for soft items. Choose bins that are big enough but not too heavy. Original packaging is fine for odd shapes.
How should I label my emergency containers and bags?
Use large, clear labels that are easy to read. Label makers or duct tape with a permanent marker work well. Identify the category and key contents.
For grab-and-go bags, attach a laminated list outside. Write dates on items for maintenance tracking. Functionality is more important than looks.
How often should I check my emergency supplies, and what should I look for?
Check supplies every six months. Use daylight saving time or specific dates like January 1st and July 1st. Check bottled water, food, medications, batteries, and chemical products.
For items without expiration dates, write the purchase date. Replace items before they expire to prevent waste.
Why do I need to rotate clothing in my emergency bags seasonally?
Clothing needs change with the seasons. Rotate clothes twice a year to keep supplies current. In fall, swap light items for heavy coats.
In spring, add sun protection. Check that clothes fit everyone, as children grow quickly. Keep a checklist for future maintenance.
Can I really create an effective emergency preparedness system without buying expensive organizing products?
Yes, you can. You don’t need fancy products to organize emergency gear. Cardboard boxes and basic bins work well.
Use what you already have, like flashlights and first aid items. Spend money on actual supplies, not organizing systems.
What should I include in a basic first aid kit for home emergency preparedness?
Start with essentials like bandages, gauze, and antiseptic wipes. Add pain relievers, antihistamines, and medications. Include items specific to your family’s needs.
Don’t forget CPR face shields, hydrocortisone cream, and personal medical devices. Store everything in a labeled, water-resistant container. Check contents every six months.
How much water should I store as part of my emergency supply checklist?
Store four liters of water per person per day. For a family of four, that’s 16 liters daily. Plan for at least three days’ supply, or 48 liters.
Use food-grade containers and replace bottled water every 1-2 years. Include water purification methods like tablets or filters. Store water in multiple locations.
What makes a good grab-and-go bag different from just throwing random items in a backpack?
A good bag has critical items in outer pockets for quick access. It’s lightweight but has enough supplies for 72 hours. Use packing cubes for organization.
Include only essential items for survival or evacuation. Customize bags for each location. The bag should be a tactical backpack that’s always packed and accessible.
Should I create individual emergency bags for each family member?
Yes, individual bags are highly recommended. Customize each bag to the person’s needs and abilities. Children’s bags should be smaller and lighter.
Include clothing, medications, and comfort items. Customize bags for specific needs, like diabetes or asthma. This ensures everyone has supplies tailored to their needs.
What are some often-forgotten items people should include in emergency preparedness supplies?
Include prescription medications, extra eyeglasses, and personal hygiene items. Don’t forget documents, cash, cell phone chargers, and a whistle.
Include pet supplies if you have animals. Many people overlook items for sanitation, communication, and emotional well-being.
How can I make sure my emergency gear system works when I actually need it?
Test your system regularly with practice drills. Conduct grab-and-go bag drills to check contents. Practice using items like flashlights and radios.
Review your emergency supply checklist with family members. Maintain supplies on a consistent schedule. Keep your system accessible and visible.
Is it realistic to organize emergency gear if I’m renting a home?
Absolutely. Renters can create effective emergency systems. Use freestanding shelves and portable containers. Focus on solutions that are temporary and mobile.
Because renters may need to evacuate quickly, organized, portable supplies are critical. Your investment in organizing gear is worthwhile, regardless of your housing situation.
Where should I store my grab-and-go bags for easiest access during an emergency?
Store bags near exit doors for quick access. Use hooks by your front door or in a coat closet. Make sure everyone can access them without trouble.
For vehicle bags, keep them in the trunk or under a seat. For work bags, store them in your desk or car. The goal is to make them easy to find and grab.
Can I use regular household items I already own as part of my emergency supplies?
Yes, you can. Use items like flashlights, batteries, and canned goods. Start with what you already have to begin organizing.
This approach helps you maintain supplies and gradually add specialized items. It makes organizing easier and more affordable.
How do I organize emergency supplies with limited space in an apartment or small home?
Use vertical storage in small spaces. Over-the-door organizers, wall-mounted shelves, and stackable containers are great. Use under-bed storage for non-perishable items.
Install hooks for hanging bags and other items. Consider multi-functional furniture like ottomans with storage. Think vertically to maximize space.
What should I include in a vehicle emergency bag, and why is it different from home or work bags?
Vehicle bags focus on car emergencies. Include jumper cables, basic tools, and spare tire. Ensure it’s properly inflated.
Also, include extra water, a first aid kit, and a flashlight. Keep it in your car trunk or under a seat. It’s designed for car-specific emergencies.