Floods and power outages pose big risks to your well water. Unlike those on city water, you must keep your water safe. The water from your well might not be safe to drink or use for cooking.
Contamination from floods is a big threat. After Hurricane Florence in 2018, the State Public Health Lab tested private wells. Nearly 45 percent showed bacterial contamination. Over 13 percent had E. coli bacteria. This shows why well water testing is key for your family’s health.
You can’t see, taste, or smell contamination in your water. Bacteria and pathogens can hide in clean-looking water. Your pets and kids are at risk if you use contaminated water. That’s why testing your well water is so important now.
This guide will show you how to test your well water safety step by step. You’ll learn how to check your well for flood damage. Then, you’ll find out the best testing methods and household water testing kit options after a flood. The good news is that following the right steps can make your water safe again.
Let’s start by understanding what risks your well faces and what you need to do right away.
Table of Contents
Understanding the Risks to Your Private Well After Flooding
Flooding is a big danger for private water wells. It can damage your well and make the water unsafe. Knowing these risks helps keep your family healthy and ensures your water is clean again.
Floodwater is full of harmful stuff. It can damage your well and bring dangerous germs into your water. These germs come from places like sewage and animal waste.
Common Contaminants in Flood-Affected Well Water
After flooding, your well water can be full of harmful stuff. Bacteria like E. coli and coliform are big concerns. These can make you very sick if you drink the water.
Floodwaters bring many contaminants into your well:
- Bacterial pathogens like E. coli and coliform bacteria from sewage and animal waste
- Viruses and protozoa that spread waterborne diseases
- Chemical contaminants such as gasoline, heating oil, and pesticides
- Physical debris including mud, sediment, and broken materials
Chemicals in the water are very dangerous. If your well gets contaminated with gasoline or heating oil, don’t use it. These need professional help to clean up. Too much rain and flooding can also make your well water unsafe.
| Contaminant Type | Source | Health Risk | Detection Method |
|---|---|---|---|
| Bacterial pathogens (E. coli, coliform) | Sewage, animal waste, septic systems | Gastrointestinal illness, severe infections | Bacterial culture testing |
| Viruses | Human and animal waste | Viral infections, fever, diarrhea | Viral testing |
| Protozoa | Animal waste, surface water | Cryptosporidium infection, parasites | Microscopic examination |
| Gasoline and fuel oils | Storage tanks, vehicles | Organ damage, cancer risk | Chemical analysis |
| Pesticides | Agricultural runoff | Neurological damage, hormone disruption | Pesticide screening |
| Sediment and debris | Floodwater transport | Physical particles, clogged pipes | Visual inspection, turbidity testing |
Why Power Outages Create Additional Water Safety Concerns
Power outages during flooding make things worse. Without power, your well pump stops working. This means water can’t move properly, creating a perfect spot for bacteria to grow.
Power loss affects your well in several ways:
- The pump can’t draw water from the well into your home
- Water pressure tanks lose pressure and may become damaged
- Electrical components in the system can fail when power returns suddenly
- Water remains static in pipes, allowing contaminants to concentrate
When power comes back, electrical surges can harm your well equipment. This makes the water even more contaminated. Your well needs a professional check before you can use the water again.
Assessing Your Well for Flood Damage Before Testing
Before testing your well water, check for flood damage first. A thorough assessment is key to private well safety. Flood waters can harm your water system. Inspecting your well well helps avoid contamination and keeps your family safe.
Don’t turn on your well pump until you’ve checked everything. Hurrying could damage your equipment or let contaminated water in. Here’s how to check your well’s condition carefully.
Step-by-Step Well Assessment Process
- Turn off power to the well at the circuit breaker right away. This step keeps you safe from electrical dangers while you inspect.
- Look for flood indicators around the wellhead. Check for mud, debris, water stains, or discoloration on the casing and area.
- Check ground stability around the well. Look for soil cracks, erosion, or unstable ground that shows water damage.
- Inspect electrical components carefully. Never touch wires or boxes. Look for water in electrical boxes or damaged wiring. Call a licensed electrician if you see issues.
- Examine the well casing for cracks, bends, or holes. Any damage lets sediment and contaminants into your water.
- Verify the well cap and seal are tight and secure. These protect your well from surface contamination.
Most private wells have pumps inside the casing underwater. You can’t inspect these yourself, so you’ll need a professional if you suspect damage.
When to Call a Professional
If you find any concerning conditions, call a licensed well contractor right away. Don’t try to fix it yourself. Professionals have the right tools and knowledge to safely fix your system.
Putting private well safety first now avoids bigger problems later. Finish this assessment before testing or using your water.
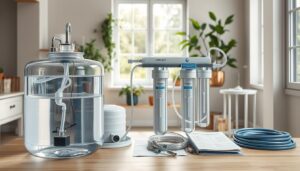
Preparing Your Well for Safe Water Testing
Before you can trust your water quality testing results, your well needs proper preparation. Floodwater and power outages leave behind sediment, debris, and contaminants. These must be removed first. Skipping this step means your test results won’t show the true condition of your water supply.
Flushing and disinfecting your system ensures accurate findings. This makes your drinking water safer for your family.
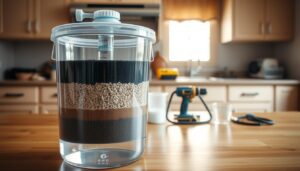
Flushing Your Well System Properly
Flushing removes floodwater, sediment, and initial contamination from your well and pipes. This process follows four clear steps that prepare your system for water quality testing.
- Clean – Remove any visible mud, sediment, and debris from the well casing, cap, and accessible components
- Re-grade – If ground around the well slopes toward it, reshape the area so surface water flows away from the well casing
- Start pump – After inspection and repair, turn on the pump carefully
- Flush – Pump water until it runs clear using a hose connected to an outside faucet, directing water to a drainage area away from your septic system
Flushing times vary widely. You might see clear water in thirty minutes. Deep wells or severely contaminated systems may need several hours or even days of pumping. Be patient with this stage—thorough flushing improves your water quality testing accuracy.
Disinfecting Your Well and Plumbing
After flushing, shock chlorination kills bacteria and harmful organisms. Mix 2 quarts of regular, unscented household bleach with 10 gallons of water. This solution must circulate through your entire well and house plumbing system.
| Step Number | Action | Details |
|---|---|---|
| 1-3 | Preparation | Remove well cap, measure water depth, calculate bleach amount needed |
| 4-7 | Application | Pour bleach solution into well, run water through all faucets inside and outside |
| 8-9 | Contact time | Let bleach solution sit for 8 to 24 hours without running water |
| 10-12 | Purging | Pump water until chlorine smell disappears, refill well cap securely |
Professional well drillers have more effective products and specialized equipment for disinfection. Consider hiring them if your well uses point construction or jet pump systems. Never drink or wash with well water until this disinfection process is complete and water quality testing confirms safety.
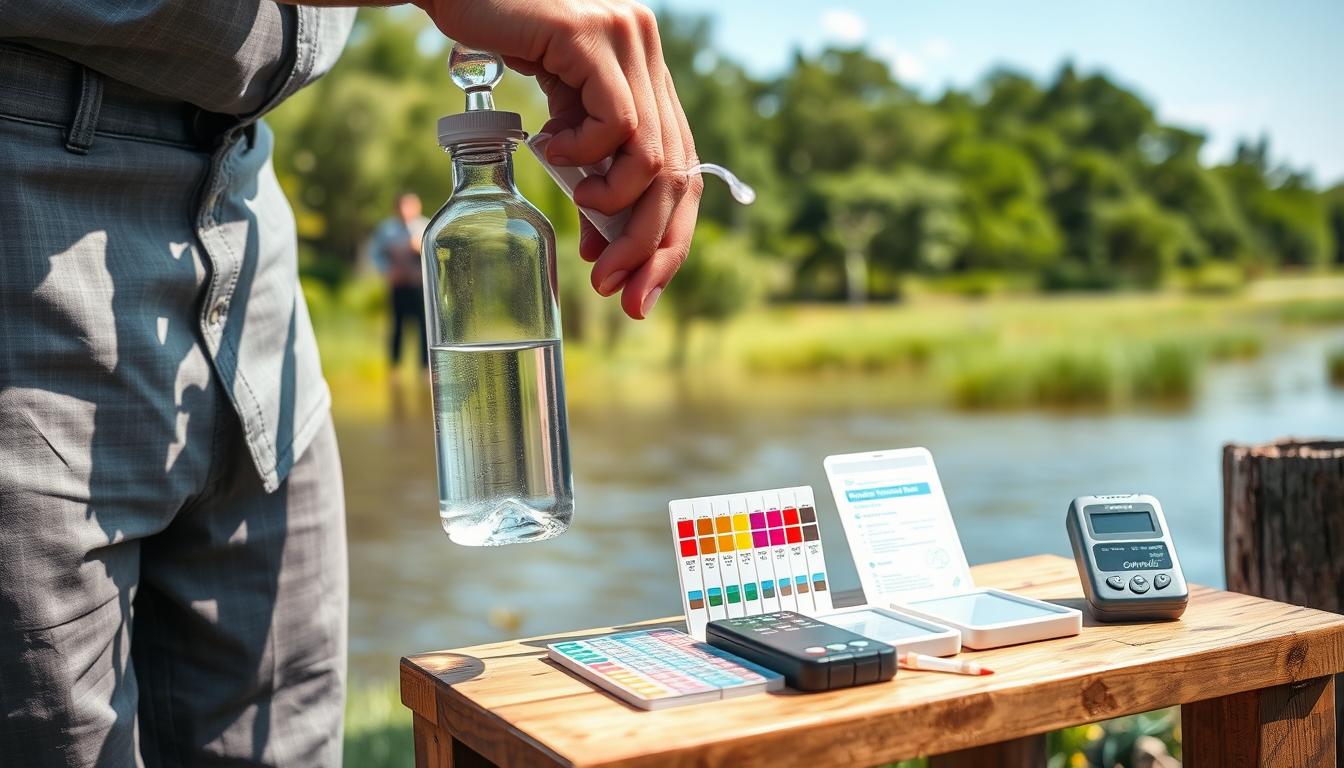
How to Test Well Water Safety Using Home Testing Kits
Home water testing kits are a quick and affordable way to check your well water after a flood or power outage. They are not as detailed as lab tests but are great for spotting bacterial contamination. These kits help find coliform bacteria, which means your water might have harmful germs.
Home testing kits are easy to use and fast. They give results in 24 to 72 hours. This lets you act quickly if your water might be contaminated. Make sure the kit tests for coliform bacteria, as it’s key for water safety after emergencies.

Knowing how to use well water test procedures is key for good results. Here’s how to test your water right:
- Find a cold water faucet and clean the area well
- Run cold water for five minutes to clear the line
- Adjust the water flow to match a pencil’s thickness
- Open the vial cap without touching the inside
- Fill the vial up to the line shown on the container
- Close the cap tightly and shake well
- Put the vial on a flat surface, away from sunlight
- Check the color against the kit’s chart after 24 hours
- If it’s not clear, wait another 48 hours and check again
Coliform bacteria in your water doesn’t mean it’s definitely bad. It just means there might be contamination. You should get your water tested by a pro to be sure. Many kits offer lab tests for more peace of mind.
It’s very important to follow the instructions carefully. Don’t touch the inside of the vials or caps. Keep the water flow right and wait long enough for the test. These steps help make sure your test results are accurate and safe for your family.
Working with Certified Labs for Accurate Water Quality Testing
Professional lab testing is the best way to check your well water after a flood or power outage. A certified lab has the right tools and trained experts. They can find contaminants accurately. Your safe well water standards depend on proper testing, which home kits can’t do. Local health departments can test your water or suggest EPA-certified labs in your area.
What to Expect from Professional Bacteria Testing
Getting your water tested by a certified lab starts with getting a sterile sampling bottle. Contact your local health department or an EPA-certified laboratory to request one.
Follow these nine steps to collect your sample correctly:
- Obtain a sterile BacT bottle from a state-certified lab or health department
- Do not open the bottle until you are ready to fill it
- Remove the anti-splash screen from your kitchen faucet cold water tap
- Disinfect the faucet tip by dipping it in bleach or flaming for 10 seconds
- Let cold water run for 4 to 5 minutes
- Fill the sterile bottle to the 100ml line and cap it tightly
- Complete the sample label and form with your contact information
- Place the filled bottle in your refrigerator immediately
- Return the bottle to the laboratory while keeping the sample chilled
Lab testing costs between 15 and 35 dollars per test. Results come in 1 to 2 weeks. They check for bacteria, E. coli, and other harmful microorganisms. If you smell fuel or suspect chemical contamination, ask about chemical tests.
Understanding Your Water Test Results
Lab results show if your water meets safe well water standards set by the EPA. Here’s what common test results mean:
| Test Result | Meaning | Action Required |
|---|---|---|
| E. coli: Absent | Your water is safe from bacterial contamination | No action needed; water is safe to drink |
| E. coli: Present | Your water contains dangerous bacteria | Do not drink; use bottled water; disinfect well |
| Total coliform: Absent | No indicator bacteria detected | Water passes safety standards |
| Total coliform: Present | Bacteria detected but may not be harmful | Retest; may need disinfection treatment |
| Fecal coliform: Absent | No fecal contamination present | Water meets safety requirements |
| Fecal coliform: Present | Serious contamination from sewage detected | Do not drink; disinfect immediately; retest |
Any E. coli means your water is not safe for drinking, cooking, or brushing teeth. Total coliform needs retesting in a week. If results show contamination, your lab or health department will help with disinfection and retesting. Ask questions if you’re unsure. Professional advice helps you understand your results for your family’s safety.
Safe Water Alternatives While Waiting for Test Results
After a flood or power outage hits your well, keeping your water safe is key. It’s best to think your water is dirty until tests prove it’s clean. This means you should not use tap water for anything until you get the test results.
While waiting, you’ll need safe water for drinking, cooking, and even for your pets. You’ll also need it for washing dishes, doing laundry, and taking baths. It’s important to use clean water for these tasks.
- Bottled water – Store several gallons for drinking and cooking needs
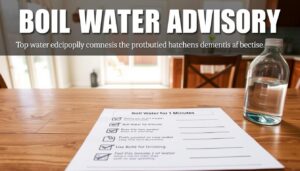
- Boiled water – A cost-effective solution using proper boiling techniques
If you choose to boil your water, follow these steps. First, filter the water through a clean cloth or coffee filter. Then, bring it to a rolling boil for at least one minute. If you’re above 6,500 feet, boil for three minutes instead. Let the water cool down in a clean, covered container.
Boiling water kills harmful germs that might be in your well. Learn more about emergency water purification methods to keep your water safe.
| Water Need | Daily Amount per Person | Best Source |
|---|---|---|
| Drinking | 1 gallon | Bottled or boiled water |
| Cooking | 0.5 gallons | Bottled or boiled water |
| Bathing | 20+ gallons | Well water (not for consumption) |
| Cleaning/Laundry | Variable | Well water (not for consumption) |
Here are some tips to make your water last longer. Use paper plates and cups to cut down on dishes. Fill bathtubs before floods to have water for flushing toilets. Keep bottled water ready as part of your emergency plan.
When your water is tested and found safe, you can go back to using it normally. If it’s contaminated, keep avoiding it for drinking, cooking, and other uses until it’s fixed. This small wait is worth it to keep your family healthy and safe.
Protecting Your Well from Future Flood Contamination
After dealing with flood damage or power outages, it’s wise to protect your well. Private well safety relies on smart planning and preventive measures. These upgrades will give you peace of mind during severe weather.
Begin by improving your wellhead. Make sure the ground slopes away from your well casing. Plants or barriers can help prevent erosion.
- Extend your well casing 1–2 feet above the highest recorded flood level in your area
- Install a sanitary well cap that creates a watertight seal against water, insects, and rodents
- Hire a registered well driller to complete any structural modifications
- Implement proper drainage systems around the wellhead
If your area floods often, you might need a new well. A professional can check if moving your well is possible.
Before storm season, prepare your well system. Here’s how:
- Store enough bottled water for emergencies
- Fill your pressure tank to the max
- Turn off your well pump’s electrical power
- Cover the wellhead with a heavy-duty trash bag if it’s not sealed
- Keep your well log in a safe place
Test your well water after floods. Retest it several weeks later. Regular testing is key in flood-prone areas. Visit resilient water preparedness resources for more tips.
Seasonal testing keeps you updated on your water quality. These steps protect your home’s most valuable resource.
Conclusion
Testing your well water after a flood or power outage is key to keeping your family safe. You can’t see, taste, or smell harmful bacteria in your water. This makes it vital to get a professional test to know if your water is safe.
By following the steps in this article, you can spot problems early. This way, you can act fast to prevent sickness. It’s a proactive step to safeguard your health.
Let’s go over the main points for testing well water safety. First, check your well for damage from flooding. Then, flush and disinfect your system to remove contaminants. You can use home kits for quick tests or certified labs for detailed analysis.
While waiting for results, use safe water alternatives like bottled water. These steps help protect your water and health.
As a private well owner, you’re fully responsible for your water quality. Unlike those with city water, you can’t rely on municipal testing. So, staying alert and proactive is critical.
If you have questions about well water testing, contact your local health department. They can help with test results or concerns about chemical contamination. If your well is damaged or contaminated, call a licensed well driller for repairs and disinfection.
Keep using safe water until you get negative test results. Once your water is confirmed clean, you can serve it to your family. By taking these steps now and preparing for future storms, you’re protecting your household. You have the power to ensure clean, safe drinking water even after tough situations.
FAQ
How soon after a flood should I test my well water?
Start checking your well water right away. But, wait until you’ve flushed and disinfected your system. This process can take hours to days, depending on how bad the contamination is.
After disinfection, you can use home testing kits or send samples to labs. Experts say wait 24-48 hours after shock chlorination for accurate results. Use safe water for drinking, cooking, and hygiene during this time.
Can I tell if my well water is contaminated by looking at it, tasting it, or smelling it?
No, it’s not safe to rely on looks, taste, or smell. Bacteria like E. coli and coliform are invisible, tasteless, and odorless. Many harmful substances can’t be detected without testing.
After Hurricane Florence, nearly half of tested wells showed bacterial contamination. This would have been hard to spot without lab tests.
What’s the difference between home water testing kits and professional laboratory testing?
Home testing kits are quick and affordable. They can show if there’s bacterial presence in 24-72 hours. But, they’re not as accurate as lab tests.
Labs use controlled conditions and trained technicians for better results. They can test for specific pathogens and chemicals. Lab tests are the best way to confirm water safety after a flood.
What exactly is shock chlorination and why is it necessary?
Shock chlorination uses high chlorine levels to kill harmful bacteria and viruses. It’s needed because flushing alone can’t remove all pathogens.
The process involves mixing unscented bleach with water and letting it sit for 8-24 hours. After, you need to flush out the chlorinated water until it’s safe. For complex systems, it’s best to get professional help.
What should I look for when assessing my well for flood damage?
First, turn off the power for safety. Look for signs of flooding like water lines and mud around the wellhead. Check if water flowed toward or away from the well.
Examine electrical components carefully. Never touch wires, but watch for water or corrosion. Also, check the well casing for damage. Make sure the well cap and seal are secure.
If you find any issues, a professional well driller must fix them before testing or disinfection.
Why is flushing my well system important after flooding?
Flushing removes floodwater and initial contamination. It involves cleaning visible debris and re-grading the area to prevent future water intrusion.
Start the pump after repairs and run water until it’s clear. Flushing time varies based on well depth and contamination. It’s a key step before shock chlorination and testing.
How much bottled water should I store for my family during the testing period?
Store enough bottled water for your household size and needs. The EPA suggests one gallon per person per day. For a few days to a week, aim for 7-10 gallons per person.
You’ll also need water for hygiene. Bottled water supplies can quickly run out during emergencies. Keep an emergency supply year-round and rotate it every six months.
What does it mean if my test results show “total coliform” bacteria?
Total coliform bacteria means your well is at risk of contamination. It’s not harmful itself but signals the presence of harmful bacteria.
You need a second test within 24 hours to check for fecal coliform or E. coli. If these are found, your well needs to be fixed to prevent health risks.
What does it mean if my test results show E. coli or fecal coliform?
Finding E. coli or fecal coliform means your water is unsafe. These bacteria can cause serious health issues.
Stop using your well water immediately. You’ll need to shock chlorinate again and wait 48 hours before retesting. Use bottled or boiled water until it’s safe.
Can I use tap water for bathing and handwashing while waiting for test results?
It’s best to avoid tap water until you’re sure it’s safe. Young children, immunocompromised individuals, and those with open wounds should not use tap water.
For most households, bottled or boiled water is the safest choice. If you must use tap water, minimize children’s contact and avoid mouth rinsing.
How do I properly boil water if bottled water isn’t available?
Boiling water is a good alternative. First, filter the water to remove sediment. Then, boil it for at least one minute.
At high elevations, boil for three minutes. Let the water cool completely before using. Store it in covered containers and use within 24-48 hours.
What happens if I turn my well pump back on before assessing for damage?
Turning on the pump without checking for damage is risky. It could cause electrical shock or fires. Water-damaged pumps may not work properly.
Using an untested system spreads contamination. Always assess, repair, and disinfect before using your well again. If unsure about electrical safety, hire a licensed electrician.
How do I collect a proper water sample for home testing kit or laboratory analysis?
Collecting a proper sample is key for accurate results. Use a cold water tap and run water for five minutes to flush the line.
For home kits, use a pencil-width stream to avoid splashing. Never touch the inside of the vial or cap. Fill to the line and cap immediately. For lab samples, use only the provided bottles.
What is a “sanitary well cap” and does my well need one?
A sanitary well cap seals your well against contaminants. It’s essential in flood-prone areas. Upgrading to a sanitary cap is a cost-effective way to protect your well.
Installation requires a registered well driller. It involves removing the old cap and installing a new one. This upgrade significantly reduces contamination risk.
What is “re-grading” around my wellhead and why is it important?
Re-grading directs water away from your well. It involves shaping the soil to create a slope. This prevents water from entering your well.
Poor grading can lead to water intrusion and contamination. Re-grading is a cost-effective way to protect your well. Regular maintenance helps keep your well safe from future contamination.
How often should I test my well water after a flood event?
Test your well water immediately after a flood. But, don’t stop there. Experts recommend repeat testing within two to four weeks and seasonally for several months.
This follow-up testing catches any contamination that might develop. If any test shows bacterial contamination, repeat shock chlorination and testing. Testing after repairs is also important.
When should I contact my local health department about my well water?
Contact your local health department in several situations. They can help with testing, answer questions, and provide guidance. They’re a valuable resource for well owners, even after flooding.
They can offer free or reduced-cost testing. This makes them a great partner in ensuring your water safety.
When should I hire a licensed well driller or pump professional?
Hire a professional for several reasons. They’re needed for assessment findings, electrical system damage, and pumping system issues. They can also help with upgrades and maintenance.
Professionals have the right equipment and knowledge. They ensure your well work meets building codes. Get quotes and check licenses through your state’s water well drilling board.
What if my well keeps flooding repeatedly—should I consider a new well location?
If your well floods repeatedly, relocating might be the best option. Repeated contamination is costly and poses health risks. A professional can assess your property for a safer location.
Installing a new well is a significant investment. It provides peace of mind and eliminates contamination risks. Discuss options with your well driller and local health department.
How long does it take to get results from a professional laboratory?
Most labs return results within 24-72 hours. Some can do it in as little as 24 hours. This quick turnaround makes lab testing practical for urgent situations.
Turnaround time depends on the lab and their workload. If you need chemical testing, results may take longer. Always ask about their specific turnaround time. Some labs offer rush processing for an extra fee.
What should I do if my home has a pressure tank—does flooding affect it?
Flooding can affect your pressure tank in several ways. If it’s submerged, the tank internals may be damaged. Power outages prevent the pump from working, making re-pressurization difficult.
If floodwater contaminated your system, the tank must be thoroughly flushed and disinfected. Inspect the tank during assessment. If it’s damaged, a professional should service or replace it before restoring power.
Are there any activities I should absolutely avoid using my well water for during the testing period?
Yes, avoid drinking, cooking, and preparing baby formula with well water. Also, brush your teeth and provide water for pets. These activities involve ingestion, which poses the greatest risk.
Try to avoid bathing or showering if possible. Some risk is involved, but it’s lower than ingestion. Use bottled or boiled water for these activities until your well is safe.