Emergencies can happen anytime. A wildfire might force families to leave quickly. A hurricane could be heading your way. An earthquake might shake your area. When disaster hits, you might not have time to gather supplies.
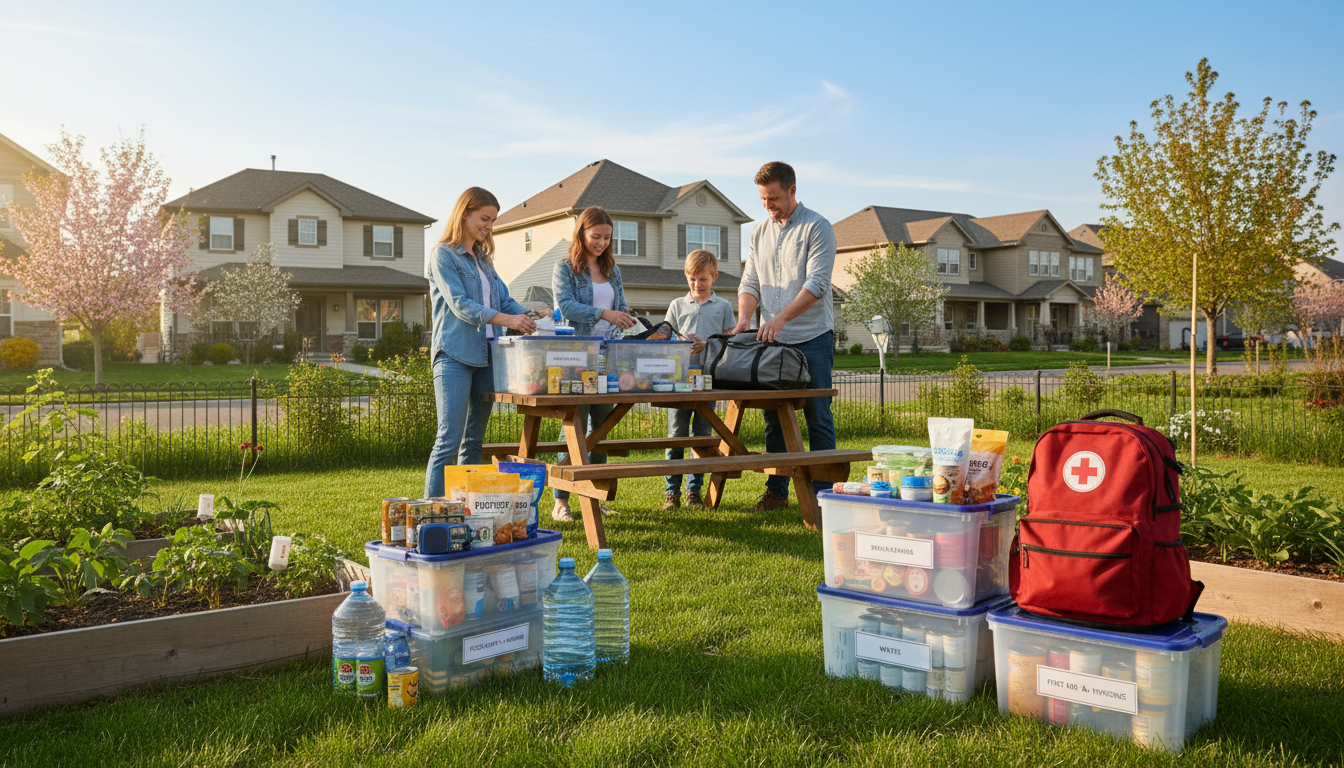
This is why every family member should have their own go bag ready. A go bag is a backpack or small bag filled with essential supplies. It has everything one person needs to survive for 72 hours away from home.
Think of it as your family’s safety net during emergencies. Whether it’s a natural disaster or an unexpected evacuation, these bags offer peace of mind.
Creating an emergency readiness kit for home might seem daunting. But, it’s not. You can build go bags step by step. Start with one family member and then move to the next. Soon, your whole family will be ready.
In this article, you’ll learn how to make a family go bag tailored to each person’s needs. You’ll discover the best supplies to include. You’ll see how to customize bags for children, infants, and people with special health needs.
You’ll also learn where to keep these bags at home. And how to update them when needed. Preparing your family for emergencies shows you care. It turns worry into action. Let’s start building the emergency readiness kit for home that your family deserves.
Table of Contents
Why Every Family Member Needs Their Own Emergency Go Bag
When disaster hits, every second is critical. Having a personal emergency go bag for each family member means quick action. No time is wasted searching for items or deciding who needs what. A bug out bag for families is most effective when tailored to each person’s needs.
Family members often spend time in different places. Kids go to school, parents work, and grandparents might be at home or out. In an emergency, you might not all be together. Having individual bags at home, in cars, at work, and at school ensures everyone has what they need, no matter where they are.
Each person in your household has unique needs. A toddler needs diapers and baby wipes, while a teenager with diabetes requires insulin and medical supplies. Adults and children have different comfort items. Your family’s emergency kit should reflect these differences.
Personal bags also make evacuation easier. Instead of one person carrying everything, each family member has their own supplies. This makes moving faster and easier.
Kids feel more secure with their own bag. Giving them a sense of control helps reduce their anxiety. They know they’re prepared and ready to go. According to recommended family disaster supplies guidance, involving family members in preparing their bags helps everyone stay calm during real emergencies.
- Individual bags mean faster evacuation times
- Each person gets supplies suited to their needs
- Multiple bags in multiple locations = better coverage
- Shared responsibility builds family confidence
- Personal items reduce stress during crisis
Spending time now to prepare individual bags for your family will pay off when you need them most. Preparation brings peace of mind.
How to Make a Family Go Bag: Essential Supplies for 72-Hour Emergency Preparedness
Creating a good emergency go bag starts with knowing the 72-hour rule. Agencies say to prepare for three days because it takes that long for help to arrive after a disaster. A 72 hour emergency kit checklist helps your family aim for a doable goal. Most essentials fit in a school backpack or a 5-gallon bucket.
First, pick the right bag for your disaster supplies. A sturdy backpack is great for personal bags. A 5-gallon bucket is good for a family’s main supply. Choose something easy to carry because a go bag is useless if it’s too heavy.
Think about your family’s needs before you start. Kids and people with medical conditions need special supplies.
Water and Food Requirements for Your Family Emergency Kit
Water is most important. You need at least one gallon per person per day for three days. That means a family of four needs 12 gallons. Use water bottles, hydration bladders, or jugs that fit your bag.
For food, plan for 2,000 calories per person per day. Choose high-calorie, nutrient-rich, and lightweight foods. Good options include:
- Energy bars (250 calories each)
- Dried fruit (170 calories per serving)
- Mixed nuts (180 calories per serving)
- Granola or cereal bars
- Dehydrated meals
- Canned goods with pull-top lids
- Peanut butter packets
Pack a portable cooking tool like a lightweight camp stove or multi-tool with a spork. Try dehydrated foods before an emergency to make sure your family likes them. Buy affordable supplies at discount stores, warehouse clubs, or online.
| Food Item | Calories Per Serving | Weight Per Item | Best For |
|---|---|---|---|
| Energy Bar | 250 | 1.5 oz | Quick energy, easy to carry |
| Dried Fruit Mix | 170 | 1 oz | Natural sugars, vitamins |
| Mixed Nuts | 180 | 1 oz | Protein and healthy fats |
| Granola Cereal Bar | 220 | 1.2 oz | Lightweight, shelf-stable |
| Dehydrated Meal Pouch | 400 | 2 oz | Complete meals, minimal prep |
| Peanut Butter Packet | 190 | 1.5 oz | Protein, satisfying |
Medical Supplies and Prescription Medications to Include
A basic first aid kit is key. Include bandages, antiseptic wipes, and pain relievers. Have a three to seven-day supply of prescription medications and copies of prescriptions. Store these in waterproof containers. Add personal medications like inhalers, EpiPens, or insulin if needed.
Consider adding more items to your 72 hour emergency kit checklist:
- Three pairs of medical gloves
- Tourniquet or hemostatic agent
- N95 masks or cloth masks
- Hand sanitizer
- Antibiotic ointment
- Elastic bandages for sprains
- Tweezers for splinters
- Thermometer
Keep important medical information with your emergency go bag essentials. Write down allergies, blood type, and current medications. Don’t forget spare eyeglasses. Store medications in their original bottles to avoid confusion.
Lighting, Communication, and Support Tools
When disaster hits, power goes out. A flashlight with extra batteries or a crank flashlight is essential. Add a headlamp for hands-free lighting. Use a red light mode to preserve night vision. Test all lighting before an emergency.
Communication is key. Pack an AM/FM emergency radio with batteries or a hand-crank version. Include a cell phone with a solar charger. Add a two-way radio if cell service is poor. These tools help you stay informed and contact loved ones.
Support tools complete your disaster preparedness supplies. Include:
- Whistle for signaling help
- Work gloves for safety
- Sturdy shoes or boots
- Change of clothes for your climate
- Wet wipes and tissues
- 30-gallon plastic bag for trash
- Three 10-gallon bags for organization
- Emergency blanket
- Three 12-hour body warmers
- Lightweight poncho for rain
Don’t forget important documents. Pack copies of identification, driver’s license, passport, insurance cards, and vital records. Include emergency cash and credit and debit cards. Write down emergency contact numbers, including an out-of-state contact. When you build a reliable bug out bag, organize these tools and supplies for quick access.
Keep everything light and compact. Test your go bag by wearing it around your house. It should be comfortable for at least 15 minutes. A heavy go bag is a liability. Review your emergency go bag essentials every six months to replace expired items and update medications.
Building Age-Appropriate Go Bags for Children and Infants
Creating a go bag for your little ones needs careful thought. Babies can’t tell you what they need in an emergency. So, parents must think of everything. This way, you can protect your most vulnerable family members and feel at ease.
For infants, your emergency bag should have special items. These are different from what adults need. Babies rely on specific items that you can’t just substitute in a crisis.
Essential Items for Infant Go Bags
Newborns and infants need special care. Make sure their emergency bags have these important items:
- Diapers and baby wipes (at least a 3-day supply, preferably more)
- Age-appropriate infant formula or baby food
- Bottled water for formula preparation
- Bottles, feeding supplies, and burp cloths
- Changes of clothing in current size plus one size up
- Receiving blankets and sleepwear
- Any specialized feeding equipment (if needed)
- Manual breast pump and nursing supplies (for breastfeeding mothers)
For formula-fed babies, ready-to-feed formula bottles are best. They don’t need water to prepare. Breastfeeding moms should pack a manual breast pump and extra breast pads for comfort.

Comfort and Emotional Items for Toddlers and Young Children
Toddlers and young children get scared in emergencies. Comfort items help a lot. Include:
- A favorite stuffed animal or blanket (“lovey”)
- Sensory toys or fidget items
- Age-appropriate snacks they actually enjoy
- Coloring books and crayons
- Small games or card games
- A change of clothes they feel comfortable wearing
A favorite teddy bear can offer big comfort in scary situations. Letting older kids pack their own bags helps them feel ready. It also means they choose items that are important to them.
Critical Documentation for Family Reunification
Documentation is key if your family gets separated. Your emergency kit should have:
| Documentation Type | Purpose | Where to Store |
|---|---|---|
| Recent family photos (individual and group) | Identification and reunification if separated | Go bag and digital backup |
| Medical consent forms | Authorizes medical treatment if parents unavailable | Go bag with copies at home |
| Immunization records | Required for shelter or medical facilities | Go bag and digital copy |
| Emergency contact information | Helps reunite families during chaos | Go bag and memorized by children |
Keep recent photos of each child and a family photo together. These are very important for emergency responders to help reunite your family. Store copies in your go bag and keep digital backups in cloud storage for safety.
Preparing go bags for your little ones shows you care about their safety. This preparation helps families feel ready for emergencies. It keeps the youngest members safe and as comfortable as possible during tough times.
Special Considerations for Family Members with Unique Health Needs
Creating an emergency evacuation bag list gets tricky when your family has members with chronic health issues or disabilities. About one in four American families face this challenge. With careful planning, you can make a list that meets their special needs. It’s important to work with healthcare providers and local emergency offices to ensure everything is included.
Your list needs more than just basic items. Families with special needs should gather all medical info in one place. This helps avoid panic during evacuations. Find shelters in your area that can meet your family’s needs. Not all shelters are wheelchair accessible or have the right medical equipment.
Many communities have special needs registries. Registering your family helps first responders know what you need during evacuations. If your family needs special transport, contact your providers to learn about backup options. Plan to leave earlier than usual to account for any extra time needed.
Medical Equipment and Specialized Supplies
Your list must include all daily medical equipment your family depends on. This includes mobility aids and life-saving devices. Make sure to have backup supplies for each item.
Here are some key items for your list:
- Prescription medications in original containers with clear labels showing dosages
- Medical equipment such as ventilators, CPAP machines, or nebulizers with power supplies
- Glasses, contact lenses, hearing aids, and dentures with backup batteries
- Feeding supplies including special formulas, thickeners, and adaptive feeding equipment
- Incontinence products including diapers, ostomy supplies, and underpads
- Mobility aids such as canes, walkers, wheelchairs, and transfer equipment
- Communication devices or picture cards for individuals with speech difficulties
- Portable oxygen tanks or respiratory supplies
- Blood pressure monitors, glucose meters, and testing supplies
- Pain management equipment or devices
Power supply planning is key. Medical equipment often needs electricity. Include portable batteries, generators, or power inverters in your list. Test these backup power sources monthly to ensure they work when needed.
| Equipment Type | Essential Backup Supply | Quantity Needed | Replacement Schedule |
|---|---|---|---|
| Prescription Medications | 30-day supply in waterproof container | Full supply for each family member | Monthly before expiration |
| Hearing Aids | Extra batteries or charging cable | 72-hour supply | Monthly |
| CPAP Machine | Portable battery pack and backup mask | One backup device | Annually or as needed |
| Insulin or Diabetes Supplies | Glucose meters, lancets, test strips | Sufficient for 14 days | Every three months |
| Mobility Devices | Replacement batteries and repair kit | Complete backup supplies | Quarterly testing |
| Feeding Equipment | Special formula and backup supplies | 30-day emergency supply | Monthly rotation |
| Oxygen Equipment | Portable oxygen tanks | 72-hour supply minimum | Monthly verification |
| Communication Devices | Backup batteries and chargers | Extra power sources | Monthly testing |
Store medical supplies in waterproof, durable containers. Label everything clearly. Keep backup supplies separate from main equipment to have options if needed.
Creating Emergency Medical Information Forms
Documentation is vital during emergencies. Include detailed medical information forms for each family member with special needs. These forms help emergency responders understand your family’s needs quickly.
Here’s what to include in your forms:
- Complete names and dates of birth for all family members
- All medical conditions and diagnoses
- Current medications with dosages and administration instructions
- Allergies to medications, foods, or other substances
- Names and contact information for primary healthcare providers
- Insurance information and policy numbers
- Specialized equipment needs and operation instructions
- Preferred hospital or medical facility names
- Emergency contact person for medical decisions
- Communication methods preferred by the individual
- Behavioral or emotional triggers requiring specific responses
- Dietary restrictions or feeding requirements
Make multiple copies of these forms. Place them in your emergency bag, at home, at work, and with emergency contacts. Use clear plastic sleeves to protect them from water damage. Update these forms every six months or whenever medical information changes.
Consider making a laminated card with key medical info. This card is very useful if your family gets separated. Include the person’s name, main medical conditions, key medications, emergency contacts, and any special communication needs.
Your emergency evacuation bag list shows your family’s preparedness. By customizing plans for special health needs, you protect everyone in crisis situations. Work with your healthcare team, local emergency services, and shelter providers to create detailed, personalized evacuation plans.
Where to Store Your Family’s Emergency Evacuation Bags
Knowing where to find your emergency bags is key. The storage spot is as critical as what’s inside. Place your family’s bags near the main exit, like a closet or garage. This makes it easy for everyone to grab them quickly.
Consider distributed storage in different spots. Storing bags in one place can be risky if you’re not home. Keep extras in your car, at work, or your child’s school if allowed. This way, you can access what you need, wherever you are.
Choose a storage spot based on your home. Apartments can use under-bed containers or a closet shelf. Homes might have garage shelves or basement areas. Keep your supplies away from extreme temperatures and moisture. Avoid places like hot attics or damp basements. Designate and prepare specific areas for emergencies to keep your supplies safe.
Make your storage system easy to follow. Use labeled containers and an inventory list. Keep a copy of the list in each bag and take a photo for your phone.
- Label all containers clearly with family member names
- Store bags at eye level for easy visibility
- Keep emergency supplies away from extreme heat and cold
- Place bags near primary home exits
- Take photos of bag contents for your phone
Teach all family members, including kids, where to find the bags. Practice drills to make sure everyone knows what to do. Make sure bags are accessible for everyone, including those with mobility issues.
Items like medications and food need special care, like in a car. Rotate these items with the seasons or keep them inside until you need to leave. Update your plans when your family or situation changes.
Maintaining and Updating Your Family’s Disaster Preparedness Kits
Your family emergency kit is a key safety investment. It takes time and effort to pack emergency go bags. But the real challenge is keeping them ready over time.
Many families forget about their emergency kits, leading to expired food and corroded batteries. To keep your kits ready, create a simple maintenance schedule. This schedule should be easy to follow.
Success comes from regular reviews and sticking to them. Set reminders every six months. Tie these reminders to daylight saving time or other memorable dates. This keeps your emergency kit ready when you need it.
Involve your whole family in maintenance sessions. Children learn about preparedness and responsibility. Teach them about their go bags and why each item is important.
When to Replace Perishable Items
Perishable items need the most attention. Water, food, medications, and batteries all have expiration dates. Create a replacement schedule based on shelf life.
Replace expiring items with fresh ones. This keeps your emergency kit current and reduces waste. It also helps your family get used to using emergency supplies.
| Item Type | Replacement Timeline | Storage Tips | Shelf Life |
|---|---|---|---|
| Bottled Water | Every 6-12 months | Store in cool, dark location away from chemicals | 6-12 months |
| Emergency Food Rations | Every 2-3 years | Keep in waterproof container with oxygen absorbers | 5-25 years |
| Prescription Medications | Before expiration date | Store in original bottles with clear labels | Varies by medication |
| Batteries (AA, AAA, 9V) | Every 12-18 months | Keep in cool, dry place to prevent corrosion | 5-10 years (unused) |
| First Aid Supplies | As items expire | Check packaging dates during reviews | Varies by item |
| Clothing and Shoes | Every 6-12 months | Check fit as children grow | No expiration |
Reviewing Your Emergency Kit Contents Regularly
Review every item in your go bags at least every six months. Check expiration dates on food, water, and medications. Replace anything that shows wear.
Children grow quickly. Clothing and shoes packed six months ago might be too small now. Update comfort items as preferences change.
Keep a master checklist of all go bag contents with expiration dates. Use clear labels on items noting when they were packed. Consider purchasing specialized emergency supplies with extended shelf lives to reduce replacement frequency.
Update documentation regularly. Contact information changes as people move or switch jobs. New medications get prescribed. Medical conditions evolve. Insurance policies change. All of these require updating the paperwork in your emergency kit. Keep a current list of family member photos and identifying information.
- Check all expiration dates on food, water, and medications
- Test flashlights and replace dead batteries
- Verify all contact information is current
- Try on clothing to ensure proper fit
- Review medical supply quantities
- Rotate expiring items into household use
- Update prescription medication lists
- Replace any damaged or missing items
Maintaining your family’s emergency kit requires minimal effort twice yearly. This small investment in time ensures your disaster preparedness kits stay ready. The peace of mind knowing your family has current, functional supplies is absolutely worth it.
Conclusion
Creating go bags for every family member might seem daunting at first. But, breaking it down into simple steps makes it achievable. You now know how to pick essential items, tailor bags for each person, and find the best storage spots. This summary gives you all the tips you need to make emergency plans your family can rely on.
Disasters and emergencies can happen without warning. But, you can prepare your family. Personalized go bags mean you can focus on safety when emergencies occur. Each bag is designed for the individual, with items like water, food, medical supplies, and comfort items.
Store these bags in easy-to-reach places at home, in vehicles, and at work or school. This way, you can quickly grab them when needed.
If you haven’t started yet, don’t worry. Begin with one bag and add to it over time. Build bags for other family members gradually. Even a partially filled bag is better than nothing.
Set aside an hour this weekend to start gathering supplies. You don’t need to finish everything at once. Remember, maintenance is key. Review your supplies every six months, replace perishable items, and update as your family changes.
Emergency preparedness is more than just go bags. It includes family communication plans, evacuation routes, practice drills, and knowing local risks. The time you spend preparing go bags is an investment in your family’s safety and peace of mind. When an emergency happens, you’ll be ready. Start today and give your family the gift of preparedness.
FAQ
What exactly is a go bag, and why do I need one for my family?
A go bag, also known as a bug out bag, is a collection of essential supplies. It’s designed to keep your family safe for at least 72 hours during emergencies. Disasters like wildfires and hurricanes can happen without warning.
Having a go bag means you can leave quickly when evacuation orders come. This is important because disasters can strike fast. Families who prepared in advance evacuated safely, while others faced delays.
A well-stocked go bag gives you peace of mind. It ensures your loved ones have what they need to survive and stay comfortable during the first 72 hours after a disaster.
Should I make one family go bag or individual bags for each person?
Individual go bags are more effective than one shared family kit. They ensure everyone has access to supplies, even if family members are in different places. This is because kids might be at school and parents at work when disaster strikes.
Individual bags also make it easier to carry emergency supplies. They distribute the weight among family members. This way, no one has to carry everything alone.
Each person’s specific needs are met with individual bags. This includes different requirements for adults, teenagers, and children. Children also feel more in control with their own bag.
While making multiple bags takes more effort, the safety benefits are worth it. It’s a key part of family emergency preparedness.
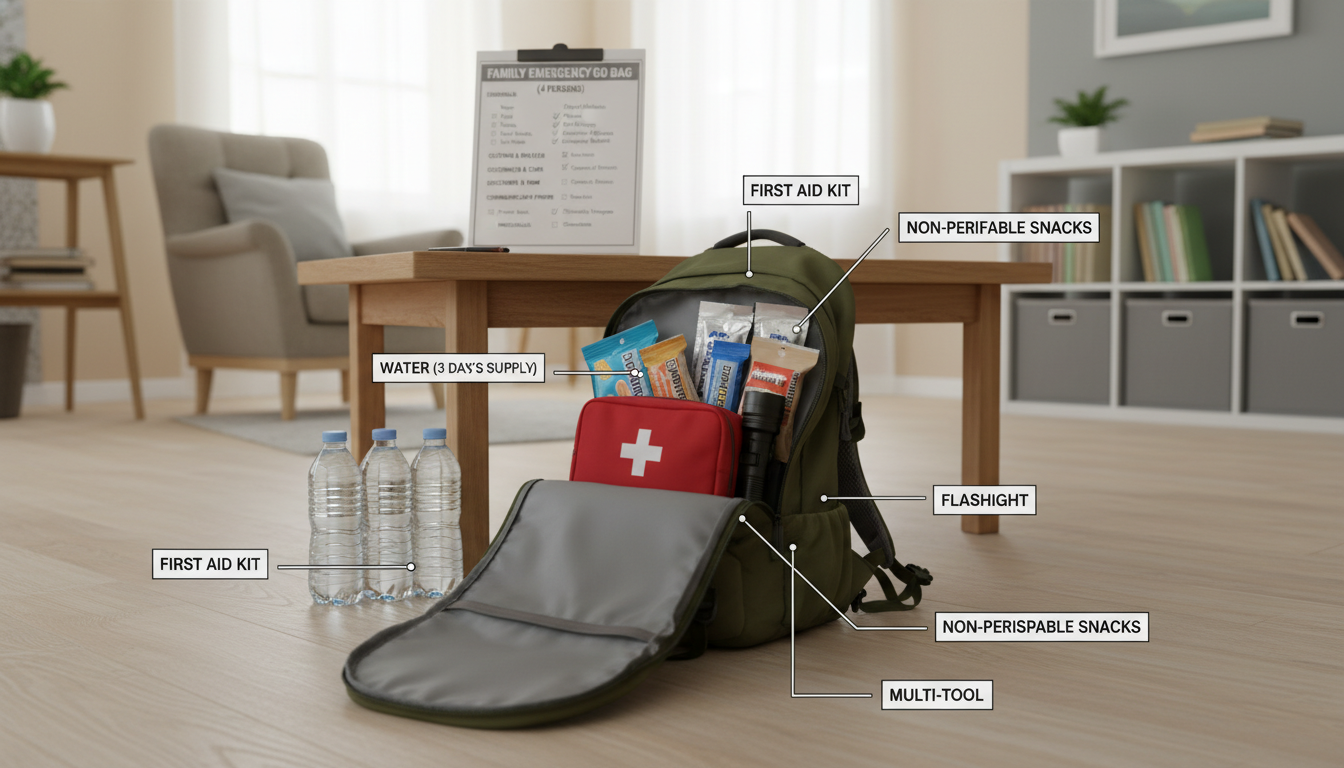
What should I pack in a basic 72-hour emergency go bag?
A complete emergency go bag checklist includes supplies organized into key categories. You’ll need water and food, like granola bars and dried fruit, for at least three days.
Medical supplies are also essential. This includes a first aid kit, prescription medications, and over-the-counter medications. Don’t forget personal hygiene items like toothbrushes and toothpaste.
Tools and communication items are important too. This includes a flashlight, multi-tool, and phone chargers. You’ll also need documentation like copies of IDs and insurance cards.
Clothing and comfort items are important as well. Pack a change of clothes, sturdy shoes, and a blanket. A standard school backpack can hold all essential supplies for one adult.
How much water should I store in my family’s disaster preparedness supplies?
Emergency management agencies recommend storing at least one gallon of water per person per day. This means each family member needs a three-gallon minimum for a basic 72-hour emergency kit.
For a family of four, that’s 12 gallons total. But remember, water is needed for drinking, washing, cooking, and hygiene. Aim for 1.5 gallons per person per day if possible.
Store water in food-grade containers from trusted brands like Aqua Safe or Ozarka. Rotate it every six months or invest in bottled water with long shelf lives. For portable go bags, pre-bottled water in smaller bottles is more practical.
What non-perishable foods work best for an emergency evacuation bag?
The best emergency kit food items are lightweight, compact, and require minimal or no preparation. Focus on nutrient-dense options like granola bars and dried fruit.
Include foods your family actually enjoys. If your kids hate granola bars, they won’t eat them during stress. Test items before an emergency to ensure they’re palatable.
Pack roughly 2,000 calories per person per day to maintain energy. For infants and toddlers, include age-appropriate options like formula and baby food pouches. Rotate food supplies every six months.
What medical supplies and medications must be included in an emergency go bag?
Your emergency kit medical supplies should include a first aid kit and prescription medications. Include common over-the-counter medications like pain relievers and antacids.
Include medical tools like scissors and tweezers. Add first aid supplies like bandages and antibiotic ointment. Don’t forget personal care items like toothbrushes and deodorant.
Keep medications in a waterproof container separate from water and food. Include a list of all family members’ medical conditions and medications. Check expiration dates every six months and replace expired items immediately.
What lighting and communication tools should be in my family’s emergency go bag?
Lighting, communication, and support tools are critical for emergency preparedness. Include a reliable flashlight and a hand-crank flashlight as backup.
For communication, pack a battery-powered or hand-crank radio. Include a whistle for signaling rescuers. Charge portable battery packs for phones and consider a solar charger as backup.
Keep important contact phone numbers written on paper. Include a basic multi-tool or knife for cutting materials. Add duct tape, paracord or rope, and waterproof matches or a lighter in a waterproof container.
Test all battery-powered items before emergencies and replace batteries every six months.
How do I prepare a go bag for an infant or toddler?
Creating an age-appropriate go bag for infants requires specialized supplies. Include diapers, baby wipes, and age-appropriate formula or baby food.
For toddlers and young children, include appropriately sized clothing and comfortable shoes. Include comfort items like a favorite stuffed animal or blanket.
Include non-perishable snacks they’ll actually eat and activities to occupy them during stressful waiting. Include diapers or pull-ups as needed, pain relievers formulated for infants or children, and any medications for chronic conditions.
Pack medical consent forms allowing other adults to authorize treatment if parents are unavailable. Include copies of immunization records and recent photos for identification and reunification if family members become separated.
What should be in a go bag for children and teenagers?
For older children and teenagers, involve them directly in packing their own family go bag contents. This builds preparedness skills and ensures they include items important to them.
Include age-appropriate clothing and sturdy shoes comfortable for walking. Add age-appropriate entertainment and comfort items like books and handheld gaming devices.
Include personal hygiene items and any prescription medications or medical devices. Pack snacks your child actually enjoys and a water bottle they can refill.
Include a 72-hour emergency kit checklist customized for their needs and a printed copy of important contact numbers in case phones die. For all children, include critical documentation like medical consent forms and copies of immunization records.
How do I prepare emergency supplies for family members with disabilities or chronic health conditions?
Preparing special considerations for family members with unique health needs requires customization. Work closely with healthcare providers and local emergency management offices to develop a personalized plan.
Identify accessible shelters in advance. Research which shelters in your area are ADA-compliant and equipped for medical needs. Keep this information in your go bags.
Families with members who have special needs should consider evacuating earlier. Register with local emergency services if a family member requires special assistance during evacuations.
The more detailed your documentation of medical needs, medications, and equipment requirements, the better emergency responders can help your family.
What medical equipment and supplies do I need for someone with special health needs?
Medical equipment and specialized supplies for someone with chronic conditions or disabilities might include all prescription medications in 30-day minimum supplies with original labels.
Include medical equipment power cords and chargers, extra batteries for medical devices, and backup power supplies like portable generators or solar power systems. Extra batteries for medical devices are essential.
Include catheter supplies, ostomy supplies, glucose monitoring equipment and test strips, insulin and syringes, mobility aids with repair kits, hearing aid batteries, vision aids or magnifying glasses, and medical compression garments.
Include backup supplies of any non-replaceable equipment. Pack a detailed list of all medical equipment, what it does, how to operate it, troubleshooting steps, and manufacturer contact information. Include emergency contact information for their healthcare providers and equipment suppliers.
What emergency medical documentation should I include in go bags?
Creating emergency medical information forms is absolutely critical and often overlooked. Each family member’s go bag should include a detailed medical summary listing all chronic conditions, surgeries, hospitalizations, allergies, and current medications with dosages.
Include insurance information, contact information for primary care physicians, specialists, and preferred hospitals, copies of recent lab results or imaging if relevant to their conditions, advance directives or living wills if applicable, and vaccination records.
For children, include medical consent forms signed by parents, clearly stating who can authorize medical treatment if parents are unavailable. Include copies of prescriptions showing medication names and dosages. For someone with special health needs, create a detailed medical profile document explaining their conditions in plain language.
Keep this documentation in a waterproof folder, duplicated in multiple go bags, and backed up digitally on your phone. Include recent photographs of each family member for reunification if separated. Laminate important cards like insurance cards or medical alert information for durability.
Where should I store my family’s emergency evacuation bags?
The ideal family emergency preparedness kit storage location must be immediately accessible during evacuations. Store go bags near your home’s primary exit in a closet, mudroom, garage, or entryway where every family member knows exactly where to look.
Use clear, labeled containers so supplies are easily identifiable. Not every home has ideal storage space, and that’s okay. Creative solutions exist for different living situations.
Apartment dwellers with limited space might use under-bed storage containers or designate a specific closet shelf for emergency supplies. Homeowners might use garage shelving, basement areas, or dedicated emergency supply closets.
Wherever bags are stored at home, they should be protected from extreme temperatures, moisture, and pests. Avoid attics that get extremely hot, damp basements that could damage supplies, or outdoor sheds where rodents might access food items.
Implement distributed storage by keeping go bags in multiple locations. Each family member’s bag at home for accessibility, additional supplies in vehicles, emergency supplies at workplaces in desk drawers or lockers, and supplies at schools if administrators permit.
This strategy ensures that if family members are in different locations when disaster strikes, everyone has access to essential supplies without needing to return home. Create a master inventory list of go bag contents, keeping one copy inside each bag and another on your phone as a photo or note so you can quickly verify everything is present.
Inform all family members—including children old enough to understand—exactly where go bags are stored and practice grabbing them during family emergency drills. For families with members who have mobility limitations, storage locations must be specially accessible.
Review storage locations periodically as families move, children change schools, or work situations change.