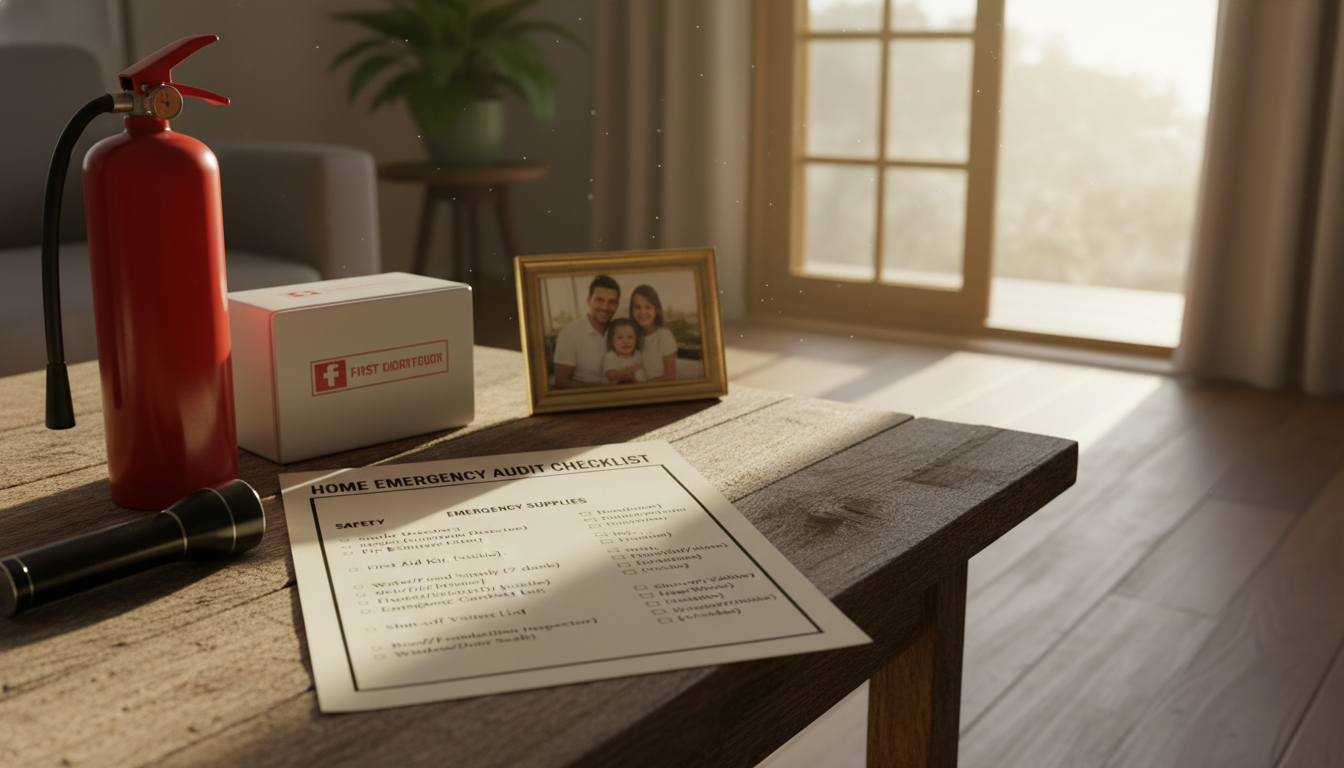
Your home is where your family feels safest. It’s smart to check its safety regularly. A home emergency audit checklist helps find problems early. You can do a full check-up in just one weekend without needing experts.
An emergency preparedness assessment covers three main areas. First, you look for dangers like fires, carbon monoxide leaks, and floods. Second, you check for security issues like weak locks and broken windows. Third, you plan for big disasters that might cut off power and services. Each area is important to keep your family safe.
This weekend home safety review might seem like a lot. But breaking it into smaller tasks makes it easier. You can focus on one section each day. By Sunday evening, you’ll know how safe your home is.
Following this guide has real benefits. You’ll know which repairs are most important. You’ll feel more ready for emergencies. You’ll sleep better knowing your family is safe. Let’s start making your home as safe as possible.
Table of Contents
Preparing for Your Home Emergency Audit Checklist
Preparing for a home emergency audit requires some planning. You’ll need to gather all necessary items before starting. This makes the process smoother and saves time.
Having the right amount of time is as important as having the right supplies. A little preparation ensures your home safety inspection checklist is thorough and complete.
Essential Materials and Tools You’ll Need
Before starting your home safety inspection checklist, gather all your materials in one place. This helps you move quickly from room to room without delays.
- A printed or digital home safety inspection checklist (create your own or find templates online)
- A bright flashlight with fresh batteries for dark spaces like basements and attics
- A notebook or tablet to write down problems and areas needing attention
- A smartphone or camera to take photos of any issues you find
- A sturdy ladder to safely reach high areas and test smoke detectors
- A pen or pencil for quick notes during your walk-through
These tools make your household emergency audit easier and more complete. A camera helps you remember what you saw later. Your notebook keeps a record of what needs fixing.
Setting Aside Time for a Thorough Assessment
Make sure to block out enough time for a thorough audit. Most homes need 3 to 5 hours, depending on size. A weekend is usually best for most families.
Inform your family about your plan and ask them to avoid interruptions. This helps you stay focused on spotting hazards. The more focused you are, the better your results will be. Check out emergency preparedness guides for more tips before starting.
Experts suggest doing audits twice a year—once in daylight and once at night. Different lighting reveals different problems. Spring and fall are good times to schedule your audit. This catches seasonal issues before they become dangerous. Your home changes with the seasons, so your safety assessment tools and checklists should adapt too.
Evaluating Fire Safety and Smoke Detection Systems
Fire safety is key in any disaster plan for your home. Smoke detectors and fire extinguishers save lives. They catch fires early, giving your family time to escape.
Testing smoke alarms is the first step in your fire safety check. Press the test button and listen for a loud sound. Smoke detectors need to be replaced every ten years.
Change batteries in smoke detectors yearly. Many families do this when clocks change for daylight saving time. Make sure every bedroom and hallway has a detector. Also, add alarms in the basement, kitchen, and near fireplaces.
Fire extinguisher placement is as important as smoke alarms. Place them in areas where fires often start.
| Location | Type of Extinguisher | Purpose |
|---|---|---|
| Kitchen | Class K or ABC | Cooking oil and grease fires |
| Garage | ABC Type | Vehicle and tool fires |
| Near Fireplace | ABC Type | Wood burning hazards |
| Each Floor | ABC Type | General household fires |
Check fire extinguisher pressure monthly. The needle should be in the green zone. Replace expired units and keep them accessible.
Teach everyone how to use fire extinguishers. Most use the PASS method: Pull, Aim, Squeeze, Sweep. Practice together to build confidence.
Inspect your fireplace and chimney yearly. Clean them to remove creosote buildup. Install a fire screen and keep furniture away from the fireplace.
Make a fire escape plan with two exits from each room. Choose a meeting spot outside. Practice the plan twice a year. Mark windows and ensure they open easily.
Your smoke alarm and fire extinguisher checks are the base of fire safety. These steps are quick but greatly improve your family’s safety.
Assessing Electrical Safety and Carbon Monoxide Risks
Electrical hazards and carbon monoxide exposure are very dangerous in any home. During your emergency response home assessment, you must check these areas carefully. A detailed electrical hazard inspection and carbon monoxide detector testing can spot risks early. This part of your weekend audit needs focus and a readiness to call experts when needed.
Inspecting Outlets and Electrical Cords
Begin your electrical safety checklist by checking every outlet in your home. Look for outlets that feel warm or have discolored covers. These signs mean overheating and need quick professional help. Also, check each outlet by gently trying to wiggle it. Loose outlets can cause dangerous electrical connections.
Walk through your home and look at all visible electrical cords. Frayed wires, cracks in insulation, or damaged plugs are fire hazards. Never ignore these signs. Power strips and extension cords should not have too many devices plugged in at once, as this overloads circuits.
Check major appliances like refrigerators, washing machines, and dryers for exposed wires or damage. Your electrical safety checklist should also include checking your circuit breaker panel. Make sure it stays accessible and all switches are clearly labeled.
- Look for scorch marks or burn spots around outlets
- Feel for unusual heat near electrical panels
- Never use damaged cords with wet hands
- Avoid plugging space heaters into power strips
- Keep cords away from high-traffic areas
Testing Carbon Monoxide Detectors Throughout Your Home
Carbon monoxide is called the “silent killer” because you can’t see, smell, or taste it. It can cause serious illness or death. Testing carbon monoxide detectors regularly during your emergency response home assessment is essential.
Install CO detectors on every level of your home. Place them near sleeping areas and bedrooms where family members spend hours. At least one detector should be near your furnace and water heater.
| Detector Location | Priority Level | Testing Frequency |
|---|---|---|
| Bedroom areas | Critical | Monthly |
| Living areas | High | Monthly |
| Basement/utility room | High | Monthly |
| Near furnace | Critical | Monthly |
| Kitchen area | Medium | Monthly |
Test each detector by pressing and holding the test button for several seconds. You should hear a loud alarm sound. Replace batteries annually or whenever you change smoke detector batteries. Most carbon monoxide detectors need replacement every 5 to 7 years. Check the manufacturer date on your units during carbon monoxide detector testing sessions.
- Locate test button on detector face
- Press and hold for 3 to 5 seconds
- Listen for alarm to sound
- Release button when alarm activates
- Document the test date
- Replace batteries if needed
Your electrical safety checklist and carbon monoxide detector testing are key to household safety. Complete this section carefully, and your home will be better protected against two of the most serious residential hazards.
Home Emergency Audit Checklist for Entry Points and Access Security
Your home’s entry points are the first defense against intruders. A detailed home security check looks at doors, windows, and other weak spots. This helps protect your family and belongings.
Almost 1 million burglaries happen in the U.S. each year, mostly through unsecured doors and windows. A thorough security check can find and fix these weak spots. This quick audit can give you lasting peace of mind.

Examining Door Locks and Deadbolts
Exterior door deadbolts are your home’s main defense against burglars. Start by testing every exterior door lock. Make sure they work smoothly from both inside and outside.
Check if all exterior doors use the same key. This makes emergencies easier to handle. Upgrade any weak or old locks you find.
Look for BHMA grading on your deadbolt packaging. AAA ratings mean the best security and quality. If you can’t find this, consider getting new locks.
Make a list of who has spare keys and where they are. If old service providers or tenants had keys, change your locks. Smart lock owners should check user access codes and update them.
- Test deadbolt operation from both sides
- Verify strike plates are firmly installed
- Check door frame integrity for damage
- Inspect hinges for security and alignment
- Document all key holders
- Review smart lock user access codes
Securing Windows and Vulnerable Access Areas
Windows are tempting targets for intruders. Test every window lock and latch during your security check. Look for any damage or weak spots.
Check your doors and windows carefully. Solid core wood or metal doors are more secure. Make sure sliding glass doors have security bars or dowels.
Don’t overlook less obvious entry points. Check basement windows, garage doors, attic vents, and pet doors. These areas often get ignored but can be entry points for burglars. Ensure all emergency exits are clear and secure.
| Access Point | Security Check | Action If Failed |
|---|---|---|
| Front Door Lock | Test smooth operation both sides | Rekey or replace with BHMA AAA rated lock |
| Strike Plate | Verify all screws fastened securely | Tighten or replace with longer screws |
| Door Frame | Check for cracks or separation | Repair or reinforce with metal braces |
| Window Locks | Test all latches function properly | Install new window locks or repair mechanisms |
| Glass Condition | Inspect for cracks or weakness | Apply security film or replace glass |
| Sliding Glass Doors | Verify dowel or security bar present | Install wooden dowel or security bar immediately |
| Basement Windows | Check locks and security bars | Add bars or secure locking mechanisms |
| Garage Door | Test lock function and frame stability | Repair or upgrade garage door locking system |
A comprehensive entry point vulnerability check is essential for your family’s safety. For more detailed guidance, check out professional home security resources. They cover all you need for emergency planning.
After your security audit, focus on emergency preparedness. Your findings will help you decide on alarm systems, cameras, and lighting. We’ll discuss these in the next sections.
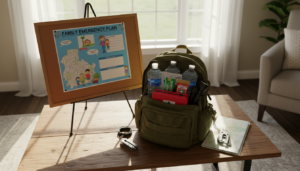
Creating Emergency Preparedness Plans and Supply Caches
Your home emergency audit shows areas that need protection. A good home crisis preparedness checklist helps you plan for emergencies. These could be severe weather, power outages, floods, or other disasters.
Think about what your family needs to survive for 3 to 7 days without help. This is the start of your emergency supply storage plan. Make sure everyone has clean water, food, basic tools, and medical supplies. Use a family emergency audit tool to find any missing items.
- One gallon of water per person per day for drinking and hygiene
- Non-perishable food with a 3-day minimum supply
- Manual can opener and basic utensils
- Battery-powered or hand-crank radio
- Flashlights with extra batteries
- First-aid kit with essential medications
- Important documents in waterproof containers
- Cash in small bills for emergencies
Store these supplies in easy-to-reach spots in your home. Replace water and perishable items every year. Keep a checklist with expiration dates and check it yearly.
Having an evacuation plan is key when you need to leave quickly. Your plan should have two meeting spots—one near your home and another outside your neighborhood. Choose an out-of-state contact person for family members to call. The emergency planning guide can help you make a detailed plan.
Give each family member tasks based on their age. Young kids can help pack emergency kits. Older kids can learn to shut off utilities or help with first aid. Practice your plan twice a year by walking through your home and discussing emergency scenarios.
| Emergency Type | Meeting Location | Contact Method | Family Responsibilities |
|---|---|---|---|
| House Fire | Front lawn or designated spot outside | Meet outside, then call 911 | Everyone exits quickly, adult checks attendance |
| Severe Weather | Safe room inside home | Text family group chat if safe | Gather emergency supplies, check on neighbors |
| Community Evacuation | Predetermined location outside neighborhood | Call out-of-state contact with status | Grab emergency backpacks, lock home, help elderly neighbors |
| Utility Failure | Kitchen or main gathering area | Family meeting to discuss plan | Designated person operates radio, ration supplies |
Make emergency planning fun for your family. Kids feel better when they know the plan. Practice different scenarios to help everyone remember their roles. Hold annual family meetings to update the plan and adjust it as needed.
Your home crisis preparedness checklist is like a safety net for your family. Regular practice and updates ensure everyone knows what to do in emergencies. With a solid plan and the security measures from your home safety audit, your family will feel safe and prepared.
Outdoor Safety Inspection and Environmental Hazards
Your home disaster preparedness review should go beyond your front door. The areas around your home are key to keeping your family safe. A detailed check of your property’s perimeter can reveal dangers that could harm you or damage your home. This part of your review covers your yard, lighting, and water systems.
Checking Yard Hazards and Outdoor Lighting
Start by walking your yard slowly. Look for things that could cause falls, like uneven pavement and garden hoses across paths. Pay extra attention to where kids and pets play.
Check your fences and gates for damage. Make sure they are secure to keep intruders out and pets and kids in.
Good outdoor lighting is important for safety and security. Check all your lights outside. Replace any that are out and clean dirty ones. Make sure motion sensor lights work well.
- Check lights near all entry points and walkways
- Inspect motion sensor sensitivity and range
- Replace bulbs with energy-efficient LED options
- Consider solar-powered pathway lights for additional coverage
- Install timers or smart lights that activate at dusk
Trim tree branches and shrubs to remove hiding spots for intruders. Keep bushes away from doors and gates to avoid blind spots.
Evaluating Flooding Risks and Drainage Systems
Water damage can be very costly. Check how water moves around and away from your home.
Make sure your gutters and downspouts direct water away from your foundation. Clean them twice a year. Downspouts should be 4 to 6 feet from your home’s base.
Test your sump pump if you have one. Clean around it to ensure it works when needed. Install water sensors in your basement and other wet areas. These sensors warn of flooding early.
| Drainage Component | What to Check | Action Items |
|---|---|---|
| Gutters | Debris, sagging, proper slope | Clean twice yearly, repair damage |
| Downspouts | Proper extension and direction | Extend 4-6 feet from foundation |
| Sump Pump | Operational status and debris | Test monthly, remove obstacles |
| Water Sensors | Battery life and placement | Test monthly in basement areas |
| Low Spots | Pooling water after rain | Grade soil to improve drainage |
Walk your property after rain to find where water pools. These spots show poor drainage that could flood your home. You can fix this by grading the soil or installing French drains.
Documenting Your Findings and Prioritizing Repairs
After your emergency preparedness assessment, the real work starts. You must record everything you found during your home inspection. Detailed notes and photos create a clear record of problems. This record helps you create a home safety action plan for your family.
Start by writing down specific issues as you find them. Note the location, describe what you saw, and explain why it matters. Photos from different angles help you remember details later. Voice memos on your phone are great too. Record your thoughts while walking through each room so you don’t forget anything important.
Once you have all your information, create a master list organized by room or safety system. This makes it easier to see everything at a glance and plan your next steps.
Creating Your Safety Repair Prioritization System
Not all repairs are urgent. Safety repair prioritization helps you tackle the most dangerous problems first. Divide your list into three groups based on how quickly each item needs attention.
| Priority Level | Examples | Timeline |
|---|---|---|
| Immediate Action | Non-functioning smoke detectors, exposed wiring, broken locks, missing carbon monoxide alarms | Within days |
| Important Repairs | Weak window locks, damaged deadbolts, missing fire extinguishers, inadequate emergency supplies | Within weeks |
| Recommended Improvements | Upgraded locks, additional outdoor lighting, enhanced emergency kits, reinforced entry doors | Within months |
Start with immediate items because they pose real danger to your family. Don’t delay on these critical fixes. A non-working smoke detector or faulty electrical outlet can’t wait. Address important repairs next, spreading them across several weeks so you don’t feel overwhelmed. Save recommended improvements for last. These upgrades boost your security and safety but aren’t urgent emergencies.
Building Your Action Plan and Schedule
A solid home safety action plan turns your prioritized list into real progress. Write down which repairs you can handle yourself and which need professional help. Research costs for each item. Break large projects into smaller tasks. For example, instead of “improve home security,” list “replace front door lock” and “install motion-sensor lights.”
- Estimate costs for each repair and improvement
- Decide what you can DIY versus what needs a professional
- Schedule specific dates for starting each task
- Set budget limits you can afford
- Assign tasks to family members when appropriate
Mark your calendar for follow-up audits every six months. Regular check-ins catch new problems before they get worse. Keep all your documentation organized in a folder, either digital or paper. This record helps with insurance claims and shows buyers your home has been well-maintained.
Share your home safety action plan with everyone living in your house. Kids, teens, and grandparents should know the emergency procedures. Everyone needs to understand how to lock doors and windows properly. Make sure household members know who should have access to your home and what to do during different emergencies. Safety works best when everyone participates.
Conclusion
You’ve finished your weekend safety project by checking every major area of your home. You’ve looked at fire safety, electrical hazards, security, emergency supplies, and outdoor risks. This shows you’re serious about keeping your family safe.
The Home Emergency Audit Checklist is just the start. Home safety is an ongoing task. You should check your home every six months for new problems. Make sure smoke detector batteries are fresh and emergency supplies are ready.
Some repairs might take time and money. But even small fixes help a lot. Fixing one lock or updating an outlet can make a big difference. You don’t have to do everything at once to see benefits.
Spending a weekend on this project has given you peace of mind. You know where your home is weak and have a plan to fix it. Your family is safer because you took action. Keep using this checklist every six months. Your dedication to home safety could save lives.
FAQ
How long does it actually take to complete a full Home Emergency Audit Checklist?
You can finish a full emergency preparedness check in a weekend. Spend 3-4 hours on Saturday and 2-3 hours on Sunday. Break it down by room or system to avoid feeling overwhelmed.
What materials do I need to gather before starting my residential emergency planning guide assessment?
You’ll need a checklist, a flashlight, a notebook or tablet, and a smartphone. A ladder is also helpful for checking high smoke detectors. Having these items ready makes the process more efficient.
How often should I conduct a home emergency audit to keep my family safe?
Do a full audit every six months. Mark these dates on your calendar. Do quick checks monthly on smoke and CO detectors. Regular audits help catch new hazards and keep systems working.
Why is testing smoke detectors so important, and how often should they be replaced?
Smoke detectors can cut fire deaths by 50 percent. Test them by pressing the test button. Replace them every 10 years, even if they work, as sensors degrade. Battery-powered detectors need new batteries twice a year.
What should I look for when inspecting electrical outlets as part of my home safety inspection checklist?
Look for warm or discolored outlet covers and loose outlets. Check for frayed cords and overloaded power strips. Also, check major appliances for damaged cords. Pay extra attention to moist areas like bathrooms and kitchens.
How do carbon monoxide detectors work, and where should I place them?
CO is a silent killer because it’s odorless and colorless. Install CO detectors on every level, near sleeping areas. Test them and replace batteries annually. Replace the whole unit every 5-7 years.
What does BHMA stand for, and why does it matter for my door lock security?
BHMA stands for Builders Hardware Manufacturers Association. It rates lock security and durability. Look for Grade 1 or 2 locks on exterior doors. This helps you know if your locks are secure.
How can smart locks enhance my home emergency audit security efforts?
Smart locks offer valuable security features. Audit digital access codes and set up notifications. They help track who enters your home and when. Use strong passwords and enable automatic locking.
What should I check when examining windows as part of my home emergency audit?
Test each window lock and listen for rattling. Identify weak frames and check sliding door security bars. Consider adding security film and window stops. Also, check pet doors, garage service doors, and attic vents.
How much water and food should I store for my emergency preparedness plans?
Store at least one gallon of water per person per day for 3-7 days. For a family of four, that’s 12-28 gallons. Include non-perishable foods and a manual can opener. Store supplies in accessible locations and rotate them before expiration.
What should my family emergency plan include?
Your plan should have meeting spots near and far from home. Choose an out-of-state contact for emergencies. Assign roles to each family member. Make it fun by practicing evacuation routes and packing emergency kits together.
How does outdoor lighting serve both safety and security purposes?
Proper lighting prevents accidents and deters burglars. Check all exterior lights and replace bulbs. Test motion sensors and focus on strategic lighting. Energy-efficient options like LEDs are cost-effective and reliable.
What specific drainage issues should I look for during my flooding risk assessment?
Ensure gutters direct water away from your foundation. Test your sump pump and identify pooling water. Install water sensors in basements and near water heaters. Poor drainage can cause flooding and damage.
What’s the best way to document findings during my emergency preparedness assessment?
Use a notebook or digital device to record issues and take photos. Consider voice memos for observations. Organize your findings by room or system. Thorough documentation prevents forgotten issues and provides valuable records.
How should I prioritize repairs identified in my home crisis preparedness checklist?
Use a tiered system for repairs. Address immediate safety hazards first, then important repairs, and lastly recommended improvements. Focus on the most critical issues first. Break large projects into smaller tasks.
Should I hire professionals or handle repairs myself during my home safety inspection checklist updates?
Many repairs are DIY-appropriate, like replacing smoke detector batteries. But, electrical work and structural issues need professionals. Assess your skills and budget to decide what to tackle yourself versus what to hire out.
What types of tripping hazards should I identify during my yard inspection?
Look for uneven pavers, cracked sidewalks, and exposed tree roots. Also, check fences and gates for integrity. Document these findings and address them to prevent falls.
What’s the fastest way to complete my household emergency audit without sacrificing quality?
Prepare thoroughly and organize your audit by system or room. Use your checklist to stay focused. Take clear notes and photos immediately. Consider having a family member help to make it more efficient.
How can I make emergency preparedness planning engaging for my children?
Make it a game by practicing evacuation routes together. Let kids help pack emergency backpacks. Create a scavenger hunt for safety items. Make fire escape plans fun by decorating route maps. This makes planning a family project.
What should I do if I find serious safety hazards during my home emergency audit?
Address critical safety hazards immediately, like exposed wiring or broken locks. Document everything with photos for insurance purposes. Never ignore serious hazards—they pose immediate risks to your family.
How do I keep my emergency supplies fresh and functional throughout the year?
Rotate perishable items and replace batteries annually. Check water storage every six months. Review medications and replace those nearing expiration. Store supplies in cool, dry locations. Refresh supplies during your next audit.
Can I use my phone’s flashlight feature instead of carrying a dedicated flashlight during my audit?
While convenient, a dedicated flashlight is better for your audit. It provides reliable illumination without draining your phone’s battery. This is important for documenting findings and staying safe.
What’s the relationship between fire escape planning and my overall home crisis preparedness checklist?
Fire escape planning is a key part of emergency preparedness. Identify two exit routes from every room and a meeting spot outside. Practice this plan regularly. This planning integrates with your broader checklist to protect against various disasters.
Should I keep copies of important documents with my emergency supplies?
Yes, store copies of important documents in waterproof containers. Include insurance policies, property deeds, and medical records. Keep digital copies on secure cloud storage. These documents are vital if you’re displaced by disaster.
How do I know if my fire extinguishers are properly maintained?
Check the pressure gauge on each extinguisher and verify expiration dates. Ensure they’re easily accessible in high-risk areas. Review the instruction placard to confirm proper use. Replace low-pressure or expired extinguishers immediately.
What creosote buildup means for my fireplace safety assessment?
Creosote is flammable and accumulates in chimneys when burning wood. Check for buildup during your fire safety inspection. Excessive creosote increases fire risk. Have your chimney professionally cleaned annually if you use your fireplace.
What should I do about basement windows during my home emergency audit?
Basement windows are attractive to burglars because they’re hidden. Ensure they have secure locks or bars. Consider adding security film and window stops. Make sure windows are clean and visible to neighbors.
How frequently should I test my carbon monoxide detector if I have a gas furnace?
Test your CO detector monthly and replace batteries annually. With a gas furnace, CO poisoning risk is higher. Have your furnace inspected annually to ensure safe operation. Consider having more CO detectors than homes without gas appliances.