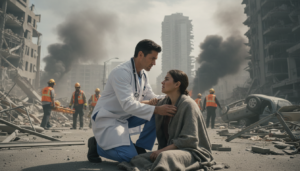
Blisters can pop up when you least expect them. They might happen if you’re hiking in the wrong shoes or if you’re evacuating during a crisis. Or maybe you’re pushing through unexpected physical activity. The good news is that knowing how to prevent and treat blisters gives you control.
Blisters occur when friction and moisture cause your skin layers to separate. Fluid builds up, creating pain and pressure. This happens to athletes, hikers, and people in emergency situations alike. The pain comes from the fluid pressing on your nerves underneath.
You don’t need medical training to handle blisters effectively. Learning about blister treatment for emergencies gives you confidence when blisters show up. This guide covers what causes blisters in tough situations, how to treat them right away, and smart ways to prevent them before they start.
The strategies in this article work whether you’re stuck with poor footwear or dealing with unexpected demands on your feet and hands. You’ll learn practical first aid for blisters that you can do anywhere. You’ll also discover how to spot when emergency blister care needs professional attention.
Blisters don’t have to slow you down or create bigger problems. With the right knowledge about prevention and treatment, you can stay safe and keep moving forward.
Table of Contents
Understanding What Causes Blisters in Emergency Scenarios
Blisters happen when your skin layers split and fill with fluid. In emergencies, this can happen fast. Your feet work harder, and your shoes might not fit right. Knowing what causes blisters helps you act fast for proper care.
Many things can lead to blisters in emergencies. You might walk more, wear shoes that don’t fit, or carry heavy loads. These situations make your skin more likely to get damaged.
How Friction and Moisture Create the Perfect Storm
Friction occurs when your shoe rubs against your skin. This rubbing heats up the area and causes your skin to split. It’s like wet paper tearing more easily than dry paper.
Sweat makes your feet moist, softening your skin. Warm conditions make this worse. When friction and moisture combine, your skin breaks down fast. That’s why managing blisters is key in emergencies.
- Repeated friction from walking
- Moisture from sweat and wet conditions
- Heat buildup inside your shoes
- Pressure from heavy packs or gear
- Ill-fitting footwear during evacuations
Common Areas Where Emergency Blisters Develop
Blisters often appear on specific parts of your feet and body. Your heels take the most pressure, and your toes and the balls of your feet rub against shoes. Your hands can blister from using tools or carrying equipment.
Shoulders can blister from backpack straps during evacuations. Any area where equipment contacts your skin can blister. Knowing these spots helps prevent blisters before they happen.
| Blister Location | Common Cause in Emergencies | Prevention Priority |
|---|---|---|
| Heels | Ill-fitting shoes, repeated walking | Heel cups, proper footwear |
| Toes | Tight shoe fit, downhill walking | Correct shoe size, moisture control |
| Ball of Foot | Pressure from weight and gear | Cushioned insoles, proper socks |
| Hands | Using unfamiliar tools | Work gloves, grip tape |
| Shoulders | Heavy backpack straps rubbing | Padded straps, proper pack fit |
We’ve all felt that burning sensation and thought we’d handle it later. In an emergency, later might be too late. Catching hot spots early is key to staying mobile and safe.
Blister Treatment for Emergencies
When a blister shows up in an emergency, you might want to pop it. But don’t. The fluid inside the blister is like a natural bandage. It protects the skin underneath from getting infected or hurting.
For small blisters that haven’t burst, just let them heal on their own. Keep the area clean and dry. Use a pad or moleskin to protect it from pressure. Check it every day for any changes.
In emergencies, like a big blister on your heel, you need quick action. A doctor or athletic trainer can safely drain it. This immediate blister relief helps avoid problems from wrong drainage.

If your blister does burst, clean it right away. Use soap and warm water. If you have it, apply antibacterial soap or hydrogen peroxide. Keeping the top skin layer on helps prevent infection and speeds up healing.
| Blister Type | Best Action | Cleaning Method | Healing Time |
|---|---|---|---|
| Small, unbroken | Leave alone, cover with pad | Keep clean and dry | 3-7 days |
| Large, unbroken | Professional drainage recommended | Soap and warm water | 5-10 days |
| Broken blister | Clean and protect | Antibacterial soap, betadine, or hydrogen peroxide | 7-14 days |
| Infected blister | Seek medical care immediately | Professional cleaning required | Varies by case |
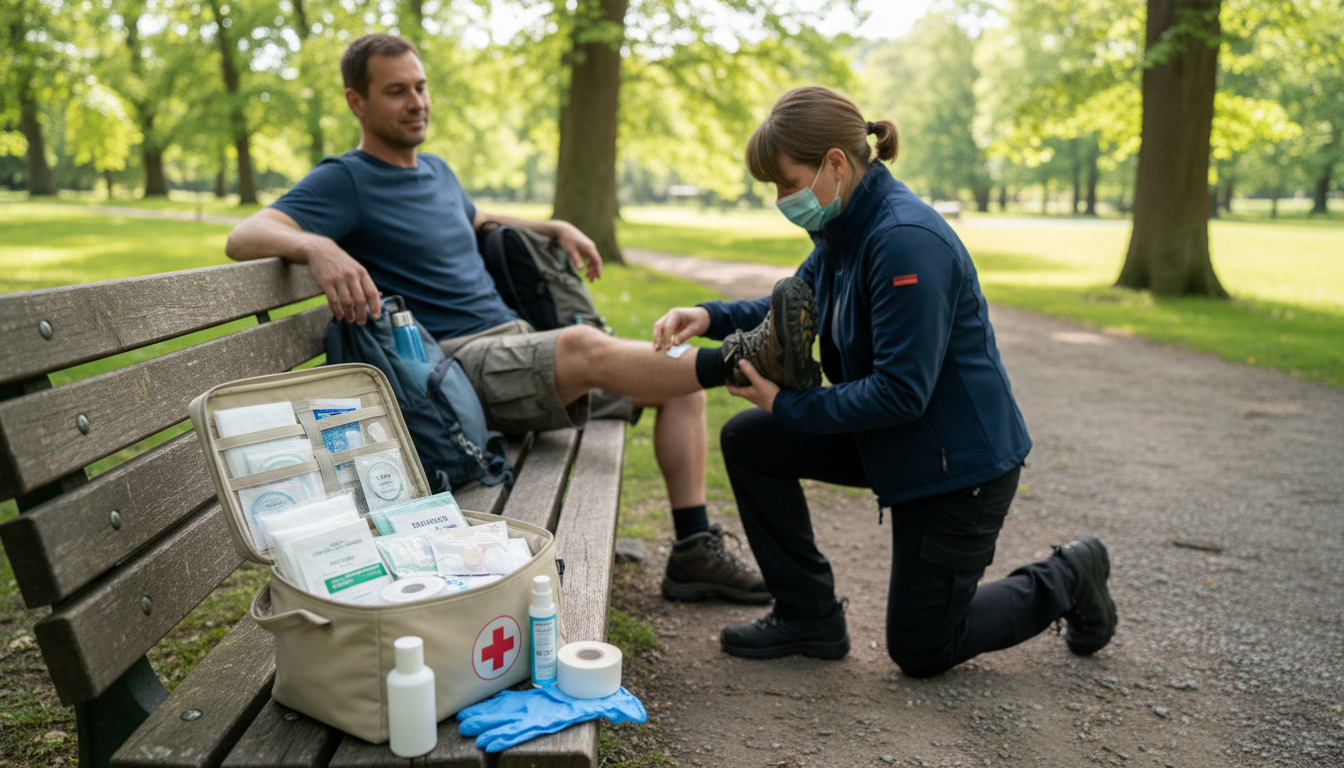
Even without a full first aid kit, clean water and basic hygiene can help. Use a clean cloth as a bandage if you don’t have medical supplies. Make sure the dressing stays in place while you’re active. For more info on treating blisters quickly, check out Nationwide Children’s Hospital Sports for expert tips.
Look out for signs of infection like pus, red skin, or red streaks. These mean you need to see a doctor right away. A doctor can give the right treatment to avoid serious problems.
- Keep unbroken blisters covered and clean
- Apply antiseptic to broken blisters immediately
- Maintain the protective skin layer whenever possible
- Change dressings daily or when they become wet
- Watch for signs of infection continuously
Preventing Blisters Before They Happen
The best way to handle blisters is to stop them from forming in the first place. Smart preparation keeps your feet comfortable when you need it most. Just five minutes of prevention can save you hours of pain later.
Knowing what gear works and how to use it properly gives you real power over your foot health during emergencies.
Choosing the Right Footwear and Protective Gear
Proper footwear makes all the difference in emergency situations. Your shoes should have about a thumb’s width of space at the toe. They should fit snugly at the heel without slipping or sliding around.
Tight shoes or loose ones both create friction that leads to blisters. Breaking in your shoes before an emergency happens is smart planning. Keep backup footwear in your emergency kit that you’ve already worn and tested.
Protective gear goes beyond just shoes. Consider including these items in your emergency supplies:
- Moisture-wicking gloves for manual work and debris clearing
- Padded backpack straps to prevent shoulder blisters
- Moisture-wicking socks made from synthetic blends or wool
- Blister prevention tape and moleskin for problem areas
Moisture-wicking fabrics keep skin dry, preventing the damp conditions that cause blisters. Avoid cotton socks because they hold moisture against your skin.
The Two-Sock Method for Maximum Protection
This clever technique reduces friction between your skin and shoes. Wear one sock inside-out as your first layer, then pull a normal sock over it. The friction happens between the two sock layers instead of on your skin.
This simple trick prevents blisters from forming during long walks or emergency evacuations.
Pair the two-sock method with these additional prevention steps:
- Apply petroleum jelly to high-friction areas before activity
- Use blister prevention tape on known problem spots
- Change socks immediately when they become damp or wet
- Keep feet as dry as possible throughout the day
Understanding your blister first aid protocol means knowing prevention strategies work better than treatments. These practical steps protect your feet during emergencies when mobility matters most.
When to Seek Professional Medical Help for Blisters
Most blisters heal on their own in a few days if you keep them clean and dry. Your body works hard to fix the damaged skin underneath. But, if a blister shows trouble signs or gets infected, you need a doctor.
Large, painful blisters might need a doctor to drain them safely. A doctor or athletic trainer can do this with the right tools. Never try to drain a blister yourself. This can lead to infection and more damage.
- Pus or yellowish fluid oozing from the blister
- Red, warm skin surrounding the affected area
- Red streaks extending outward from the blister
- Fever or general illness
- Blisters that grow larger or more painful
- Blisters caused by burns or chemical exposure
Emergency burn blisters need special care from doctors. Burns cause blisters differently and can harm deeper tissues. A doctor’s plan helps them heal right and reduces scarring.
People with diabetes or weak immune systems are at higher risk for infections. If you’re in this group, see your doctor for any blisters. Your body can’t fight off bacteria well when it’s weak.
| Situation | Action to Take | Timing |
|---|---|---|
| Small blister, no infection signs | Self-care at home with proper hygiene | Monitor daily for 5-7 days |
| Large, painful blister interfering with movement | Call your primary care doctor | Within 24 hours |
| Signs of infection present | Visit urgent care or contact your physician | Same day |
| Blister from burn injury | Seek emergency burn blister treatment at ER or urgent care | Immediately |
| Multiple blisters covering large body areas | Go to emergency room | Immediately |
| Fever with blister infection | Visit emergency room or call 911 | Immediately |
Infections spread fast, which is a big worry in emergencies. Catching problems early makes treatment easier. Your doctor can give antibiotics for infections. Urgent care handles draining for painful blisters. The emergency room is for serious infections, burn blisters, or big areas affected.
Getting help from a doctor isn’t overreacting. Most blisters heal well with early treatment. Trust your gut if something feels off. A quick doctor visit is better than waiting for an infection to get worse.
Conclusion
You now know what causes blisters in emergencies. Friction and moisture damage your skin. Blisters often appear on your heels, toes, and the sides of your feet.
Dealing with blisters in emergencies is simple. For intact blisters, use clean bandages and padding. Broken blisters need gentle care and protection from dirt. If pain or infection gets serious, seeing a doctor is wise.
Start getting ready for emergencies now. Check your emergency kit for blister supplies like bandages and moleskin. Wear in your hiking boots or good shoes before a crisis. Try the two-sock method at home for when you really need it.
With these tips, you’re ready for blisters anytime. Your feet will stay safe, and you can focus on staying safe during tough times. Take action today, and you’ll be better prepared for tomorrow. Your body will thank you when emergencies come.
FAQ
What exactly causes blisters to form during emergency situations?
Blisters form when skin gets damaged due to rubbing and moisture. In emergencies, this damage happens because of repeated friction. Sweat makes your skin softer, making it more prone to damage.
When you’re in an emergency, you might walk more, wear shoes that don’t fit, or carry heavy loads. This can cause blisters. The combination of rubbing, heat, and moisture creates the perfect environment for blisters to form quickly.
Should I pop a blister or leave it alone?
It’s best to leave intact blisters alone. The fluid inside acts as a natural bandage, protecting the skin underneath. This reduces the risk of infection and helps the blister heal faster.
But, if you have a large blister in a high-pressure area, you might need to handle it differently. Cover it with a donut-shaped pad or moleskin to relieve pressure. Keep the area clean and dry, and watch for signs of infection. If the blister breaks, focus on proper wound care instead of trying to drain it yourself.
What’s the best way to treat a broken blister in an emergency?
For broken blisters in emergencies, clean the wound with available supplies. Use antibacterial soap and clean water, or antiseptic wipes from a first aid kit. Try to keep the top layer of skin intact as a protective barrier.
Gently clean the area, pat it dry with a clean cloth, and apply antibiotic ointment if you have it. Cover the blister with a sterile bandage or clean cloth, securing it to stay in place. Don’t worry if you don’t have a full first aid kit—clean water and basic hygiene can help prevent infection and support healing.
How can I treat blisters with improvised supplies during an emergency?
You don’t need special medical equipment to treat blisters in emergencies. Use clean cloth as a bandage if you don’t have medical supplies. Secure dressings so they stay in place during activity.
If you have clean water, use it to wash the blister area gently. Create a makeshift protective covering using clean fabric. Keep the blister clean and protected from further friction. If you have antiseptic solution, use it to reduce infection risk. Pad the area around the blister to prevent further rubbing.
What is the two-sock method, and how does it prevent blisters?
The two-sock method changes where friction occurs. Wear the first sock inside-out, then a regular sock on top. This setup allows the sock layers to slip past each other, absorbing friction.
Choose moisture-wicking synthetic or wool blends for the best results. This method is valuable during emergencies when you might be wearing ill-fitting footwear or walking long distances.
What prevention strategies should I implement before an emergency occurs?
Prepare for emergencies by taking action now. Choose proper footwear with a thumb’s width of space at the toe and a snug heel fit. Break shoes in before emergencies.
Include backup footwear in your emergency kit that’s already been worn and tested. Protect your hands with gloves during manual labor, use padded backpack straps, and wear moisture-wicking fabrics. Apply lubricants like petroleum jelly to high-friction areas before activity begins.
Use blister prevention tape or moleskin on known problem spots. Keep feet as dry as possible by changing socks when they become wet. Spending five minutes on prevention now can save you hours of discomfort later.
What are the warning signs that a blister needs professional medical attention?
Seek medical help if you notice signs of infection like pus, increasing redness, warmth, red streaks, or fever. Also, consult healthcare professionals if you have large or painful blisters, blisters caused by burns or chemical exposure, or other trauma beyond simple rubbing.
People with diabetes or compromised immune systems are at higher risk for complications and should seek evaluation. Don’t attempt to drain large blisters yourself without proper sterile technique, as you’re creating an open wound vulnerable to bacteria.
When should I call a doctor versus going to the emergency room for a blister?
Call your primary care doctor if you notice early signs of infection or have concerns about a blister’s appearance. Visit urgent care for moderate infection signs like localized swelling, increased warmth, and mild pus drainage.
Go to the emergency room if you see signs of serious infection, blisters covering large areas of the body, or blisters caused by burns or chemical exposure. Remember, infections can spread quickly, so seeking help early is not an overreaction.
Are burn blisters different from friction blisters and do they need different treatment?
Yes, burn blisters require different treatment protocols than friction blisters and should always be evaluated by healthcare professionals. Burn blisters may indicate deeper tissue damage beyond what’s visible on the surface, making professional assessment essential.
Unlike friction blisters, which you might safely leave intact, burn blisters carry different risks for infection and healing complications. Never attempt home treatment for emergency burn blister treatment—these require medical evaluation to assess the extent of tissue damage and ensure proper wound care.
What should I include in my emergency kit for blister care?
Stock your emergency kit with items for first aid for blisters including moleskin or donut-shaped blister pads, sterile gauze pads, antibiotic ointment (like Neosporin), blister prevention tape, and adhesive bandages in various sizes. Include several pairs of dry socks—preferably moisture-wicking synthetic or wool blends—and consider keeping a pair of well-broken-in backup shoes.
Add pain relief medication, antiseptic wipes or solution, tweezers for removing debris if needed, and non-stick sterile pads. Include a small tube of petroleum jelly or other lubricant for friction prevention. Don’t forget gloves for hand protection during manual tasks. Having these supplies readily available means you can implement immediate blister relief and emergency first aid protocol as soon as problems develop.
Can I prevent blisters on my hands during emergency situations?
Yes, emergency foot blister care extends to hand protection. Wear protective gloves when handling equipment, tools, or debris to prevent friction blisters on your palms and fingers. Choose gloves that fit properly without bunching or creating additional friction points.
If you don’t have gloves available, apply petroleum jelly or other lubricants to your hands before engaging in manual activity, and take frequent breaks to reduce continuous friction. Wash your hands regularly and keep them as dry as possible, changing your grip position frequently to distribute pressure across different areas. If blisters do develop on your hands, treat them using the same principles as foot blisters: keep them clean, protected, and covered. Hand blisters require extra attention because hands are difficult to immobilize, making infection risk higher.
How do I know if my shoes are causing blisters during an emergency evacuation?
If you’re experiencing treating blisters quickly during an emergency evacuation, problematic shoes typically show these signs: blisters developing on your heels or toes within the first few hours of wear, your heel slipping inside the shoe with each step, or pressure points where the shoe seam or edge rubs your skin.
Ill-fitting shoes are the primary culprit during evacuations when you might grab whatever footwear is available. To assess fit, there should be approximately a thumb’s width of space at your toe when standing, and your heel should feel snug without slipping. If you determine your shoes are the problem, prioritize finding alternative footwear from your emergency kit or a safe location. In the meantime, apply extra padding around problem areas and consider wrapping your foot with athletic tape to reduce movement inside the shoe.
What’s the difference between preventing blisters and treating them during an emergency?
Prevention strategies focus on preventing blister formation before it happens—choosing proper footwear, using the two-sock method, applying lubricants, keeping feet dry, and addressing hot spots immediately. Treating blisters quickly means responding immediately when you feel burning or friction sensations, covering the area with protective padding, and maintaining cleanliness.
Prevention is always superior to treatment because an ounce of prevention avoids the pain, reduced mobility, and infection risks of actual blisters. But, in true emergencies, you may not have had time to prevent them, which is why knowing both approaches matters. The ideal emergency preparedness strategy involves blister first aid protocol—taking preventive measures before the emergency and having treatment supplies ready if prevention fails. Combining both approaches gives you the best chance of staying comfortable and mobile during critical situations.
How do moisture-wicking socks help prevent blisters during emergencies?
Moisture-wicking socks made from synthetic materials or merino wool actively pull sweat away from your skin and allow it to evaporate, keeping your feet dry. This is critical because sweat softens skin and increases friction vulnerability. Cotton socks absorb moisture but don’t release it, leaving your feet wet and prone to blistering.
In emergency situations where you might be walking for extended periods or in varying weather conditions, moisture-wicking fabrics dramatically reduce blister risk by maintaining a dry environment. Even if you’re wearing ill-fitting shoes, dry feet blister less readily than wet feet. Consider including several pairs of quality moisture-wicking socks in your emergency kit, and change your socks if they become damp. This simple strategy, combined with the two-sock method, provides powerful protection against friction blisters when you’re stuck wearing less-than-ideal footwear.
What immediate actions should I take the moment I feel a hot spot forming?
Treating blisters quickly starts the moment you feel a hot spot—that burning sensation on your heel or another friction-prone area. Stop as soon as safely possible and remove your shoe. Inspect the area for redness or skin irritation.
If you catch it early enough before a full blister forms, you can prevent serious damage by addressing the friction source. Check for debris in your shoe, adjust your sock position, and if possible, change into a fresh pair of dry socks. Apply a lubricant like petroleum jelly or blister prevention tape to the hot spot area. Once covered and protected, put your shoe back on and continue moving. If you can change shoes or adjust your footwear, do so immediately. Taking these quick action steps at the first sign of trouble prevents hot spots from developing into painful, debilitating blisters that compromise your mobility during an emergency.
How do I keep a blister bandage secure during physical activity or evacuation?
Keeping your blister dressing secure during emergency blister care requires multiple securing methods. Use blister-specific adhesive pads or athletic tape applied with slight tension around the bandage edges—not so tight that you cut off circulation, but secure enough that it won’t slip during movement. Start the tape on healthy skin several inches away from the blister, extending it firmly over the bandage and onto healthy skin on the other side.
For foot blisters, consider using elastic bandaging wrapped around your foot to hold the dressing in place. Change your dressing if it becomes wet, dirty, or loose, as an unsecured bandage provides no protection. If you’re in an evacuation situation without specialized tape, use clean cloth strips secured with knots or medical-grade adhesive. Test your dressing by flexing and moving the affected area—if it shifts, resecure it before continuing activity. A properly secured dressing maintains protection and allows you to continue necessary movement during emergencies.
Can I use liquid bandage products for emergency blister treatment?
Liquid bandage products can be helpful for small blisters and hot spots during treating blisters quickly, but they work best for intact blisters or early-stage prevention. These products create a protective seal over the blister area and can reduce friction, making them valuable for immediate blister relief.
They’re not ideal for already-broken blisters because they don’t allow adequate drainage and can trap bacteria if infection develops. If you use a liquid bandage, apply it only after thoroughly cleaning the area with soap and water, and monitor closely for signs of infection. Liquid bandages work well in combination with other strategies—for example, applying liquid bandage to a hot spot before it becomes a full blister, then covering with moleskin for additional protection. In emergency kits, liquid bandage products take up minimal space and have a long shelf life, making them excellent additions alongside traditional bandaging supplies.
What role does proper footwear fit play in blister prevention during emergencies?
Proper footwear fit is absolutely foundational for blister prevention in emergencies. Shoes that fit correctly dramatically reduce friction and pressure points that cause blisters. The ideal fit includes approximately a thumb’s width of space at the toe (about half an inch), allowing room for your foot to expand slightly during activity without pressing against the shoe’s end.
Your heel should fit snugly—firm enough that your foot doesn’t slip with each step, but not so tight that it restricts blood flow. Laces or closures should secure your midfoot without pressure points. Before any emergency situation, break in shoes gradually through normal wear, not wearing them for the first time during a crisis. Keep backup footwear in your emergency kit that’s already been worn and tested. If an emergency forces you into ill-fitting shoes, compensate with extra padding, the two-sock method, and frequent sock changes. Your shoes are your first line of blister defense, making proper fit investment worthwhile.
How does body weight distribution and gait affect blister formation during emergencies?
During emergencies, changes in your normal movement patterns can create unexpected blister problems. Carrying heavy loads shifts your center of gravity and changes your gait, putting pressure on different areas of your feet than you’re accustomed to. Walking longer distances than usual, wearing unfamiliar footwear, or maintaining an abnormal pace all alter how your feet interact with your shoes.
These gait changes increase friction in new locations and prevent the natural pressure distribution your feet normally experience. To minimize blister risk, pay attention to how you’re walking—try to maintain an even pace and natural stride even if you’re tired or anxious. If you feel pressure developing in unusual areas, stop when safe and adjust your shoe lacing or sock position. Consider using blister prevention tape or moleskin on areas that normally don’t blister but are experiencing new pressure. Being aware of how emergency conditions alter your movement helps you anticipate and prevent blister formation before it happens.
What’s the proper technique for cleaning a broken blister to prevent infection?
Blister wound management for broken blisters starts with gentle cleaning. Wash your hands with soap and water before touching the blister to avoid introducing bacteria. Using clean water—preferably warm but any clean water works in emergencies—gently rinse the blister area to remove dirt and debris.
Use a soft cloth or sterile gauze to pat the area dry; avoid rubbing. If available, apply a mild antiseptic like hydrogen peroxide or alcohol-based wipe, though plain water is acceptable if nothing else is available. Pat dry again with a clean cloth. If the blister