When disaster hits, your gear must be ready. A broken backpack strap or a torn jacket can be a big problem. Basic sewing skills keep your equipment in top shape.
The Survival Punk Podcast Episode 442 says sharpening and sewing are key. These skills might not be glamorous, but they’re essential. Knowing how to fix your gear can mean the difference between life and death.
Learning to sew for repairs is not just for homemakers. It’s a vital survival skill. You don’t need expensive tools or years of practice. Just the right knowledge and some practice.
This guide will teach you everything you need to know. You’ll learn which tools to carry and why they’re important. You’ll discover simple techniques for fixing things in the field. You’ll also learn how to make do with limited supplies.
Even if you’ve never sewn before, you can learn. Basic sewing for repairs is simpler than you might think. Let’s get started.
Table of Contents
Why Every Prepper Needs Field Repair Skills
When disaster hits, you can’t just order new stuff online. Your gear is your lifeline. Knowing how to fix clothes and mend tears means you’re in control, not just waiting for help. Field repair skills are key to being truly prepared.
The Survival Punk Podcast says even top-notch gear is useless without repair skills. In a real crisis, new supplies won’t show up. You must fix your gear yourself.
The Reality of Gear Failure in Survival Situations
Gear breaks down when you need it most. Backpack straps snap, rain gear tears, and boots fail. These aren’t just small problems. A broken piece can lead to serious issues.
Think about what happens if your backpack breaks:
- You can’t carry your supplies well
- Carrying too much weight is dangerous
- You get tired faster
- You’re exposed to the weather
Even the best gear wears out. Threads break, seams come apart, and fabric tears. Without repair skills, your expensive gear is useless. Quick fixes keep your gear working when you can’t get new stuff.
Self-Reliance Through Maintenance and Repair
Being self-sufficient means fixing things yourself. Mending clothes is part of the prepper way. It shows you don’t rely on others for everything.
Repairing your gear makes it last forever:
- Learn how to maintain your gear
- Fix small problems before they get big
- Know how to repair different materials
- Feel confident in fixing things in the field
Every repair you do saves money and boosts your independence. You don’t have to wait for stores to open or for deliveries. Your hands and a needle are your lifeline. This is what sets true preppers apart.
Learning to repair clothes is not just a skill for serious preppers. It’s essential for survival.
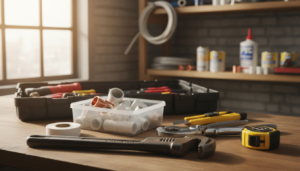
Essential Tools for Your Survival Sewing and Repair Kit
When disaster hits, your gear is key. A good sewing and repair kit keeps your clothes and gear working when you need them. Knowing how to sew by hand is important. Plus, quality repair supplies don’t take up much space.
Your survival kit should be light and versatile. Each item must have a purpose. Here are the must-haves for field-ready repairs.
Needles and Thread Options for Different Materials
Knowing about needles and thread is key. Different fabrics need different tools. Your kit should have a variety for any repair.
- Assorted hand needles in multiple sizes for lightweight fabrics like nylon and cotton
- Heavy-duty needles designed for thick materials such as leather, canvas, and plastic
- Curved needles for reaching tight spaces and working on three-dimensional repairs
- Awls for punching through dense materials before threading
Thread choice is just as important as needle choice. Make sure your kit has:
- Polyester thread in various colors, including black and tan for blending with common gear
- Heavy-duty thread for high-stress repairs that experience constant movement or weight
- Unwaxed dental floss as a backup option—it’s surprisingly strong for shoe repairs and heavy-duty stitching
Multi-Purpose Tools and Adhesives
Hand sewing is better with the right tools. A Leatherman multi-tool is great for scissors, pliers, and wire cutters. These tools make repairs faster and lighter.
Adhesives are needed for repairs that stitching can’t handle:
- Fabric glue for patching tears in clothing and packs
- Shoe glue or rubber cement for sole repairs and waterproofing
- Super glue for emergency fixes on plastic and metal components
Compact Repair Supplies That Pack Light
Space is important in survival situations. Your repair supplies should fit in small spaces.
| Item | Purpose | Weight Advantage |
|---|---|---|
| Pre-threaded needles | Eliminates threading delays in field conditions | Saves space and time |
| Sewing cards (credit-card sized) | Holds needles, thread, and small patches securely | Fits in wallet or small pocket |
| Thimble | Protects fingers when pushing needles through tough fabric | Prevents hand injuries during repairs |
| Safety pins | Temporarily hold fabric together and serve multiple functions | Minimal weight, maximum utility |
| Fabric scraps from worn clothes | Provides patch material for tears and holes | Recycled weight you already carry |
Keep your thread and needles in a small pouch. This keeps them dry and easy to find when you need them. Use small backing surfaces or cardboard to protect your hands and gear when sewing through thick materials.
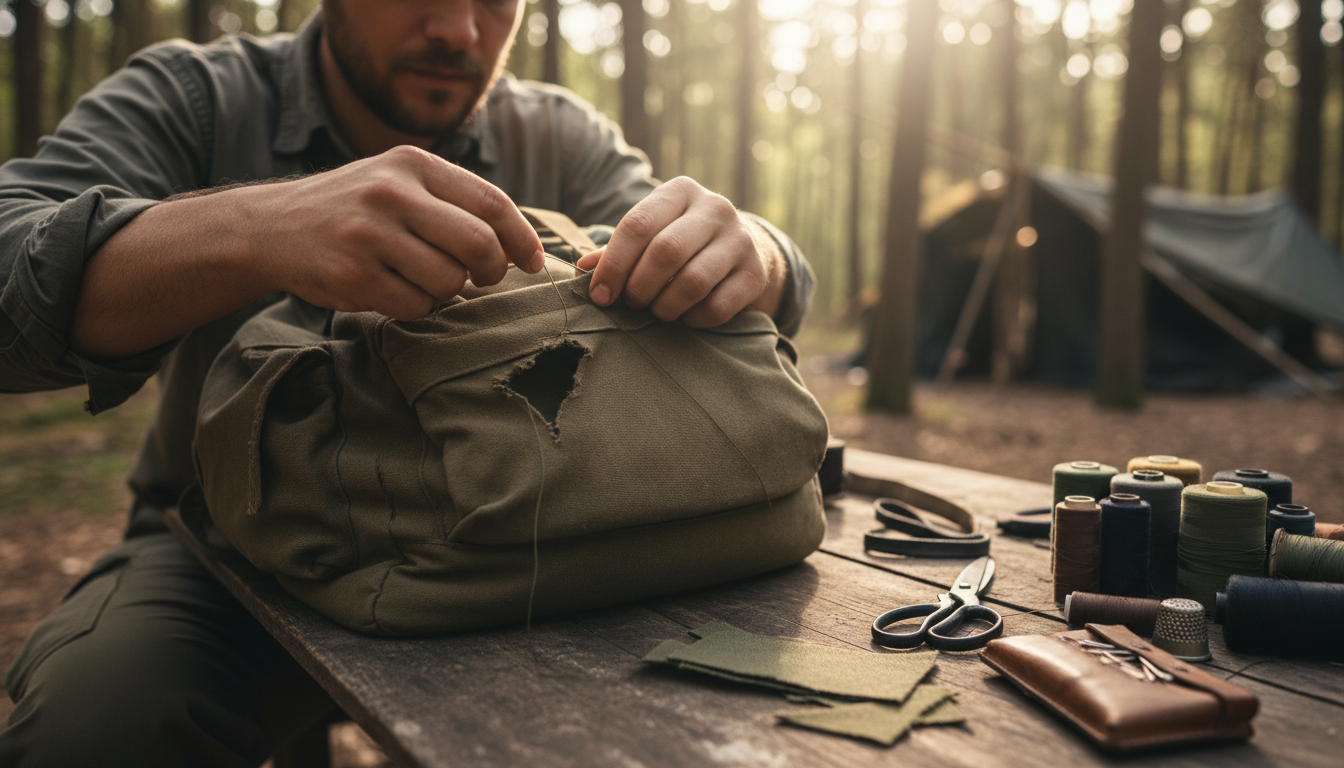
Basic Sewing for Repairs
Field stitching isn’t about making your gear look perfect. It’s about fixing what’s broken fast so you can keep moving. Basic sewing for repairs focuses on practical skills that work in real survival situations, not fashion magazine standards. Anyone can learn simple stitching methods with practice and patience, even if you’ve never held a needle before.
Learning basic sewing for repairs starts with understanding the fundamentals. You don’t need artistic talent or steady hands—you need confidence and repetition. Start by practicing simple stitching methods on scrap fabric or old clothes before working on actual gear. This builds your skills without risking critical equipment.
- Thread your needle by wetting the thread end or using a needle threader for easier insertion
- Tie secure starting knots using an overhand or square knot on both ends
- Keep tension even by pulling thread snugly without puckering the fabric
- Hold the needle at a comfortable angle for control and safety
- Match thread weight to your fabric type for stronger, lasting repairs
Preparing your tear matters as much as the stitching itself. Clean the damaged area, align the edges properly, and use safety pins or tape to hold everything in place. Tape works well in windy or cold conditions when your hands aren’t as steady.
Simple stitching methods become stronger when you reinforce stress points. Add extra backstitches near edges and corners where gear experiences the most pressure. These small details keep your repairs functional under real-world conditions.
| Repair Step | What to Do | Why It Matters |
|---|---|---|
| Thread Preparation | Wet thread end or use needle threader | Makes threading easier and faster |
| Knot Security | Use overhand or square knots on both ends | Prevents stitches from unraveling during use |
| Tension Control | Pull thread snugly, not tight | Avoids fabric puckering and weak spots |
| Area Preparation | Clean edges and use tape to hold alignment | Creates straighter seams and easier stitching |
| Stress Reinforcement | Add extra backstitches at corners and edges | Strengthens repairs where gear takes the most wear |
Remember that imperfect repairs are infinitely better than no repairs at all. Your goal in basic sewing for repairs isn’t museum-quality work—it’s functional stitches that hold under stress. Every prepper starts somewhere. With simple stitching methods and consistent practice, you’ll develop the skills needed to keep your gear functional in the field.
Thread Alternatives When You’re Out of Supplies
Running out of thread doesn’t stop your hand sewing. Preppers find substitutes in nature and everyday items. Knowing what works for different fabrics is key. Let’s look at practical substitutes for when you can’t find thread.
Fishing Line and Paracord Inner Strands
Fishing line is a top choice for field repairs. Monofilament fishing line is great for nylon and polyester because it doesn’t snag. Braided fishing line is strong for heavy repairs, like fixing backpacks.
Paracord inner strands are also good for sewing. A 550 paracord has 7 strands that can be used separately. These strands are strong and flexible for most repairs. Just pull the paracord apart to get the strands you need.
- Monofilament fishing line: Best for slippery synthetic fabrics
- Braided fishing line: Offers maximum strength for durable repairs
- Paracord inner strands: Versatile for various fabric types
Dental Floss and Improvised Cordage
Dental floss is a strong emergency thread substitute. It’s great for shoes and leather because it’s durable and makes strong knots. It’s perfect for beginner sewing repairs.
Without dental floss, nature has alternatives. Plant fibers, animal sinew, or human hair can be used in extreme situations. These materials need skill but show true preparedness.
| Material | Best For | Strength Level | Availability |
|---|---|---|---|
| Unwaxed Dental Floss | Shoe and leather repairs | High | Very Common |
| Monofilament Fishing Line | Synthetic fabrics | High | Common |
| Braided Fishing Line | Heavy-duty repairs | Very High | Common |
| Paracord Inner Strands | General fabric work | Very High | Common (if carrying paracord) |
| Plant Fibers | Emergency situations | Moderate | Natural environments |
Knowing these alternatives makes you a self-reliant prepper. You can fix things anywhere, anytime. Being creative with what you have keeps your gear working when you’re out of thread.
Three Essential Hand Stitches for Field Repairs
Learning to mend your gear can make you a self-sufficient prepper. When your clothes or gear tear, knowing how to fix them quickly is key. These three stitches are great for fixing clothes, sleeping bags, tents, and backpacks. All you need is a needle, thread, and your hands.
To start, thread your needle and tie a knot. Begin from the underside of the fabric and go through to the top. This keeps your repair looking neat.
The Running Stitch
The running stitch is simple to use. Move forward about one-quarter inch and push your needle back down. Keep repeating this up-and-down motion along the tear. It’s best for small rips in clothes and lightweight gear.
For bigger holes, use double thread for extra strength.
The Backstitch
The backstitch makes stronger repairs than the running stitch. Bring your needle up, then push it back down behind where it came out. Bring it up ahead and repeat. This stitch locks in place well.
The Whip Stitch
The whip stitch is perfect for sealing edges and fixing tears on sleeping bags or tent walls. Push your needle through the folded edge, keeping stitches close. This creates a waterproof seal.
| Stitch Type | Best Use | Difficulty Level | Speed |
|---|---|---|---|
| Running Stitch | Small rips in clothing and gear | Easy | Fast |
| Backstitch | Heavy-duty seams and tears | Moderate | Moderate |
| Whip Stitch | Edge sealing and waterproofing | Moderate | Slow |
Practice these stitches at home before going into the wilderness. Being able to fix tears quickly depends on muscle memory. Start with old clothes and damaged gear you don’t mind practicing on. Once you get these stitches down, fixing gear won’t be a big deal.
Building Your Complete Survival Repair Kit
A complete survival repair kit is more than just needles and thread. It needs different repair methods for various gear failures. By combining sewing, adhesives, patches, and heavy-duty fasteners, you can fix almost any problem in the field.
Think of your repair kit as a toolbox with layers. The first layer has traditional sewing supplies. The second layer adds materials that work with stitching. The third layer has emergency solutions for when sewing alone isn’t enough. This way, you’re ready for fabric tears, broken equipment, and unexpected failures.

Duct Tape, Wire, and Heavy-Duty Fasteners
Duct tape is a prepper’s best friend for good reasons. It handles temporary waterproofing, seals small punctures, and even makes emergency splints for broken gear. Keep both large and small rolls, as weight is important when carrying everything.
Wire has uses that tape can’t. Include different gauges in your kit:
- Light snare wire for securing small items
- Medium gauge wire for structural repairs
- Heavier gauge wire for improvised fasteners and frame reinforcement
Zip ties in various sizes are great for quick repairs that take too long to stitch. They attach gear to packs, secure loose straps, and hold broken pieces in place until you can fix them properly. A good multi-tool with pliers, wire cutters, and screwdrivers helps you work with these materials effectively.
Patches, Glues, and Waterproof Solutions
Learning to patch fabric properly makes your clothing repair skills advanced. Start with waterproof repair tape like Tenacious Tape for rain gear, tents, and inflatable sleeping pads. This tape sticks in wet conditions and creates an immediate seal that prevents water penetration.
Flexible shoe glue creates a strong bond perfect for footwear repairs and fabric applications. Hot-melt glue sticks that you can melt with a lighter fix small punctures in sleeping pads without carrying liquids. For structural repairs on hard gear like pack frames or canoe hulls, epoxy resin paired with kevlar felt provides lasting strength.
| Adhesive Type | Best Use | Drying Time | Weight |
|---|---|---|---|
| Flexible Shoe Glue | Footwear and fabric bonds | 24 hours | Lightweight |
| Hot-Melt Glue Sticks | Sleeping pad punctures | Minutes | Very light |
| Epoxy Resin | Structural repairs | 24 hours | Moderate |
| Waterproof Tape | Tent and rain gear | Immediate | Light |
Combining patches with stitching makes repairs more durable. Clean the damaged area first, apply your adhesive or waterproof patch, and reinforce the repair with basic stitches. This way, your fix will hold even under stress.
When assembling your kit, use a detailed guide to create a sewing repair that balances traditional supplies with modern adhesives. Different problems need different solutions. A well-rounded approach to clothing repair skills keeps you ready for any wilderness scenario.
Conclusion
Learning basic sewing for repairs is essential for preppers. It’s not just a skill; it’s a must-have. When your gear fails, you’ll need to fix it quickly. Knowing how to do field repairs keeps you safe and moving.
Begin your repair journey today. Don’t wait for an emergency to learn. Start with old clothes or scrap fabric and practice the three essential stitches this week. Mending clothes at home boosts your confidence and skills.
Assemble your survival repair kit now. Include needles, thread, patches, and duct tape. Keep your kit handy and your skills sharp.
A man who can fix his tools stays in the fight longer. You become self-reliant when you can repair your gear. Every expert started as a beginner who practiced.
Practice sewing on regular clothes now, not when disaster hits. Get good at mending clothes before you really need to. Your future self will thank you. Preparedness is more than just supplies; it’s about skills no one can take away. Start now.
FAQ
Why is basic sewing for repairs considered a survival skill?
Basic sewing is key for survival because it keeps your gear working in emergencies. A small tear in your backpack or rain gear can be deadly without repair options. Sewing skills are not just for home use; they’re vital for keeping you safe.
What should I include in a basic bug-out bag sewing kit to keep it lightweight?
Your bug-out bag sewing kit should have essentials like heavy-duty needles and pre-threaded ones. Include dark-colored thread, a thimble, safety pins, a needle threader, and waterproof thread. Fishing line is a great space-saving alternative. A sewing card with needles attached is also useful.
Can I really fix my gear with fishing line instead of thread?
Yes, fishing line is better for many repairs. It works well on synthetic fabrics and is strong for heavy-duty needs. It’s a good backup if you run out of thread. Just make sure your knots are tight.
What’s the difference between mending torn clothes and repairing heavy gear like backpacks?
Mending clothes uses standard thread and needles, while repairing gear needs heavy-duty materials. For gear, use strong thread, heavy needles, and tight stitches. This is because gear faces more stress than clothes.
How do I know which needle size to use for different materials?
Choose needles based on fabric weight and type. Use small needles for thin fabrics and large ones for thick materials. Curved needles are best for round repairs. Always pick a needle that moves smoothly through fabric.
What are the three essential stitches every prepper should master?
The running stitch is basic. It’s used for small tears in various materials. The backstitch is stronger for high-stress areas. The whip stitch closes edges invisibly, perfect for stuffed items.
Can I use dental floss for gear repairs if I run out of thread?
Yes, dental floss is great for shoe and leather repairs. It’s strong and doesn’t fray easily. It’s a good backup for thread, and it’s already in your kit.
How do I patch fabric properly so the patch stays put permanently?
Clean the area well and let it dry. Use a patch slightly larger than the damage. Apply glue and press the patch firmly. Reinforce with stitching for extra strength.
What can I use instead of thread if I’m in a true survival situation with no prepared supplies?
Use paracord strands or plant fibers for thread. They’re strong and can be found in nature. Practice using them for repairs before you need them.
Why should I practice basic sewing before an emergency actually occurs?
Practicing sewing builds muscle memory and confidence. It helps you learn your style and what works best for you. This way, you can repair gear quickly and effectively in emergencies.
What’s the best way to organize a complete survival repair kit so I can find items quickly?
Use small containers for everyday carry kits and larger ones for home kits. Color-code thread spools and keep tools separate. This makes it easy to find what you need fast.
How do I repair the seams on my pack or backpack using hand sewing techniques?
Use heavy-duty thread and needles for repairs. Start your stitches before the damage and go through both layers. Reinforce with adhesive for extra strength.
Is there a difference between thread for synthetic fabrics versus natural materials?
Yes, different threads work better for different materials. Polyester thread is good for most synthetic fabrics. Natural thread like cotton works better for natural materials. Always have polyester thread as a backup.
Can I use paracord inner strands as thread for essential mending stitches?
Yes, paracord strands are great for repairs. They’re strong and flexible. They’re also in your kit already, making them a good choice for emergencies.
What adhesives should I include in my repair kit for different types of gear failures?
Include flexible shoe glue, fabric glue, hot-melt glue sticks, super glue, and epoxy putty. Use Tenacious Tape for waterproof repairs. This combination covers most repair needs.
How do I repair a torn tent seam or hole using field repair techniques?
Clean the area and apply a patch with Tenacious Tape if possible. Use stitching and adhesive tape for larger damage. Waterproof tape is best for tent repairs. Duct tape is a good emergency option.