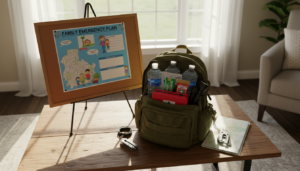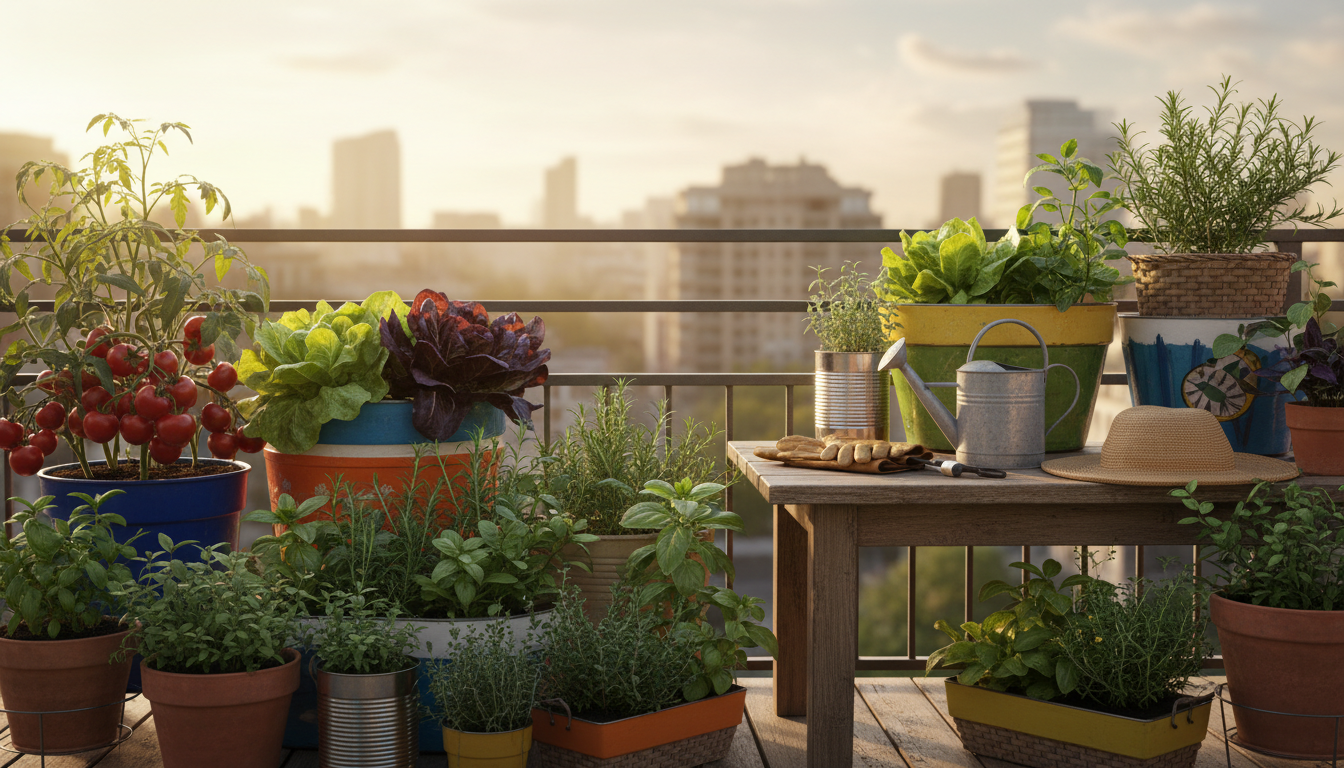
You don’t need a big backyard to start growing an emergency garden. Even with a tiny balcony or just a few feet of outdoor space, you can grow fresh vegetables. An emergency garden ensures you have real food when you need it most.
Many think emergency food gardens need special skills or lots of money. But that’s not true. This guide will show you how to create a practical garden that fits your space and budget. We’ll focus on what really works, not just fancy photos.
Your emergency food garden does three key things. It adds fresh vegetables to your stored food. It gives you a meaningful activity during stressful times. It helps you feel in control when the world seems scary.
Here’s the truth: stockpiles eventually run out. But seeds and the skill to grow food last forever. That’s why learning to garden now is so important. You’re building a skill that will stay with you forever.
This article will guide you from setup to harvest. You’ll learn what to plant, how to care for your vegetables, and how to save what you grow. By the end, you’ll be ready to start your own emergency garden.
Ready to begin? Let’s explore why growing an emergency garden is a smart choice for your family right now.
Table of Contents
Why Growing an Emergency Garden Matters Now More Than Ever
The world feels unpredictable. Supply chains break down. Store shelves empty. In these uncertain times, many people find that self-sufficient gardening offers peace of mind. A crisis vegetable garden turns anxiety into action, making you feel in control of your food.
Even a small garden bed or container can produce fresh vegetables when you need them most.
Growing your own food means less dependence on systems beyond your control. You build resilience one plant at a time.
Reclaiming Control Through Self-Sufficient Gardening
When external circumstances feel overwhelming, self-sufficient gardening gives you something tangible to control. You decide what grows. You decide when to harvest. Unlike stockpiles that run out, the ability to grow food never disappears.
A crisis vegetable garden supplements your pantry staples beautifully. Fresh tomatoes, leafy greens, and herbs reduce your trips to crowded stores during uncertain times. You earn independence from supply chains that may fail. Research shows that gardening provides practical skills for maintaining food when external resources become unreliable.
- Homegrown vegetables reduce grocery store dependency
- Fresh produce supplements stored emergency food
- Small garden spaces yield surprising amounts of food
- Self-sufficient gardening builds genuine confidence
The Mental and Physical Benefits of Crisis Vegetable Gardening
Beyond calories and nutrition, a crisis vegetable garden heals your mind. Tending plants becomes meditation. Digging soil becomes exercise. Watching seeds sprout becomes hope.
Anxiety thrives when you feel powerless. Gardening hands you back your power. The physical work—planting, weeding, watering—burns stress while building strength. Your body gets gentle activity. Your mind gets rest from worry.
Harvesting food you grew yourself delivers accomplishment. This feeling matters deeply during uncertain times. It reminds you that you can create solutions. You can nurture life. You can provide for yourself.
| Benefit Category | Mental Health Impact | Physical Health Impact |
|---|---|---|
| Daily Gardening Activity | Reduces anxiety and stress through focused work | Provides gentle exercise and improved flexibility |
| Plant Care Routine | Creates structure and purpose during chaos | Increases vitamin D from sunlight exposure |
| Harvest Accomplishment | Boosts confidence and self-worth | Supplies fresh, nutrient-dense food sources |
| Natural Connection | Provides emotional grounding and perspective | Strengthens immune system through outdoor activity |
A crisis vegetable garden transforms uncertainty into purpose. It offers food security and emotional stability in one simple practice.
Setting Up Your Emergency Food Garden on Any Budget
You don’t need to spend a lot to start an emergency food garden. With smart planning, you can use what you already have or find cheaply. It’s all about knowing what your plants need and finding creative ways to meet those needs.
Finding the right spot is your first step. Most veggies need 4 to 6 hours of direct sunlight daily. Look around your place for sunny spots. Balconies, patios, and small corners are great. If space is tight, try container gardening. For more room, raised beds are a good choice.
Budget-Friendly Container Options
Containers are perfect for small spaces. You don’t need to buy expensive pots. Look for free or cheap options around your home and neighborhood:
- Five-gallon buckets (ask local restaurants or bakeries for used ones)
- Whiskey barrels cut in half
- Large plastic trash cans
- Fabric smart pots (Gro Pro and Hydrofarm make affordable versions starting around $5)
- Hanging baskets for herbs and lettuce
Remember to drill drainage holes in any container. Without them, roots will rot and plants will die. Make at least 4 to 6 holes in the bottom of each container.
Building Affordable Raised Beds
Raised beds are great for when you have ground space. The half cinder block method is almost free:
| Bed Size | Number of 4″ Blocks | Estimated Cost | Time to Build |
|---|---|---|---|
| 8 feet x 4 feet x 8 inches high | 24 blocks | $36 | 20 minutes |
| 4 feet x 4 feet x 8 inches high | 12 blocks | $18 | 10 minutes |
| 8 feet x 2 feet x 8 inches high | 12 blocks | $18 | 15 minutes |
Stack the blocks in a rectangle, two high. The holes in cinder blocks are perfect for herbs like basil and thyme. Other materials like bricks, reclaimed wood, and old tires also work well for a budget-friendly garden.
Preparing Your Soil Mixture
Good soil is key. The best mix has equal parts:
- Compost or aged manure
- Vermiculite, perlite, or sand for drainage
- Garden soil or topsoil
This mix gives nutrients, drainage, and structure. If you can’t find all three, use quality organic potting soil for containers. For raised beds, mixing topsoil with compost works well. Don’t forget the compost—it feeds your plants as they grow.
Site Preparation Made Simple
If you’re putting a raised bed on grass, remove the sod first. You have two ways to do this:
- Time-intensive method: Cover the area with a black tarp or plastic for 2 to 4 weeks. The grass dies underneath, then you place your bed on top.
- Labor-intensive method: Use a spade to cut and remove the sod layer, then place your bed directly on bare soil.
Use landscape fabric or cardboard on the bottom to stop weeds. Your garden planning should focus on function over perfection. Even imperfect setups can produce a lot of food if you plant the right crops and care for them properly.
Best Fast-Growing Emergency Crops for Maximum Production
Choosing the right plants is key in emergency food gardening. You want fast-growing crops that give quick results and build food security for months. Some veggies mature in weeks, while others last longer but store better.
Knowing which plants fit your space and timeline is important. Whether it’s a small balcony or a big garden, the right choices turn limited space into reliable food sources.

Quick Harvest Vegetables That Regrow
Some veggies produce food in weeks and keep giving all season. These plants use the “cut and come again” method. This means you remove outer leaves or crops while the plant keeps producing.
Leaf lettuces are fast, maturing in about 40 days. You can fit many in small spaces. Radishes are even faster, taking just 25 days, and need little space. Survival gardens benefit greatly from these fast-growing plants that tolerate shade and cool weather.
Spinach, kale, and Swiss chard do well in cool seasons. They keep producing leaves for months. Kale even gets better after frost, making it super nutritious.
- Leaf lettuces: Ready in 40 days, regrow after cutting, grow in containers
- Radishes: Mature in 25 days, take little space, replant every two weeks
- Spinach: Cool-weather crop, harvest leaves for months, freezes well
- Kale: Survives frost, improves after freezing, super nutritious
- Swiss chard: Colorful, nutrient-dense, produces all season
Storage Crops for Long-Term Food Security
While quick veggies satisfy hunger now, storage crops build lasting food security. These take longer but reward patience with long-lasting harvests. Root veggies, winter squash, and alliums are key for emergency food.
Carrots produce 16 roots per square foot and last months in cool, dark places. Beets and potatoes offer similar storage with great nutrition. Winter squash yields 6 to 8 fruits per plant, lasting up to a year when cured. Onions and garlic store almost the entire season, adding flavor and health benefits.
| Crop | Days to Maturity | Yield Per Plant/Area | Storage Method | Storage Duration |
|---|---|---|---|---|
| Carrots | 60 | 16 per square foot | Cool, dark space or root cellar | 4-6 months |
| Beets | 55-70 | 12 per square foot | Cool storage with greens removed | 3-5 months |
| Winter Squash | 80-110 | 6-8 per plant | Cool, dark, ventilated area | Up to 1 year |
| Potatoes | 70-90 | 5 pounds per 5-gallon bucket | Cool, dark cellar or storage bin | 4-6 months |
| Onions | 100-120 | 12 per square foot | Cool, dry place with air circulation | 6-8 months |
| Garlic | 240 (planted fall) | 8 per square foot | Braided or cool storage | 8-10 months |
Tomatoes are great for both quick production and long storage. A single plant can produce 12 pounds of fruit. You can eat them fresh, sun-dry, freeze, or can them.
Cucumbers deliver 5 to 10 pounds per plant with little effort. They’re perfect for fresh eating or pickling. Bush beans produce over 1 pound per plant and dry well for winter soups.
Building an emergency garden with fast-growing and long-term crops creates lasting food security. Start with quick producers for immediate nutrition. Then, fill your space with storage crops for extended supplies. Watch your garden become a reliable food source for your family all year.
Maximizing Your Backyard Emergency Food Supply in Limited Space
You don’t need a lot of land to have a productive backyard emergency food supply. The Square Foot Gardening method lets you grow a lot of food in a small space. It divides beds into square-foot sections and plants specific amounts of each crop. This way, you make the most of every inch, perfect for those with little yard space.
Whether you live in an apartment or a house, you can turn your space into a garden. The key is knowing your sunlight and choosing the right growing method for your situation.
Garden Plans for Different Spaces
Your backyard emergency food supply can start small and grow. Here are plans for different spaces:
| Garden Size | Total Yield | Best For | Key Crops |
|---|---|---|---|
| 4′ × 4′ Raised Bed | 45+ lbs | Small yards, beginners | 18 lettuce, 18 spinach, 32 carrots, 18 beans, herbs |
| 4′ × 8′ Raised Bed | 120 lbs | Medium spaces | 36 lettuce, 64 carrots, 18 spinach, 36 beans, 2 zucchini |
| Two 4′ × 8′ Beds | 190+ lbs | Dedicated gardeners | 36 lettuce, 64 carrots, 36 beans, 4 peppers, 36 garlic, 12 potatoes |
| Balcony/Patio Setup | 20-40 lbs | Apartments, condos | Hanging lettuce, cherry tomatoes, radishes, herbs |
These impressive yields come from spaces smaller than a typical bedroom. A single 4′ × 8′ bed can produce enough vegetables for your family’s meals all season.
Vertical Growing Strategies
Training plants upward saves space in your backyard emergency food supply. Vertical growing is great for:
- Cucumbers on trellises
- Beans on poles or fence panels
- Tomatoes with sturdy stakes
- Winter squash on strong supports
- Peas on netting or strings
Vertical arrangements can double your production in the same space. They also improve air circulation around plants.
Container and Patio Solutions
Apartment dwellers can build a substantial backyard emergency food supply using containers. You need 4-6 hours of direct sunlight daily, ideally on a south-facing balcony or patio.
- Hanging baskets for lettuce, greens, and radishes
- Railing planters for cherry tomatoes and herbs
- Window boxes for quick-growing greens
- 5-gallon containers for peppers and beans
- Large barrels for potatoes or root crops
Mix and match these containers to create a flexible growing system. This lets you expand your food security gardening as you gain confidence and harvest space.
Space-Saving Planting Tips
Maximize productivity by interplanting fast-growing crops between slower ones. Radishes mature in 3-4 weeks, making room for later plantings. Green onions grow quickly in gaps between larger plants. Herbs like basil, parsley, and cilantro fit into small spaces while adding nutritional value.
Root vegetables in central beds keep soil undisturbed. Place warmth-loving crops on the southern side with abundant sunlight. Your backyard emergency food supply grows stronger when every square inch serves a purpose.
Essential Tips for Disaster Preparedness Gardening Success
Growing food at home is a skill that takes practice and care. To succeed in disaster preparedness gardening, you need to know basic maintenance and how to preserve your harvest. These skills turn your garden into a reliable food source. Let’s look at the practical steps to keep your garden thriving and your food secure.
Watering and Maintenance Basics
Water is key in disaster preparedness gardening. Most vegetable gardens need about 1 inch of water per week. Container gardens need a bit more because they dry out faster.
To check if your plants need water, stick your finger into the soil about 2 inches deep. If it’s dry, it’s time to water.
Light daily watering is better than heavy weekly watering, which is important in hot months. This keeps the soil moist without drowning the roots. Mulch also helps by reducing water loss and controlling weeds. Use 2-3 inches of straw, wood chips, pine shavings, or newspaper around your plants.
Weeding is important in your garden routine. Weeds take nutrients and water from your vegetables. Hand weeding is a mindful activity that reduces stress. Regularly picking vegetables also helps.
Most plants produce more when you harvest frequently. Leaving ripe produce on the plant signals the end of the season. So, picking regularly encourages continued growth.
Visit your garden daily. Check soil moisture, remove weeds, pick ripe vegetables, and observe plant health. This routine is good for your mental health and keeps your gardening investment productive. For fertilizing, compost is best in emergencies. Apply compost around struggling plants to boost nutrients naturally.
Preserving Your Harvest for Year-Round Food Security
Your disaster preparedness gardening success goes beyond the growing season with proper preservation. Different vegetables need different storage methods. Here’s a table showing the best preservation technique for common garden vegetables:
| Vegetable | Best Preservation Method | Storage Duration |
|---|---|---|
| Tomatoes | Canning or sauce making | 1-2 years |
| Leafy Greens | Blanching then freezing | 8-12 months |
| Carrots | Fresh storage in cool space or pickling | 4-6 months fresh |
| Winter Squash | Fresh storage in dark, cool location | 2-3 months |
| Beans | Blanching then freezing | 8-12 months |
| Potatoes | Fresh storage in basement or root cellar | 3-4 months |
| Cucumbers | Pickling | 6-12 months |
| Peppers | Freezing or pickling | 8-12 months |
Preservation methods include canning, freezing, drying, pickling, and cool storage. Root crops like potatoes, carrots, beets, and onions store well in dark, ventilated spaces. Leafy greens freeze beautifully after quick blanching. Tomatoes, peppers, and cucumbers are great for canning and pickling. Making sauces and jams adds variety to preserved foods.
Preserved vegetables are highly nutritious and valuable. Freezing maintains more nutrients than other methods. Your disaster preparedness gardening reaches its full when you preserve abundance for winter months and emergencies. Store preserved items in cool, dark spaces away from direct light and temperature swings.
Conclusion
Growing an emergency garden is a smart move for your home. You can start growing food anywhere, with any budget, and at any skill level. This journey from seed to harvest brings you real food security and peace of mind.
Starting small is key. Begin with a single container of lettuce or a handful of radish seeds. Every expert gardener began where you are now. Your goal is to produce food and be self-sufficient, not to have perfect plants. As you get more experience, your confidence and harvest will grow.
Growing food does more than just feed you. It calms your mind and builds your resilience. Unlike stockpiles that run out, this skill lasts forever. You take back control over your food supply and enjoy the taste of something you grew yourself. The best time to start is now, today, in this moment.
You have everything you need to begin. Growing an emergency garden is within your reach, waiting for you to start. Begin today and see the power of feeding yourself and your family. This is not just for emergencies. It’s a rewarding lifestyle that brings joy, nutrition, and real security to your life.
FAQ
Can I really grow an emergency garden if I’ve never gardened before?
Yes, you can! Growing an emergency garden is perfect for beginners. You don’t need experience or a green thumb to start. Fast-growing veggies like lettuce and radishes are easy to care for.
Start small with a few containers or a raised bed. This will help you build confidence and learn as you go. Remember, every gardener starts from scratch, and you’ll learn as you grow.
What if I only have a small balcony or patio with limited space?
Space isn’t a problem for growing food. Container gardening works great for small areas. Use vertical growing to make the most of your space.
A 4’x4′ raised bed can produce over 45 pounds of food. Even a small balcony can help with your diet. Choose high-yield crops and use vertical space to maximize your area.
How much money do I need to spend to set up an emergency garden?
You can start an emergency garden on a tight budget. Use recycled materials like buckets and pallets for containers. Raised beds made from cinder blocks are cheap and sturdy.
Make your own soil mix using compost and other materials. Seeds are very affordable. You can set up a productive garden for under .
How much sunlight does my emergency garden need?
Most veggies need 4-6 hours of sunlight daily. Leafy greens can handle less light, making them great for shady spots. Tomatoes and squash need 6-8 hours of sun.
Check your space to find the sunniest areas. South-facing spots get the most sunlight. If it’s too shady, grow shade-tolerant plants.
What are the fastest vegetables to grow in a crisis gardening situation?
Leafy greens and radishes grow the fastest. Radishes are ready in 25-30 days. Leaf lettuce takes 30-40 days and can be harvested continuously.
Spinach, arugula, and green onions are also quick. These fast-growing plants help you get food quickly. Succession planting ensures a continuous harvest.
Which vegetables should I grow for long-term storage and food security?
Root veggies like carrots and potatoes store for months. Winter squash and pumpkins last 3-6 months. Onions and garlic store well when cured.
Tomatoes can be canned, frozen, or made into sauce for long-term storage. These crops take longer to grow but are worth it. A single potato plant can yield 5-10 pounds.
What is the Square Foot Gardening method, and how can it help my emergency garden?
Square Foot Gardening maximizes space by dividing it into squares. Each square can hold different amounts of plants. This method saves space and water.
A 4’x4′ bed can produce 45+ pounds of veggies. It’s great for small spaces like balconies. This method helps you use every inch of space.
How often should I water my emergency garden?
Most gardens need about 1 inch of water weekly. Daily light watering is better for containers. Use the finger test to check soil moisture.
Mulching retains moisture and keeps roots cool. Container plants need more water than raised beds. Drip irrigation delivers water directly to roots.
Does regular harvesting actually increase my plant production?
Yes, regular harvesting boosts production. It tells plants to produce more. Harvesting leafy greens continuously encourages new growth.
Cherry tomatoes and beans produce more when picked often. Daily visits to your garden improve production and mental health.
What preservation methods work best for different vegetables?
Different veggies suit different preservation methods. Tomatoes are great for canning. Leafy greens freeze well.
Root veggies store fresh for months. Herbs dry well. Match preservation methods to your equipment and storage.
Can I really produce meaningful amounts of food in a small emergency garden?
Yes, small gardens can produce a lot of food. A 4’x4′ bed can yield 45+ pounds of veggies. A 4’x8′ bed produces about 120 pounds.
Container gardens on balconies can also produce a lot. Even a small garden can supplement your diet. It’s not just about the food; it’s about the sense of security.
Is gardening really beneficial for mental health during crises or emergencies?
Yes, gardening is very beneficial for mental health. It gives you a positive focus and reduces anxiety. Daily visits to your garden can be calming.
Gardening connects you with nature and improves your mood. It’s a way to feel in control during uncertain times. Gardening is a natural stress reliever.
What if I don’t have access to quality soil for my emergency garden?
You can make do with what you have. Use a mix of compost, peat moss, and perlite for good soil. Homemade compost or local garden soil can work.
Layer materials like cardboard or newspaper at the bottom of containers. This improves your soil as you garden. Start with what you have and improve it over time.
How do I prevent weeds without using chemicals in my emergency garden?
Mulch is your best defense against weeds. A 2-3 inch layer blocks sunlight and prevents weed growth. Hand-pulling weeds is simple in containers and raised beds.
Regular visits to your garden help catch weeds early. Avoid deep tilling, which brings weed seeds to the surface. Healthy plants outcompete weeds in well-maintained gardens.
Can I use fertilizer, or should my emergency garden be organic?
You don’t need expensive fertilizers. Compost is the best option. It feeds your plants slowly and improves soil structure.
Use kitchen scraps and yard waste for compost. If needed, add fish emulsion or seaweed extract for quick nutrition. Organic methods build sustainable soil fertility.
What’s the best way to set up drainage in containers for my emergency food garden?
Drainage is key for container gardening. Make sure containers have drainage holes. Drill holes in buckets or barrels before filling with soil.
Fill the bottom with rock or gravel for air space. Use mulch to prevent soil washing out. Well-draining potting mix and fabric smart pots prevent waterlogging.
How much space does my emergency garden actually need to make a real difference?
Even small spaces can produce a lot of food. A 4’x4′ bed can yield 45+ pounds of veggies. A 4’x8′ bed doubles that.
Container gardens on balconies can also produce a lot. Use vertical space and high-yield crops to maximize your area. Even small spaces can help with your diet.
When should I start seeds versus buying transplants for my emergency garden?
Both seeds and transplants work for emergency gardens. Seeds are cheap and perfect for budget-conscious gardeners. Direct seeding works well for some veggies.
Transplants save time and are good for certain crops. Combine both methods for the best results. Start seeds for cheap crops and buy transplants for others.