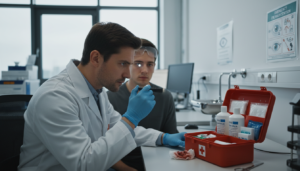
Imagine hiking in the mountains or camping far from town when someone falls. A bone breaks. Medical help won’t come for hours, maybe days. Knowing how to splint a broken bone is key in this situation.
This skill can prevent serious issues. It helps manage pain and stops further injury. It’s vital when you’re far from hospitals and doctors.
A splint keeps a broken bone stable. It protects the area until medical help arrives. Whether you’re in the wilderness or waiting for an ambulance, the right splint can make a big difference.
This guide teaches you about emergency splinting. You’ll learn to spot serious fractures and gather materials. You’ll also learn how to apply a splint correctly and watch for warning signs.
We’ll cover when to seek help immediately and how to handle unusual situations. Remember, this is for emergency situations only. Always choose professional medical treatment when possible.
Use these techniques as a temporary fix until a doctor can treat the injury. If you’re in a remote area with an injury, call for emergency medical help as soon as possible. For detailed medical guidance, check out how to splint a broken bone from trusted health organizations.
Table of Contents
Recognizing When Emergency Splinting Is Necessary
Figuring out if you have a serious fracture is key to knowing if you need to stabilize a broken bone. Not every injury needs emergency splinting, but some do require fast action. Knowing the warning signs can help avoid serious complications.
Signs of a Fracture That Requires Immediate Stabilization
A real fracture shows clear signs that are different from minor sprains or bruises. Trust your gut if something feels off at the injury site.
Watch for these warning signs:
- Severe pain that gets worse when you move the injured area
- Visible deformity or an unnatural angle to the limb
- Inability to bear weight or use the affected arm or leg
- Rapid swelling and bruising that develops quickly after injury
- Grinding or popping sensation at the moment of injury
- Limited range of motion that didn’t exist before
- Numbness or tingling beyond the injury site
If you see any of these signs, you need to stabilize the fracture. Doing so quickly helps prevent more damage.
Understanding the Risks of Delaying Immobilization
Waiting to stabilize a fracture can lead to more problems. Every minute without support lets bone pieces move and cause more harm.
| Risk Factor | What Happens Without Immobilization | Impact on Recovery |
|---|---|---|
| Bone Fragment Movement | Broken pieces grind against surrounding tissue | Increases pain and internal bleeding |
| Blood Vessel Damage | Fragments puncture or compress blood vessels | Cuts off oxygen supply to tissues |
| Nerve Compression | Swelling puts pressure on nearby nerves | Causes numbness, weakness, or permanent damage |
| Closed to Open Fracture | Bone breaks through the skin from movement | Creates infection risk and requires surgery |
| Shock Development | Blood loss and pain trigger shock response | Becomes life-threatening without treatment |
| Healing Complications | Bone sets in incorrect position | May require re-breaking and resetting later |
Immobilizing a fracture keeps bone pieces stable and prevents complications. Using the right splinting techniques reduces pain, limits tissue damage, and preserves blood flow. Quick action with emergency splinting can prevent a bad injury from getting worse.
The simple rule is: when in doubt, splint it out. Splinting a minor injury won’t hurt, but not splinting a real fracture can cause lifelong problems. Your fast action in the first hours can greatly affect healing.
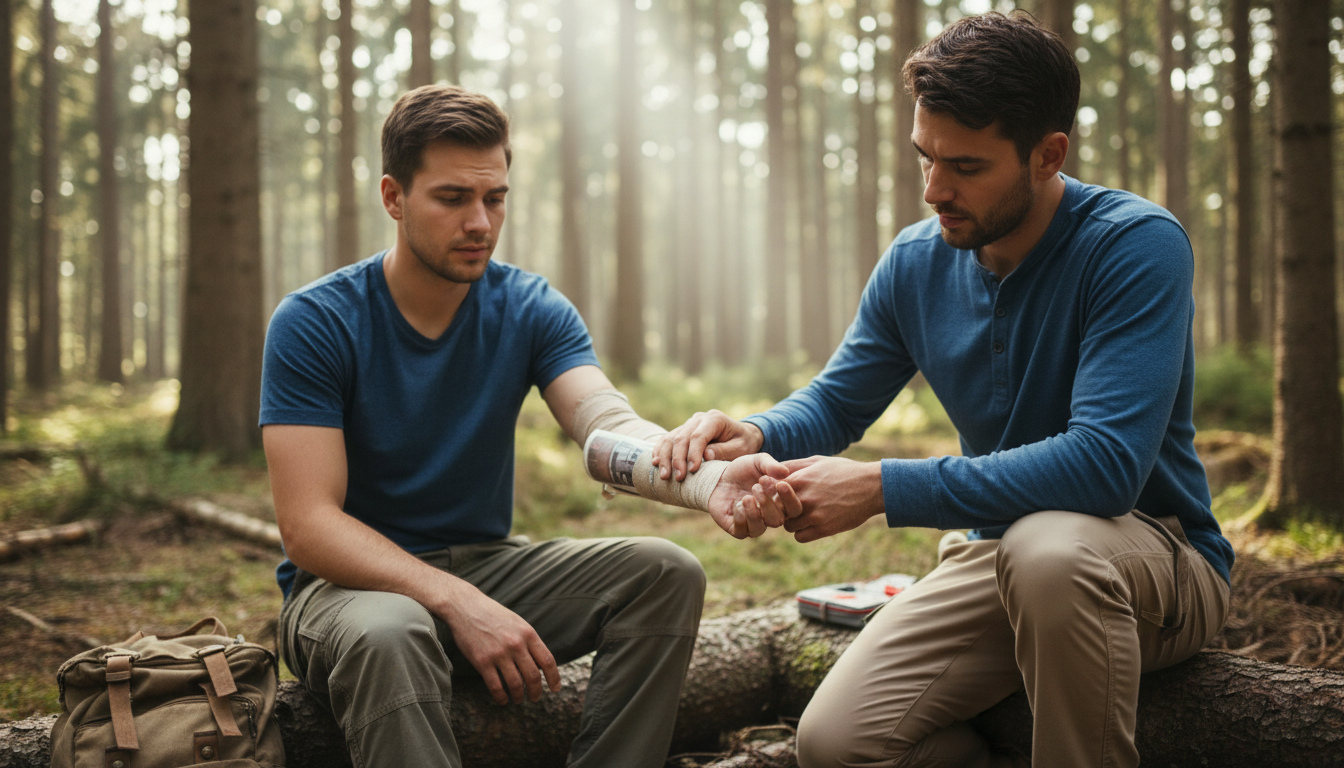
Gathering Makeshift Splint Materials in Remote Locations
Being far from medical help means you must find splint materials nearby. The best splints have two parts: something rigid to keep the bone in place and soft padding for comfort. Knowing what to look for is key to saving limbs in emergencies.
Your surroundings offer many rigid options. Look for straight tree branches or sticks in forests. Hikers can use trekking poles or tent poles. In towns, rolled newspapers, magazines, or cardboard are good. Even books, umbrellas, or foam sleeping pads can work if rolled tightly. The goal is to find something that won’t bend under gentle pressure.
For padding, look for soft, protective materials. Clothing like shirts, socks, and bandanas are great. Towels and blankets also cushion well. In nature, moss or leaves wrapped in fabric can be used. Foam from backpack straps adds comfort and protection.
Securing your splint needs strong ties and fasteners:
- Belts and shoelaces
- Cloth strips torn from clothing
- Bandanas and scarves
- Rope or paracord
- Duct tape if available
- Vines in extreme wilderness situations
A clever technique called buddy taping uses your body as a splint. Tape an injured finger to the next one, or an injured toe to its neighbor. This method keeps the injured part stable without extra materials.
Being creative with what’s around you is the best way to gather splint materials. You don’t need fancy medical supplies to make effective emergency splints.
How to Splint a Broken Bone
Knowing how to splint a broken bone can save you from serious damage when help is far away. The steps to splint a bone need patience and attention to detail. Your main goal is to keep the injured area completely stable and safe from further harm. This guide will help you through each step of splinting in an emergency.
Caring for Open Wounds Before Applying a Splint
Before splinting, you must clean any open wounds on the injured limb. An open wound can get infected, leading to serious problems if medical help is delayed.
Here’s how to protect the wound:
- Use clean water to gently rinse the wound if water is available
- Pat the area dry with the cleanest cloth you have
- Cover the wound with clean fabric or a cloth bandage
- Do not remove any object that is embedded in the wound
This basic care keeps dirt and bacteria out of the wound. It’s not sterile, but it helps protect the wound until help arrives.
Positioning the Injured Limb Correctly
A key part of splinting is to splint as found. This means you should not try to straighten, realign, or reposition the broken bone.
Trying to move a fracture can cause serious damage:
- Blood vessels may be torn, cutting off blood flow
- Nerves can be stretched or crushed
- Soft tissue around the bone can be further damaged
- Pain will increase dramatically
Keep the injured limb in the exact position you found it. The only exception is if the skin appears very pale or cold and you are many hours from medical care. In that rare case, gentle repositioning may be necessary, but move with extreme caution and stop immediately if you meet resistance.
Securing the Splint Without Cutting Off Circulation
Securing the splint correctly ensures immobilization without harming the limb. Follow these steps to apply splint correctly:
| Step | Action | Important Note |
|---|---|---|
| 1 | Add padding between the splint and skin | Use cloth, blankets, or soft materials |
| 2 | Place rigid supports on opposite sides of the injury | Extend splint beyond the injury area |
| 3 | Include joints above and below the fracture | Prevents movement of connected bones |
| 4 | Secure with ties at multiple points | Never place ties directly over the fracture |
| 5 | Position knots away from the injury site | Prevents additional pressure on damaged tissue |
| 6 | Make ties snug but not tight | You should slip one finger under each tie |
Ties that are too tight can cut off blood circulation to the limb. This can cause tissue death and permanent damage. A properly secured splint holds the injury stable without restricting blood flow. Check frequently that the limb below the splint remains warm, pink, and has normal sensation.
Learning to splint a broken bone takes practice, but these steps help you stay focused in an emergency. Take your time, work carefully, and remember your goal is to immobilize and protect the injury until medical help arrives.
Emergency Splinting Techniques for Different Body Parts
Different body parts need different splinting methods in emergencies. The location of the fracture guides how you stabilize it. Knowing these techniques helps you care for injuries in remote areas with available materials.
Arm and Wrist Fractures
For lower arm or wrist fractures, use a folded newspaper or thick clothing as a cradle. Place the arm at a 90-degree angle if you can. Use cloth ties or fabric strips to hold it in place.
You can also make a sling from a triangular bandage or large fabric. This supports the arm and keeps it against your body.
Hand and Finger Fractures
Hand and finger injuries need gentle care. Buddy taping is a good emergency method. Use a stick, ruler, or spoon as padding next to the injured digit.
Wrap padding around both fingers. This method keeps the broken bone segments aligned.
Lower Leg and Ankle Fractures
Lower leg or ankle fractures need strong support. Wrap the leg in padding like a blanket or thick clothing. Use cloth strips or ties to secure it.
If you have materials, place boards or sticks on either side of the leg. The splint should go from above the knee to past the foot. This provides great stability.
| Injury Location | Primary Materials | Positioning | Key Considerations |
|---|---|---|---|
| Lower Arm/Wrist | Newspaper, magazine, or folded clothing | 90-degree angle at elbow | Use cloth ties for security; create a sling for support |
| Hand/Fingers | Stick, ruler, or spoon with padding | Buddy taping to adjacent finger | Maintain gentle alignment; wrap both fingers together |
| Lower Leg/Ankle | Blanket, padding, or boards/sticks | Extended from knee to foot | Bilateral support; secure with cloth ties |
| Upper Leg (Femur) | Blanket, board, or second leg binding | Bind to opposite leg with padding between | Immobilize entire leg as one unit |
| Hip/Pelvis | Blanket or board (movement last resort) | Both legs strapped together with padding | Avoid moving if possible; board transfer only if necessary |
| Collarbone/Shoulder | Sling from fabric or triangular bandage | Arm against body | Support weight; restrict movement |
Upper Leg, Hip, and Pelvis Injuries
Upper leg fractures are serious and need full immobilization. Bind the injured leg to your other leg with padding. Keep both legs together as one unit.
For hip and pelvis fractures, do not move the person unless absolutely necessary. Only move them in danger like fire or flood. If you must move, secure both legs together with padding.
Gently place the person on a rigid board and move them as a single unit. This prevents further damage.
Collarbone, Rib, and Shoulder Injuries
Collarbone and shoulder injuries benefit from supportive slings. Make a sling from a triangular bandage or large fabric. It holds the arm against the body, reducing movement and pain.
For rib injuries, wrap the chest with cloth or elastic material. This provides compression and support. These injuries need care to prevent complications, so binding should be snug but never tight enough to restrict breathing.
Even imperfect emergency splinting techniques provide critical protection when professional medical help is hours away. The goal is to immobilize broken bone as best you can with available resources. For detailed guidance on professional splinting methods, consult evidence-based splinting protocols. Your quick action and proper immobilization can prevent serious complications and reduce pain during evacuation.
Monitoring Circulation and Adjusting Your Splint
Putting on a splint is just the start. You must keep an eye on the injured area after applying it. Check the limb every 15 to 30 minutes to ensure blood flow and nerve health.
It’s vital to spot problems early. A splint that’s too tight can cause serious harm. Swelling after a fracture can make a splint too tight. So, regular checks are key for safe splint use.
Checking for Swelling, Paleness, and Numbness
Watch for five warning signs when checking the injured area. These signs show if the splint is working right or causing harm.
- Pain: More pain means the splint might be too tight
- Pallor: White, pale, or blue skin means poor blood flow
- Paresthesia: Tingling or “pins and needles” means nerve compression
- Pulselessness: No pulse below the injury site
- Paralysis: Loss of movement in fingers or toes
For arm injuries, check your fingertips. Look at their color and warmth. Press on a fingernail and watch the color return quickly. Ask the person to wiggle their fingers. Touch the fingers lightly to check for normal feeling. Repeat the same steps on the toes for leg injuries.
When to Loosen or Remove the Splint
If you see swelling, paleness, numbness, or growing pain, act fast. Loosen the splint ties gently. Don’t remove it completely. Just loosen it enough to bring back blood flow while keeping the bone stable.
Some swelling is normal after a fracture. But swelling that makes the limb tight against the splint is a problem. You must adjust the splint to prevent damage.
If pain gets much worse after putting on the splint, remove it and get medical help right away. This sharp pain rise may mean the splint is causing permanent harm.
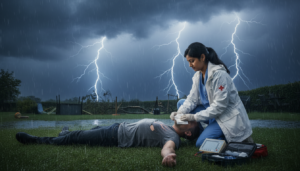
Critical Situations That Require Immediate Medical Evacuation
Being far from help means knowing when to call for rescue is key. Not all fractures need immediate help, but some do. Spotting these signs early can save lives.
Some injuries are emergencies that can’t wait. If you’re in a remote area, call 911 or send someone for help. Every second is critical.

Look out for these critical warning signs that need immediate medical help:
- Bone piercing through the skin (compound fracture) with high infection and bleeding risk
- Open wounds at the injury site that cannot be controlled
- Complete loss of feeling below the injury
- No pulse or warmth below the injured area
- Fingers or toes turning blue, purple, or white with numbness
- Signs of shock including rapid heartbeat, shallow breathing, or confusion
- Fractures involving the skull, neck, back, or pelvis
- Severe bleeding that won’t stop
Older adults with hip or femur fractures are at high risk. These injuries can lead to serious complications. Getting them to a doctor quickly is essential.
While waiting for help, keep the injured person warm and calm. Use splinting and monitoring techniques. Your fast action and care can greatly improve their chances of recovery.
Conclusion
You now know how to handle broken bones and fractures. The steps are easy to remember. First, spot the injury signs and keep the limb as it is. Then, find materials for a splint and immobilize the joints.
Make sure the splint doesn’t cut off blood flow. Watch for swelling, paleness, and numbness. Most importantly, seek medical help as soon as you can.
Preventing broken bones is the best strategy. Wear protective gear like helmets and knee pads. Take breaks to avoid muscle and bone fatigue.
Stay fit to improve balance and strengthen bones. Be cautious of your surroundings and know your limits. These steps lower your risk of needing emergency first aid.
Think about taking a wilderness first aid course. Practice with trained instructors. Keep a basic first aid kit handy and always tell someone your plans.
Learning basic first aid skills empowers you in emergencies. It lets you act confidently when it counts.
You might never face a broken bone in the wilderness. But if you do, you’re prepared. Medical care is essential, but your immediate action is just as important.
Your quick response can prevent more harm, reduce pain, and even save a life. That knowledge and confidence are invaluable.
FAQ
What are the main signs that indicate I have a broken bone that needs immediate splinting?
Signs of a fracture needing splinting include severe pain and visible deformity. You might also see swelling, bruising, and difficulty moving the limb. If something looks or feels wrong, it probably is. These signs mean you need to start splinting the injury right away.
Why is fracture immobilization so critical in emergency situations?
Immobilizing a fracture prevents serious complications. Without stabilization, bone fragments can cause more pain and damage. This can lead to nerve damage, open fractures, and increased blood loss. Proper splinting is key to healing, even after medical help.
What everyday items can I use to create a makeshift splint in a wilderness emergency?
You can use common items to make splints. Straight sticks or poles work well for support. Use clothing or foam for padding. Secure everything with belts, shoelaces, or tape. Be creative with what you have around you.
Should I try to straighten a broken bone before splinting it?
No, never try to straighten a broken bone. This can cause more damage. Only in extreme, remote situations should you try to reposition the limb. Even then, do it with great caution.
What are the correct steps for applying a splint to an injured limb?
First, clean any open wounds. Then, add padding to protect the skin. Place rigid supports on both sides of the injury. Extend the splint to immobilize joints above and below the fracture. Secure it with ties, but make sure it’s not too tight. This ensures proper stabilization.
How do I splint a broken arm or wrist when I’m far from medical help?
For arm and wrist fractures, create a cradle using a folded newspaper or clothing. Secure it with cloth ties. Use a sling to support the arm’s weight. This combination provides effective immobilization for upper limb injuries.
What should I do for a broken finger or toe in a remote location?
Use the buddy taping technique to immobilize the injured digit. Tape it to an adjacent digit. You can also add a padded support using a stick or spoon. This method uses the body as a splint.
How do I splint a lower leg or ankle fracture with improvised materials?
Create a splint using boards or sticks on either side of the leg. Extend it from above the knee to past the foot. For a femur fracture, bind the injured leg to the uninjured one. This prevents dangerous movement.
How often should I check the splinted limb for circulation problems?
Check every 15 to 30 minutes for signs of poor circulation. Look for pain, pallor, paresthesia, pulselessness, and paralysis. For arm injuries, check if fingertips are warm and the right color. Perform similar checks on toes for leg injuries. This is essential for preventing permanent damage.
What should I do if the splint is causing swelling, numbness, or increased pain?
Loosen the splint immediately if it’s causing swelling or numbness. If pain increases, remove the splint and seek medical help. It’s better to have a slightly loose splint than risk permanent damage.
What types of fractures are true medical emergencies requiring immediate evacuation?
Seek immediate help for compound fractures, open wounds, nerve damage, circulation problems, and severe bleeding. Also, evacuate hip or femur fractures in older adults. If you can’t reach help within hours, activate emergency services or start self-evacuation.
Can I apply a splint and then wait days for professional medical help?
While splinting can stabilize a fracture, don’t delay seeking medical help. Splinting is a temporary measure. Actively try to reach medical help as soon as possible. Monitor circulation and adjust the splint if needed. Medical professionals will assess the splint and any additional damage.
What should I include in a first aid kit if I’m heading into remote areas?
Include elastic bandages, tape, padding, and splinting materials. Add pain relief, antibiotic ointment, and a first aid manual. Always tell someone your plans and location. This prepares you for emergency splinting situations.
How can I reduce my risk of fractures while enjoying outdoor activities?
Wear protective gear and avoid muscle fatigue. Stay fit to improve balance and bone strength. Be aware of hazards and know your limits. Taking wilderness first aid courses can also help. These steps reduce your risk of needing emergency care.
What’s the difference between caring for a fracture in a wilderness emergency versus an urban setting?
The principles of splinting are the same, but time to help varies. In cities, get to a hospital quickly. In wilderness, you may need to be more resourceful and monitor closely. Knowing how to stabilize a fracture is key in both situations.