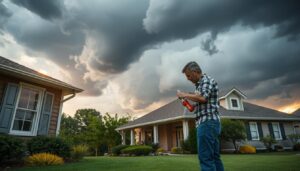
Severe storms can hit without warning. Your roof is often the first to suffer. Roof damage after a storm is a big problem for homeowners in the U.S. every year.
Storms can take many forms. Tornadoes, hurricanes, hailstorms, and summer squalls all threaten your roof. Coastal areas face hurricane risks. The Midwest deals with tornado damage. The Great Plains experience hail damage. No matter where you live, your roof needs protection.
The National Roofing Contractors Association has a key message. Always inspect your roof from the ground after a storm. Never climb onto your roof yourself. This keeps you safe from falls and further injury.
Storm damage roof repair needs a pro. A skilled roofing contractor has the right tools and knowledge for safe repairs. They can find damage you might miss. They can fix problems correctly.
This article will guide you through every step. You’ll learn how to spot damage. You’ll know when to call a professional. You’ll understand how to work with your insurance company. You’ll also learn about emergency repairs. Let’s start protecting your home.
Table of Contents
Understanding Roof Damage After a Storm
Storms pose real dangers to your home’s roof. Different storms cause different types of damage. Knowing what to look for is key to protecting your family and home.
Your roof protects everything inside from rain, wind, and debris. When storms hit, your roof takes the first hit. Understanding the damage is the first step to keeping your home safe and dry.
Why Storm Damage Assessment Is Critical
Small roof damage can quickly turn into big problems. A missing shingle or tiny crack might seem minor. But water can seep in and damage your home’s interior.
Moisture leads to mold growth, affecting air quality and health. Wet insulation makes your home less warm or cool, raising energy bills. Structural wood can rot over time. A prompt assessment prevents these issues.
Water intrusion and mold spread silently behind walls. Foundation damage can occur when water pools around your home. Early evaluation stops small problems from becoming nightmares.
Common Types of Weather Events That Affect Roofs
Roofs face threats from many severe weather types across the U.S. Knowing your local weather risks helps you prepare and respond quickly.
| Weather Event | Wind Speed | Primary Damage Type | Affected Regions |
|---|---|---|---|
| Hurricanes & Tropical Storms | 74+ mph | Missing shingles, roof deck exposure, structural damage | Coastal areas, Gulf states |
| Tornadoes | 65-200+ mph | Roof removal, complete structural failure | Central plains, Midwest |
| Severe Thunderstorms | 40-80 mph | Torn shingles, branch impact, water damage | Nationwide |
| Hailstorms | Variable wind | Dented shingles, granule loss, leaks | Hail Alley (TX, OK, KS, NE) |
| Winter Storms & Ice Dams | 20-40 mph | Ice damage, water backup under shingles | Northern climates |
| Heavy Rain Events | Variable wind | Standing water, clogged gutters, leaks | All regions |
Hurricanes and tropical storms bring extreme winds above 74 miles per hour. These powerful systems strip shingles from roofs. They expose the underlayment and roof deck beneath. Coastal states along the Atlantic and Gulf face these threats most often during hurricane season.
Tornadoes create the most violent winds of any weather event. Spinning winds can exceed 200 miles per hour. Tornadoes can remove entire roof sections or topple roofs completely. The central plains and Midwest experience frequent tornadoes, mainly during spring and early summer.
Severe thunderstorms strike nationwide with high winds and heavy rain. These storms tear at shingles and knock branches onto roofs. Flying debris creates dents and punctures. The combination of wind and rain causes water to penetrate under shingles. Storm debris roof inspection becomes essential after these events to find hidden damage.
Hailstorms pummel roofs with ice balls of varying sizes. Large hail leaves visible dents and pockmarks in shingles. The impact knocks away protective granules that shield shingles from sun and rain. Even smaller hail can damage roofing materials over time. Texas, Oklahoma, Kansas, and Nebraska experience frequent hailstorms in an area known as “Hail Alley.”
Winter storms and ice dams create problems in northern climates. Ice buildup at roof edges blocks water drainage. Meltwater backs up under shingles and seeps into your home. Heavy snow adds weight to roof structures. Temperature fluctuations cause roofing materials to expand and contract.
Heavy rain events can occur anywhere in the country. Poor roof drainage creates standing water. Clogged gutters cause water to back up under shingles. Prolonged moisture weakens roofing materials and encourages leaks. After any major storm, use the Roof Storm Damage Checklist to guide your inspection and document what you find.
Different storms leave different calling cards on your roof. High winds scatter shingles across your property. Hail creates a pattern of dents across the roof surface. Debris impact causes localized damage in specific areas. Recognizing these patterns helps you understand what your roof has experienced. This knowledge prepares you for the detailed damage identification that comes next.
Identifying Different Types of Storm Damage to Your Roof
Severe storms can really take a toll on your roof. Knowing what happened is key to filing claims and fixing your roof. Storms cause different kinds of damage, and spotting these patterns is the first step to repair.
Storm damage varies a lot based on the weather. Wind, hail, and water all impact roofs in unique ways. Each type needs a different fix. Let’s look at what to check on your roof.
Wind Damage and Missing Shingles
Strong winds can rip shingles off your roof. Winds between 39 and 54 mph can lift shingles and break their seals. Winds over 74 mph can remove shingles completely, leaving your roof exposed.
Look for these signs of wind damage:
- Missing shingles after storm events that leave visible gaps
- Shingles that are lifted, curled, or creased but stay attached
- Torn shingle edges where overlaps meet
- Exposed underlayment or roof deck showing through
- Debris scattered around your yard from your roof
Even if shingles stay on, wind can damage the seal. This lets rain get under the shingles. When documenting damage for your wind damage roof insurance claim, take photos of all gaps and displaced shingles from different angles.
Hail Damage to Shingles and Roof Surface
Hailstorms can leave lasting marks on your roof. Hail creates dents, pockmarks, or bruising on shingle surfaces. It also knocks off protective granules that shield the asphalt underneath.
These granules are important:
- Protect asphalt from UV rays and sun damage
- Help shed water away from the roof
- Extend your roof’s lifespan significantly
- Give your roof its distinctive color and appearance
Even a little granule loss can shorten your roof’s life. Look for granule collections in your gutters after hailstorms. Hail damage might not be obvious from the ground, so a professional inspection is key for your insurance claim.
Water Damage and Leak Detection
Water can get into your home after storms. Finding roof leaks starts with spotting obvious signs like water stains on ceilings and dripping water in your attic.
Watch for these water damage indicators:
| Obvious Signs | Hidden Warning Signs |
|---|---|
| Water stains on ceilings | Musty odors in rooms |
| Dripping water in the attic | Peeling paint on walls |
| Visible moisture in the attic | Warped or soft wood |
| Puddles in your attic space | Mold spots appearing |
Poor drainage and clogged gutters can trap rainwater on your roof. This water can damage the underlayment and get into your roof deck and walls. This creates serious structural problems.
Knowing these damage types helps you talk to roofing contractors and insurance adjusters. Your observations guide the inspection process and support your claim.
Immediate Steps to Take After a Storm Hits
When a storm hits, you might want to check outside right away. But, safety comes first. Wait until the storm has fully left. Look out for power lines, broken trees, and debris. Never go on your roof to look for damage. It’s safer to let experts handle it.
When it’s safe, inspect your home from the ground. Walk around your house and look for roof damage. You might see shingles missing, gaps, or sagging areas. Make a note of what you see.
Documentation is key. Use your phone or camera to take pictures and videos. Include the date and time in your photos. This will help when you file an insurance claim. Also, take photos of any other damage, like gutters, siding, windows, and downed trees.
Key Actions to Take Immediately
- Check for water leaks inside your home and photograph any stains or damage
- Move valuable items away from affected areas
- Place buckets under active leaks to prevent water damage
- Cover broken windows with plastic sheets or boards (from inside only)
- Contact your insurance company right away to report the damage
- Schedule a professional roof inspection with a trusted contractor
Take photos of any interior damage too. Wet spots, stained drywall, and water inside your home show the storm’s impact. These photos will help your insurance claim.
Call your insurance provider quickly. Tell them what happened and share your photos. Then, find qualified roofing contractors for a professional check-up. They can spot damage you can’t see.
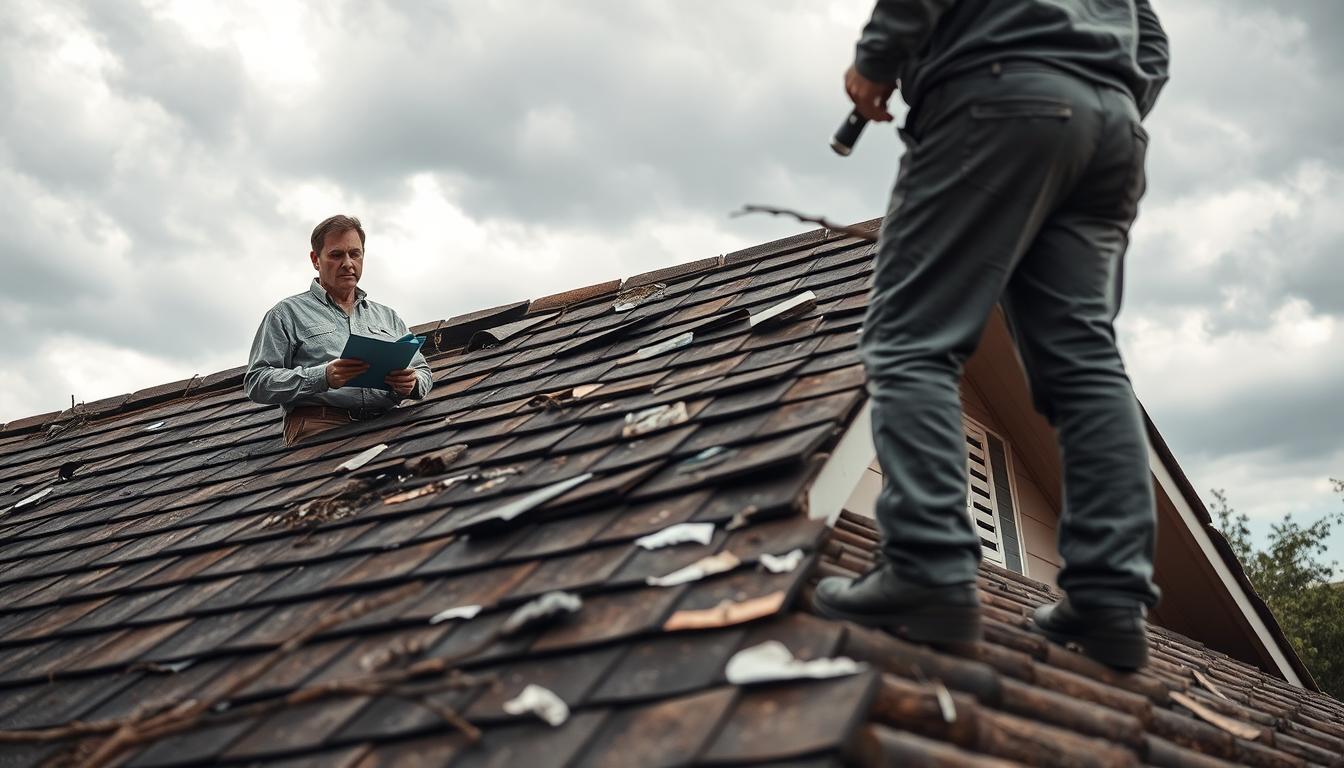
Conducting a Safe and Thorough Roof Inspection
After a storm, checking your roof is key. A detailed storm debris roof inspection helps you see the damage before calling experts. By reviewing your home’s exterior and interior, you can gather important info. This helps keep you safe and gives contractors the details they need.
Do your inspection during the day when it’s light. Take your time and document everything with photos and notes. Remember, this is just to find problems, not to fix them yourself.

Inspecting from Ground Level
Begin by walking around your house at different distances. Look at the roof’s shape and check for sagging or uneven areas. Use binoculars to see details without climbing up.
Look for these signs of damage:
- Missing or displaced shingles
- Curled or cracked shingles
- Bare spots where shingle granules have worn away
- Discolored areas on the roof surface
- Debris such as tree branches or leaves scattered across the roof
Take photos of every angle, even if it looks fine. These images help with insurance claims and contractor assessments.
Checking Gutters, Vents, and Surrounding Areas
Don’t forget to check gutters and roof accessories. Look for dents, separation, or a lot of granule buildup in your gutters. Granules in gutters mean hail damage to your shingles.
Inspect these components:
- Gutters and downspouts for dents or gaps
- Soffit and fascia boards for cracks or holes
- Roof vents, chimneys, and skylights for displacement
- Flashing around roof features for bending or separation
- Windows for cracks or broken glass
- Siding for dents, holes, or missing sections
- Outdoor air conditioning units for damage
- Fences, deck railings, and lawn structures for visible harm
Damage to these areas shows the storm’s strength. This info helps your insurance claim.
Examining Your Attic and Interior Ceilings
Interior damage often shows what’s hidden outside. Water leaks from storm damage might not be seen on the roof but show inside your home.
If you can safely get into your attic, bring a flashlight. Look for:
- Water stains on the roof deck’s underside
- Wet or damp insulation
- Daylight coming through roof gaps
- Musty or moldy odors
- Dark streaks indicating water travel patterns
Check all interior ceilings and walls for water stains, discoloration, bubbling paint, or sagging drywall. Water often travels along rafters or beams before dripping, so damage may appear far from the actual leak location.
Use your flashlight to inspect dark corners and spaces thoroughly. Document all findings with photos for your insurance provider and roofing contractor.
| Location to Inspect | What to Look For | Why It Matters |
|---|---|---|
| Roof surface | Missing shingles, cracks, granule loss | Direct storm damage requiring repair |
| Gutters and fascia | Dents, separation, granule buildup | Shows storm severity and water flow issues |
| Roof vents and flashing | Displacement, bending, gaps | Prevents water infiltration into attic |
| Attic | Water stains, wet insulation, light gaps | Reveals hidden water damage early |
| Interior ceilings | Water marks, paint bubbling, sagging | Indicates active or recent leaks |
Stay safe during your inspection. Never climb onto the roof if it’s wet or steep, and wear appropriate footwear with good traction. Your goal is gathering information, not performing repairs. Share all your findings with a professional roofing contractor who can conduct a complete assessment and recommend necessary repairs.
Working With Professional Roofing Contractors for Storm Damage Repair
After a storm hits, finding the right roofing contractor is key. They have the skills, tools, and knowledge you need. They can spot damage you might miss. Plus, they make sure your repairs meet local codes and keep your warranty valid.
After a storm, many roofing companies come out. Some might offer deals that seem too good. Trust your gut about these offers. A good contractor offers solid warranties and fair prices. Start by looking at the Owens Corning Roofing Contractor Network for trusted professionals.
Essential Credentials to Verify
Before you hire anyone, check their qualifications. Make sure they have the right license for roofing in your state. They should have insurance and workers’ compensation. Also, look for a local address and membership in groups like the National Roofing Contractors Association.
- Valid state roofing license and local permits
- Current liability and workers’ compensation insurance
- Established local business address
- Positive online reviews and customer references
- Membership in professional roofing associations
- Written warranty on materials and workmanship
Questions to Ask Professional Contractors
Make a list of questions to compare contractors. Ask about their experience with storm damage. Get references from recent projects in your area. Know their timeline and payment plans before you sign.
| Question to Ask | Why It Matters |
|---|---|
| How many years have you been in business? | Experience with storm damage roof repair demonstrates reliability and skill |
| Can you provide three local references from recent projects? | References show completed storm damage roof repair work and customer satisfaction |
| What warranty do you offer on materials and labor? | Warranties protect your investment in roof repairs |
| Will you handle insurance claims and coordinate with my adjuster? | Experienced contractors can navigate the insurance process smoothly |
| What is your timeline for completing the storm damage roof repair? | Clear timelines help you plan and avoid weather delays |
| Do you use subcontractors for any portion of the work? | You deserve to know who will be working on your roof |
Red Flags to Watch For
Watch out for warning signs when choosing a contractor. Contractors who show up right after a storm and then disappear are not trustworthy. Never pay a lot of money before work starts. Contractors who offer to waive your insurance deductible are breaking the law. Be wary of those without a local address or proper identification, or who pressure you to sign contracts quickly.
- Door-to-door solicitation immediately after severe weather
- Requests for large upfront payments before work starts
- Offers to handle insurance deductibles illegally
- No permanent local business address or verifiable credentials
- High-pressure tactics demanding immediate contract signatures
- Unwillingness to provide written estimates and references
Comparing Estimates and Making Your Selection
Get at least three written estimates for your project. Don’t just look at prices. Compare the scope of work, materials, timelines, and payment plans. A detailed estimate shows the contractor knows what needs to be done.
During a roof inspection, the contractor will check your roof from all angles. They will document their findings with photos. This shows they are committed to quality work.
Building a Strong Working Relationship
Once you choose a contractor, good communication is key. Agree on how you want to communicate and how quickly they will respond. Read your contract carefully and ask questions. Stay updated on the project without interrupting the work. A professional contractor will keep you informed and transparent.
Filing a Wind Damage Roof Insurance Claim
After a storm hits, filing a wind damage roof insurance claim is key. The process can seem tough, but knowing what to expect helps. Your insurance company aims to help you recover from storm damage. Taking the right steps now protects your interests and ensures fair compensation.
Success in the process comes from being organized and detailed from the start. Start your claim right after the storm. Waiting too long can hurt your case in several ways. Policies have time limits for damage reports. Your memories are clearer when documented soon after.
Documenting Damage for Your Insurance Provider
Good documentation is critical for your claim. Take photos and videos right after the storm, if it’s safe. Show the damage from different angles and close-ups of specific issues. Include wider shots to show your property’s context.
Your documentation should include:
- Photographs taken from the ground and from safe elevated positions
- Close-up images of damaged shingles, missing sections, and dents
- Videos narrated with date and time stamps
- Interior damage photos showing water stains and leaks
- Pictures of debris or fallen tree branches that caused damage
Write a detailed inventory of damaged areas. Note when you found the damage and its extent. Keep all storm-related receipts, including emergency repairs and temporary lodging. Create a timeline of damage, contact with your insurance, and all communications.
If you have pre-storm photos or reports, include them. These prove the damage is new and storm-related, not from wear and tear.
Understanding Your Coverage and Claim Process
Before filing your claim, review your policy well. Knowing your coverage prevents surprises. Look for details on coverage limits, deductibles, and exclusions for storm damage.
Key policy details to understand include:
| Policy Element | What It Means | Why It Matters |
|---|---|---|
| Coverage Limits | Maximum amount your insurer will pay for roof damage | Determines if repairs are fully covered |
| Deductible | Amount you pay before insurance coverage begins | Affects your out-of-pocket costs |
| Replacement Cost vs. Actual Cash Value | Whether you get full replacement or depreciated value | Determines repair funding adequacy |
| Time Limit for Filing | Deadline to report damage to your insurance company | Missing deadlines can result in claim denial |
The typical wind damage roof insurance claim process follows these steps:
- Contact your insurance company quickly to report the damage
- Provide your initial documentation and photographs
- Receive a claim number and adjuster assignment
- Schedule the insurance adjuster’s inspection
- Be present during the inspection to point out all damage
- Review the adjuster’s assessment and settlement offer
- Negotiate if the offer seems insufficient
Your insurance company will send an adjuster to evaluate the damage. Be there during the inspection. Show all the damage you’ve documented. A roofing contractor can also attend, providing expert insight.
Don’t rush to accept the first settlement offer. Many are negotiable. Review the adjuster’s assessment carefully. Compare their estimates with quotes from local roofing contractors. If the settlement is too low, you can appeal or dispute it. Write to your insurance company explaining why you think the offer is not enough.
Some homeowners hire public adjusters for help. They have experience with wind damage claims and can fight for fair settlements. Always read documents from your insurance company before signing. Talk to your roofing contractor about whether the settlement covers necessary repairs.
Being thorough with documentation and understanding your policy improves your chances of getting fair compensation for your wind damage roof insurance claim.
Emergency Roof Repairs and Prevention Measures
Storm damage can make your roof weak to water and structural issues. Quick repairs protect your home until you can fix it for good. Using fast fixes and smart prevention keeps your roof strong for years.
Emergency Roof Tarping Services
Storms can tear holes in your roof, putting your home at risk. Emergency roof tarping services offer vital protection. Contractors put on waterproof tarps to keep your home dry.
This fix stops water damage while you wait for permanent repairs. Insurance claims take time, and roofers might be busy. A good tarp prevents water damage and mold.
Never try to tarp your roof yourself. It’s dangerous and can cause serious injuries. Professionals have the right tools and know-how. Most insurance covers emergency tarping, so keep all receipts.
- Emergency water extraction from flooded interiors
- Temporary structural support if damage compromises safety
- Emergency board-up services for broken windows and openings
Ice Dam Roof Damage Prevention
In cold climates, ice dams are a big problem. They form when warm air melts snow on the roof. The water then freezes at the edges, causing leaks.
Preventing ice dams starts in your attic. Good insulation and ventilation keep the roof cold. Seal attic floor leaks to stop heat loss. During roof replacement, ask for ice and water shield at the edges.
Keep gutters clean to ensure water drains well. After snow, use a roof rake from the ground to remove snow. Clogged gutters can cause the same problems as ice dams.
| Prevention Method | When to Use | Benefit |
|---|---|---|
| Attic Insulation | Before winter weather | Prevents heat loss that causes melting |
| Gutter Cleaning | Fall and spring | Ensures water drains away properly |
| Roof Raking | After heavy snowfall | Removes snow buildup safely from ground |
| Ice and Water Shield | During roof replacement | Protects edges from water backing up |
If ice dams form, call professionals to melt them safely. Never chip at ice yourself, as it damages your roof.
Get annual roof checks, and trim trees to avoid damage. Replace damaged shingles quickly. Consider durable roofing materials, like in hail-prone areas.
While storms can damage roofs, regular care and prevention help a lot. These steps protect your home and make your roof last longer.
Conclusion
Dealing with roof damage after a storm can feel stressful and overwhelming. But now, you know how to handle it with confidence. Follow the steps in this article to protect your home and save money. Start by inspecting from the ground, document your findings, and get help from qualified roofing contractors.
Roof damage can come in many forms. Wind can rip off shingles, hail can dent and crack your roof, and water can leak into your home. Each problem needs a different solution. Acting fast is key to avoid more damage that insurance might not cover.
When filing an insurance claim, document the roof damage well. Take photos and videos from different angles. Keep records of all talks with your insurance and contractors. Choose roofing contractors wisely, looking for established companies with good reviews and proper licenses.
The journey from finding storm damage to a fully repaired roof takes time. It might take weeks or months, depending on the storm’s impact. Stay calm and go through each step carefully. Thousands of homeowners have successfully fixed their roofs. You can too. Start today by checking your roof or calling your insurance company. Help is available, and you’re not alone.
FAQ
How quickly should I assess roof damage after a storm?
Check your roof as soon as it’s safe after the storm. Wait for all dangers to clear. Even small damage can cause big problems.
Take photos and videos before fixing anything. This helps with your insurance claim.
What are the most common types of storm damage I should look for?
Look for wind damage like missing shingles. Also, check for hail marks and granule loss. Water damage can cause stains and leaks.
Musty smells and warped wood are signs of water issues. Check your attic for these signs.
Is it safe to climb on my roof to inspect storm damage myself?
No, it’s not safe for homeowners to climb roofs. Falls are a big risk. Instead, inspect from the ground with binoculars.
Get professionals to check your roof. They have the right gear and know what to look for.
What should I include in my documentation for an insurance claim?
Document everything with photos and videos. Show the damage from different angles. Include close-ups of specific areas.
Take pictures of interior damage and debris. Document your yard and property. Keep receipts for emergency repairs.
Keep a timeline of the storm and damage. This helps with your insurance claim.
How do I find and vet a qualified roofing contractor for storm damage repair?
Start by researching contractors online and through local associations. Check their licenses and insurance. Ask for references and warranties.
Compare estimates from different contractors. Look for experience with storm damage. Avoid contractors who seem too good to be true.
What are the main steps in the insurance claims process for roof damage?
First, review your insurance policy. Then, contact your insurance company to report the damage. Provide detailed documentation of the damage.
Get the adjuster’s assessment and initial offer. Compare this to repair costs from contractors. Don’t accept the first offer without reviewing it.
When do I need emergency roof tarping services?
You need emergency tarping for exposed roof damage. This prevents more damage while waiting for repairs. Never tarp your roof yourself.
Get professional help for tarping. Most insurance covers this service.
How can I prevent ice dam roof damage in winter?
Keep your attic well-insulated and ventilated. Seal air leaks and install ice shields. Clean gutters and remove snow safely.
If ice dams form, get professionals to remove them. Never chip at ice yourself.
What should I do immediately after discovering roof damage from a storm?
First, ensure the storm has passed and it’s safe. Inspect from the ground and document everything. Take temporary measures if safe.
Contact your insurance company and get professional inspections. This helps with your claim.
What are the signs of hail damage to shingles that I should watch for?
Look for dents and granule loss on shingles. Hail can knock off protective granules. Use binoculars for a closer look.
Even minor damage can shorten your roof’s life. Get a professional assessment.
How do I identify wind damage and missing shingles after a storm?
Look for gaps in roof coverage and damaged shingles. Use binoculars for a closer look. Check roof edges for damage.
Document all damage for your insurance claim. This helps prove wind damage.
What interior signs indicate water damage and roof leak detection after weather events?
Look for water stains, dripping water, and musty odors. Check your attic for signs of water damage. Use a flashlight for a thorough inspection.
Water damage may appear far from the leak. This helps identify problems before professionals assess.
Should I get a professional inspection even if I don’t see obvious damage?
Yes, get a professional inspection. They can spot hidden damage. This ensures accurate documentation for insurance and repairs.
Even minor damage can be significant. Professionals have the right tools and knowledge.
What questions should I ask roofing contractors during the vetting process?
Ask about their experience, references, and warranties. Check their licenses and insurance. Understand their payment terms and timeline.
Ask about their safety measures and how they handle changes. This helps you choose the right contractor.
How should I maintain communication with my roofing contractor during the project?
Set clear communication channels from the start. Understand the contract and ask questions. Request regular updates and clarify any changes.
Stay informed but trust the professionals. Good communication ensures a successful project.
What should I do if my insurance settlement doesn’t cover the full repair costs?
Compare the settlement to repair costs from contractors. Review your policy for coverage. Prepare a detailed appeal with evidence.
Consider hiring a public adjuster for disputes. They can negotiate on your behalf.