Imagine having running water at home without electric bills. Indoor gravity water systems make this dream come true. They use gravity to move water, no pumps or electricity needed.
For nearly a century, families in rural America used gravity-fed systems. These saved hours of labor each day. No more hauling water by hand or waiting for electricity. Now, more homeowners are choosing this smart technology for energy independence and emergency prep.
Indoor gravity water systems are simple. A tank sits high in your home. Water flows down to your sinks and showers. A 1,500-gallon tank at the right height gives strong water pressure.
Building a gravity-fed system might seem hard. But it’s based on simple physics. This article guides you through each step. You’ll learn about parts, building your storage platform, and installing pipes. By the end, you’ll be ready to do it yourself.
Gravity water systems cut electricity costs and prepare for power outages. Keep reading to learn how to bring this technology into your home today.
Table of Contents
Why Indoor Gravity Water Systems Are Perfect for Off-Grid Living
Living off-grid is tough without modern comforts. Managing water is one of the biggest challenges. A no-pump water system changes everything, making hauling water buckets a thing of the past.
Gravity-fed systems have been around for centuries. They’ve powered homes and farms, proving their reliability. Today, they’re great for rural homes, emergency backup, and sustainable living.
With a gravity-fed system, you work smarter, not harder. You get running water without needing electricity. It’s a mix of old wisdom and modern living.
The Labor-Saving Benefits of Gravity-Fed Water
Hauling water by hand is exhausting in off-grid living. Before electricity, families spent hours collecting water. This limited what they could do on their homesteads.
A gravity-fed system cuts down on this work. It frees up time and energy for other important tasks. Families can focus on gardening, livestock, and enjoying their property. The change is huge. For more info, visit reliable water system resources.
- Reduces physical strain on household members
- Frees 2-4 hours daily previously spent hauling
- Improves quality of life for remote living situations
- Enables consistent indoor water access year-round
- Supports better hygiene and sanitation practices
How Gravity Systems Work Without Electricity
Gravity-fed systems are simple. Water flows downhill naturally. This is the basic idea. No pumps or electricity needed.
Physics makes it work easily. Every 2.31 feet of elevation difference creates 1 PSI of pressure. So, a tank 23 feet higher than your faucet gives about 10 PSI. That’s enough for showers and washing.
| Elevation Difference (feet) | Water Pressure Generated (PSI) | Practical Use |
|---|---|---|
| 5 feet | 2 PSI | Slow trickle flow |
| 10 feet | 4.3 PSI | Basic filling and washing |
| 20 feet | 8.6 PSI | Comfortable shower pressure |
| 30 feet | 13 PSI | Excellent household pressure |
| 50 feet | 21.6 PSI | Superior flow for multiple uses |
Off-grid indoor water setups need no maintenance. They work silently and continuously. This is why gravity wells were key before electricity. Today, they’re valuable for power outages or where electricity is not available.
The system runs silently and continuously. It uses Earth’s natural forces for your needs. You work with nature, not against it.
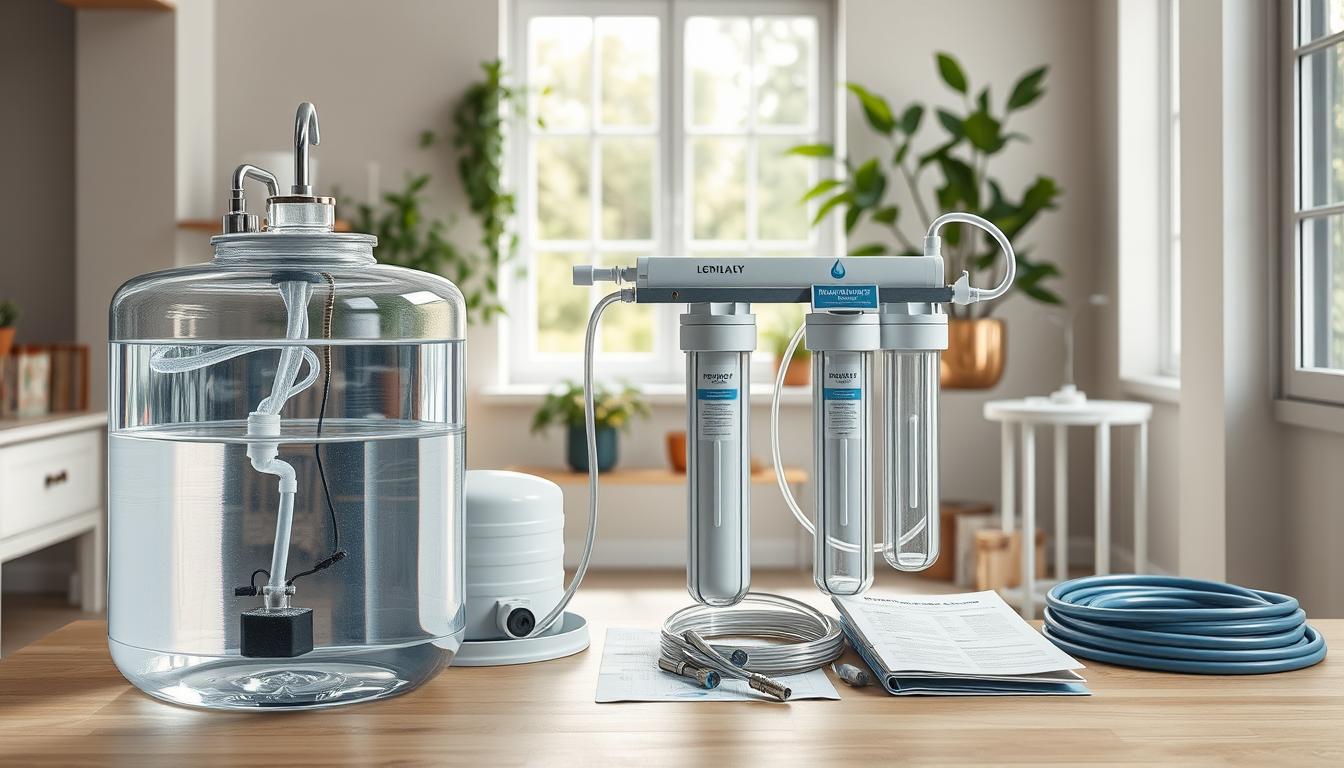
Essential Components for Your Gravity-Fed Water Supply
Starting a gravity flow plumbing system means getting the right materials first. Think of this as your shopping list for success. Most items are found in standard hardware stores, and the cost is often lower than electric pump systems.
Your project has four main parts: the platform, the water tank, plumbing supplies, and optional accessories. Knowing each piece helps you make smart choices for your elevated water tank systems.
Structural Platform Materials
A solid foundation is key. You’ll need:
- A level for accurate measurements
- 12 to 14 grade stakes for marking your area
- ¼-inch thick plywood for forms
- ½-inch screws and a drill
- 3/8-inch rebar for concrete reinforcement
- 20 to 25 bags of 80-pound ready-mix concrete
These materials create a stable base for your elevated water tank systems. A strong platform prevents leaks and system failures.
Water Storage Tanks and Sizing
Choosing the right tank size is important. Consider this comparison:
| Tank Size | Best For | Daily Use |
|---|---|---|
| 55-gallon drums | Starter systems or minimal use | 1-2 people |
| 1,500 gallons | Small households | 3-5 people |
| 3,000 gallons | Full household use | 5+ people |
Always pick food-grade tanks for drinking water. Avoid using containers from non-food sources to prevent contamination.
Plumbing Supplies for Gravity Flow Systems
Your gravity flow plumbing setup needs:
- ¾-inch PVC pipe (larger diameter compensates for lower pressure)
- Laundry sink faucets or garden hose connections
- PVC connectors and joints
- Pipe tape for secure connections
- Shut-off valves at key points
The ¾-inch pipe size is important for better water flow. Household faucets can’t handle the flow of gravity-fed systems.
Optional Accessories
A solar water pump can refill your tank automatically, though it’s not required. You might want to add a water filtration system for emergency preparedness to ensure clean drinking water year-round.
Shopping smart saves money. Many hardware stores offer bulk discounts on concrete and pipe materials. You can find used tanks on resale sites, cutting costs significantly. Focus on quality for food-grade components while looking for deals on structural materials.
Building Your Elevated Water Storage Platform
Building a solid foundation is key for your home’s water system. A well-made platform ensures your water system works well for years. It’s important to build a stable base to avoid costly repairs and safety issues later.
Your platform needs to be higher than all water outlets in your home. This height creates the pressure needed for water to flow. Without the right height and stability, your system won’t work as it should.
Creating a Stable Foundation with Concrete
Start by preparing the site for your concrete foundation. You can either build a dirt mound or a wooden platform. Both are good options for a sustainable water system.
To make a concrete pad, follow these steps:
- Level your ground and stake out a circle 6 to 12 inches wider than your tank diameter
- Build forms using plywood strips standing 6 inches tall
- Install rebar inside the forms for added strength
- Pour concrete into the prepared forms
- Allow the concrete to cure completely before placing your tank
Use a level tool to check if the pad is flat. Concrete needs 7 days to cure fully, but weather can affect this. Make sure the pad is larger than your tank to prevent damage.
Selecting the Right Tank Size and Placement
The size of your tank depends on your family’s water needs. A family of four uses about 300 to 400 gallons daily. Consider these factors when choosing your tank:
| Tank Size | Best For | Advantages | Disadvantages |
|---|---|---|---|
| 55-gallon drum | Single person or testing | Easy to install, affordable, portable | Frequent refilling, limited pressure duration |
| 275-gallon tote | Small families | Moderate cost, manageable height, decent capacity | May require platform support structure |
| 1,000+ gallon tank | Large families | Less frequent refilling, sustained pressure, better for rainwater systems | Heavy installation, requires sturdy platform, higher cost |
Where you place your tank is important for success. Keep it close to the house to reduce pipe length. Make sure it’s easy to refill and protect it from sunlight. In cold areas, place it where freezing won’t harm pipes.
The tank’s height affects your water pressure. Every 2.31 feet of height adds 1 PSI. A 10-foot tank gives about 4.3 PSI, good for basic use. A 20-foot tank provides about 8.6 PSI, great for showers and more.
If you’re using rainwater, place your tank below the roof. This makes your system more efficient. For smaller setups, a 12-foot platform made from 4×4 lumber works well for DIY projects.
Indoor Gravity Water Systems: Installation and Piping Setup
Setting up your gravity water system turns your elevated tank into a home water source. Success comes from planning and knowing how it works with lower pressure than city water.
Start by mapping the path from your tank to your home’s fixtures. Choose a natural slope to avoid air pockets and ensure water flow. Steer clear of sharp drops that could disrupt the system.
Use ¾-inch PVC pipe for main lines. Its larger size helps with the system’s lower pressure. Even with only 5 to 15 PSI, the bigger pipe keeps water flowing well.
Guidance on gravity-fed water systems suggests ¾-inch PVC for most setups. But, standard kitchen faucets won’t work with gravity systems.
Here’s how to connect your pipes:
- Cut PVC pipe cleanly using a sharp saw
- Apply PVC primer to both the pipe and fitting
- Use PVC cement to create watertight joints
- Allow cement to cure for at least 24 hours before introducing water
- Add tees and elbows as needed to direct water to different fixtures
- Secure pipes with straps to prevent sagging or stress on joints
Choosing the right fixtures is key. Laundry sink faucets and garden hose connections are good choices. For kitchen sinks, low-flow faucets work well for hand washing.
Start by filling your tank a bit to test for leaks. Then, pressurize it fully. Check all joints and connections. Weatherproof wall and floor penetrations to avoid water damage. Insulate exposed pipes in cold areas to prevent freezing.
Install valves at branch points to control water flow. This helps manage your system better and makes maintenance easier. Your gravity system will provide reliable water once set up and tested.
Water Pressure Considerations and Flow Optimization
Getting the right water pressure and flow rate is key for your Indoor Gravity Water Systems. You don’t need city-level pressure for a comfortable home water supply. Understanding elevation and pipe size helps design a gravity-fed system that meets your needs.
Understanding PSI and Elevation Requirements
Water pressure is linked to elevation. For every 2.31 feet your tank is above a fixture, you gain 1 PSI of pressure. This lets you calculate the pressure at different points in your home.
A tank 10 feet above your kitchen sink gives about 4.3 PSI. At 15 feet, you get roughly 6.5 PSI. At 23 feet, you reach about 10 PSI. These numbers are lower than city water pressure, but gravity systems work fine with them.
What matters is the pressure you need for your activities. Washing hands needs just 3 to 4 PSI. Showers work better with 8 to 10 PSI. Most households find 6 to 8 PSI enough for normal use. A full tank gives more pressure than a half-empty one, so plan your tank level wisely.
- Full 1,500-gallon tank: delivers 2 gallons per minute at laundry sink and 1¾ gallons per minute at kitchen sink
- Half-full tank (700-800 gallons): provides adequate flow for multiple fixtures through larger-diameter pipes
- Tank elevation of 10 feet: approximately 4.3 PSI available
- Tank elevation of 23 feet: approximately 10 PSI available
Choosing the Right Pipe Diameter for Adequate Flow
Pipe diameter is key for good flow in a gravity-fed water supply. Bigger pipes let more water pass through, even at lower pressure. It’s like traffic: a wider road lets more cars flow, even if they’re moving slower.
When designing a piping system, the same principle applies. Use ¾-inch pipe for main supply lines. For longer runs, consider 1-inch pipe to reduce pressure loss. Use ½-inch pipe only for short branches to individual fixtures.
Larger diameter pipes allow adequate flow even at lower pressure. Your system can deliver water quickly and efficiently without needing high pressure. This is why Indoor Gravity Water Systems are popular for off-grid homes.
| Pipe Diameter | Best Use | Flow Characteristics | Pressure Loss |
|---|---|---|---|
| ½-inch | Short branches to fixtures | Moderate flow for single outlet | Higher loss over long distances |
| ¾-inch | Main supply lines (standard) | Good flow for multiple fixtures | Balanced loss and performance |
| 1-inch | Long runs and high-demand areas | Excellent flow for multiple simultaneous uses | Minimal loss, best efficiency |
Common questions include: “Will I have enough pressure for a shower?” Yes, with proper elevation and larger pipes. “Can I run multiple fixtures at once?” Absolutely, if you size your pipes correctly. “How do I boost pressure if needed?” Increase your tank elevation or upgrade your pipe diameter.
The beauty of gravity-fed water supply design is working with nature. Proper pipe sizing turns lower pressure into an advantage by maintaining steady flow. Your Indoor Gravity Water Systems will serve you reliably for years with these basics in place.
Filtration and Maintenance for Clean Household Water
Clean water is key to a healthy home. Even clear water can hide harmful bacteria and chemicals. Your no-pump system needs good filtration to keep your family safe. A gravity-fed ceramic filter system is perfect, needing no electricity and little effort.

Creating a ceramic water filter is easy and cheap. You’ll need three 5-gallon buckets, a ceramic filter kit, a spigot, and some parts. Start by drilling holes in your buckets. Drill a ¾-inch hole for your spigot and a 5/8-inch hole for the filter element.
Dirty water goes into the top bucket and passes through the ceramic filter. A pre-filter sock catches big particles. Clean water drips into the middle bucket and then the bottom, where you can get it from a spigot. This design makes your system self-sufficient.
| Ceramic Filter Capability | What It Removes | What It Doesn’t Remove |
|---|---|---|
| Bacteria Elimination | Disease-causing bacteria | Viruses |
| Protozoa Protection | Giardia and cryptosporidium | Dissolved minerals |
| Chemical Filtration | Heavy metals, herbicides, chlorine | Some pesticides |
| Sediment Reduction | Fine particles and sediment | Odor compounds |
Filtration happens slowly, less than 1 gallon per hour. This slow pace lets for thorough cleaning but means you need to prepare water ahead. Keep extra containers for your system to keep water flowing all day.
Ceramic filter elements last about a year, depending on water quality and use. The pre-filter sock needs cleaning or replacing when dirty. Never let your filter freeze, as ice can damage it. If your water has a lot of debris, the pre-filter sock is key to avoid clogs.
Regular maintenance keeps your system working well. Here’s a simple schedule to follow:
- Weekly: Check all visible pipes and fittings for leaks
- Monthly: Clean or replace the pre-filter sock
- Seasonal: Inspect tank integrity and flush pipes if sediment builds up
- Annually: Replace the ceramic filter element
Look out for signs like reduced water flow, unusual taste, or smells. These mean your filter needs attention. A slow flow rate usually means the element is full and needs replacing. With regular care, your off-grid system will serve you for years, making your home safe and independent.
Conclusion
You’ve learned how to build your own indoor gravity water system. You know how they work, how to install pipes, and keep the water clean. This guide shows you can have your own water supply.
Gravity-fed systems have been around for nearly 100 years. They’re valuable today too. They save money, give you energy independence, and work even when the power is out.
These systems also help the environment. You control your water instead of relying on companies. With modern materials, building one is easier than ever. It’s a long-term investment with low costs.
Whether a gravity system is right for you depends on your property and lifestyle. If your land is suitable, it’s a great choice. Start by checking your land and calculating your water needs.
Begin with a small setup if you’re new to this. Every expert started where you are. Now, it’s time to take action. Check your property, get your materials, and connect with others who are interested.
Remember, many families have used gravity water systems successfully. You have the knowledge to start your own. Whether for off-grid living, backup, or environmental reasons, you’re on your way to water independence.
FAQ
What exactly is an indoor gravity water system and how does it differ from traditional plumbing?
An indoor gravity water system uses elevation and physics, not electric pumps. It’s different from traditional plumbing that relies on municipal water or electric wells. Your system has a tank higher than your fixtures, letting water flow down naturally.
This system has been around for nearly a century. It doesn’t need electricity, making it great for off-grid living and emergency prep. It’s also sustainable for your home.
How much water pressure will I actually have with a gravity water system?
Pressure depends on how high your tank is. For every 2.31 feet, you get 1 PSI. So, a 10-foot tank gives you about 4.3 PSI.
At 15 feet, you get 6.5 PSI, and at 23 feet, it’s around 10 PSI. This pressure is enough for most household needs. You just need to use bigger pipes for better flow.
Can a gravity water system really work for all my household water needs?
Yes, a well-designed gravity system can meet most family needs. You just need to match your usage to the right tank size and height. A 1,500-3,000 gallon tank at the right height can serve your home without needing constant refilling.
Even a 55-gallon drum can handle basic needs like drinking and handwashing. Gravity systems are reliable and save on daily maintenance and electricity costs.
What’s the difference between using ¾-inch and ½-inch pipes in a gravity water system?
Pipe size is key for gravity systems. A ¾-inch pipe allows more water flow, even at lower pressures. This is because it’s wider, like a bigger road for water to flow.
½-inch pipes restrict flow too much. They’re best for short lines to fixtures. For main lines, use ¾-inch for better flow.
How do I calculate the water pressure I need at my fixtures?
Pressure needs vary by activity. For filling sinks or tanks, 3-4 PSI is enough. Handwashing and face washing need 5-6 PSI.
Showers need at least 8-10 PSI for comfort. Kitchen sinks with sprayers work best at 8-12 PSI. To find the needed elevation, multiply your desired PSI by 2.31 feet.
For a comfortable shower, you need your tank at least 23 feet above the fixture. Gravity systems let you create zones for different pressure levels.
What materials should I use to build the platform and tank structure?
Your tank’s foundation needs to be strong, as a 1,500-gallon tank weighs about 6,000 pounds. Use a concrete foundation with reinforcement for durability.
For the platform, you can use pressure-treated lumber, but concrete is better for stability. Make sure the tank is food-grade if it holds drinking water. Use materials that can withstand weather and freezing.
How should I protect my gravity water system from freezing in winter?
Protecting your system from freezing is key in cold climates. Position the tank where it gets sunlight and airflow. Consider a tank heater if needed.
Insulate all exposed pipes with foam rated for your climate. Trench pipes below the frost line for better protection. Keep the tank full to maintain temperature better.
Some use heat tape on vulnerable sections, but this needs electricity. Plan your system’s route and insulation during installation for easy winter protection.
What filtration system should I use with my gravity water system?
A gravity-fed ceramic filter system is ideal for off-grid water. It’s no-pump and doesn’t need electricity. A two-bucket design works well: dirty water goes in the top, clean water drips into the bottom.
Ceramic filters remove bacteria, protozoa, sediment, and organic matter. Use a pre-filter sock to catch larger particles. Replace ceramic elements annually or when flow rate drops.
Can I use my gravity water system during power outages?
Yes, gravity systems work during power outages. They don’t need electricity, so your water keeps flowing. This makes them great for emergency prep.
Many use gravity systems as a backup. They’re more reliable than electric pumps and don’t rely on the grid. This independence is why gravity systems are popular for off-grid living.
How often do I need to maintain my gravity water system?
Gravity systems need little maintenance. Check for leaks weekly and clean pre-filter socks monthly. Inspect pipes seasonally and replace ceramic filters annually.
Gravity systems are simple and reliable. They require less maintenance than electric systems, saving you money on service calls.
What’s the best way to plan the route for pipes from tank to house?
Plan your pipe route carefully. Choose the most direct path from tank to fixtures. Use a continuous downward slope to avoid air pockets.
Document the route before digging. Check for underground utilities and obstacles. Bury pipes below the frost line or use insulation if necessary. Plan entry points for weatherproofing and structural integrity.
Can I combine rainwater collection with my gravity water system?
Yes, combining rainwater with your gravity system is a great idea. Your elevated tank can accept rainwater from gutters. This works well for non-potable uses like flushing toilets and watering gardens.
For potable rainwater, add a first-flush diverter and ceramic filtration. This combination extends your tank’s utility and reduces dependence on wells. It’s a sustainable and reliable solution for off-grid homes.
What permits or codes do I need to consider for a gravity water system?
Building codes for gravity systems vary by location. Check with your local building and health departments before starting. Some areas have specific rules for gravity systems, while others are more lenient.
Even if permits aren’t required, consulting a professional ensures your system meets standards. This prevents costly changes later and ensures insurance coverage.
How much does it cost to build an indoor gravity water system?
Costs vary based on system size and components. A basic system with a 55-gallon drum and simple piping might cost 0-0. A larger system with a 1,500-gallon tank and ceramic filtration can cost ,000-,000.
The tank is the biggest expense, but the system saves money on electricity over time. Within five to ten years, most systems pay for themselves through avoided costs.
Can I retrofit a gravity water system into an existing home?
Yes, retrofitting is possible if your property has suitable elevation. You can integrate gravity plumbing with your existing system. Start small, like with a 55-gallon drum, and expand as needed.
Professional help may be needed for wall penetrations and integrating shutoff valves. Retrofitting adds security and independence, making your home more resilient during emergencies.
What happens if my tank overflows or develops a leak?
Plan for overflow by positioning the tank correctly. Install an overflow pipe to direct excess water away from your foundation. Regularly inspect for leaks, which often appear as wet spots around joints or tanks.
Address leaks quickly to prevent damage. Gravity systems operate at lower pressure, so leaks develop slowly. Keep your tank full to maintain pressure and prevent major issues.
Do gravity water systems work well with low well water sources?
Yes, gravity systems are great for low-producing wells. They handle slow water flow into your tank, providing consistent pressure to your home. This makes them ideal for properties with low-yield wells.
Combine low well production with rainwater collection for year-round water security. Gravity systems adapt to whatever rate your well produces, making them versatile for off-grid properties.