Clean water storage starts with clean containers. Whether you’re preparing for emergencies or storing rainwater, the container you choose makes all the difference. Many people don’t realize that even new containers need proper cleaning and disinfection before their first use.
Waterborne illnesses can hide in invisible bacteria left behind in storage containers. These germs don’t just stay on the surface. They can grow inside your container and contaminate your water supply for weeks or months. That’s why knowing how to clean water storage containers properly is so important for your family’s health.
This guide will walk you through every step of preparing containers for safe drinking water storage. You’ll learn which containers work best, the complete cleaning process, and how to use bleach solutions the right way. The CDC provides detailed guidance on safe water storage practices that protect your water from recontamination.
The good news is that disinfecting containers isn’t complicated. You don’t need special equipment or expensive products. With basic supplies and the right steps, you can ensure your stored water stays safe and clean.
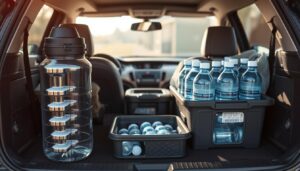
Whether you’re working with small 5-gallon jugs or larger water barrels, these techniques apply to all types of containers. Your stored water is only as safe as the container holding it. Let’s make sure you do this right from the start.
Table of Contents
Why Cleaning Water Storage Containers is Essential for Safe Drinking Water
Keeping your water storage containers clean is more than just filling them up. Your drinking water’s safety depends on a clean environment inside. Even new containers can have residues, dust, and microorganisms you can’t see. Knowing why sanitizing tanks is important helps keep your family safe and your emergency water ready.
Clean containers are key to being ready for emergencies. Many people miss this important step, not knowing contamination can happen fast. But, cleaning properly stops these issues before they begin.
Preventing Bacterial Growth and Contamination
Bacteria like E. coli grow fast in water, warming up or sitting undisturbed. They create a slimy biofilm on the container’s walls. This film keeps contaminating your water, making it unsafe.
Signs your tank needs cleaning include:
- Water that tastes or smells odd
- Visible algae as green or brown discoloration
- Water tests showing E. coli or coliform bacteria
- Cloudy or sediment-filled water
If you see these signs, sanitize your tanks right away. Even if they look clean, hidden dangers can lurk inside.
Maintaining Water Quality Over Time
Well-maintained containers keep your water fresh for six months. Algae not only makes water look bad but also helps harmful bacteria grow. Regular cleaning stops these issues.
Think of cleaning tanks as a smart investment in your peace of mind. By keeping up with maintenance, you make sure your emergency water is safe. It’s not just extra work—it’s life-saving preparation.
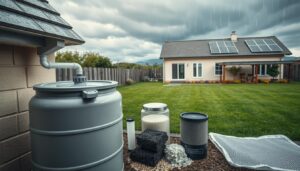
Choosing the Right Water Storage Container for Your Needs
Finding the right container for water storage is key to safe drinking water. Before you start cleaning and disinfecting, pick a vessel that fits your needs. The right container is essential for keeping your water clean and safe for your family.
Food-grade plastic is the best choice for water storage. These containers are made without harmful chemicals that could contaminate your water. Look for containers labeled “NSF approved” or “food grade” when shopping. Camping supply stores, emergency preparedness retailers, and farm supply stores offer quality options.
- Made from durable plastic, ceramic, or metal materials
- A single small opening (5-8 cm) with a tight-fitting cover
- A narrow neck to prevent hands or objects from entering during pouring
- Standard volume of 20 liters with a comfortable handle for easy carrying
- Smooth interior surfaces without ridges where bacteria can hide
Clean plastic water barrels are ideal for families needing more storage. Dark-colored tanks placed away from sunlight need less maintenance and may only need cleaning every two years. Light-colored tanks in direct sun require more frequent cleaning.
Never reuse containers that held chemicals, pesticides, motor oil, or industrial cleaners. Even thorough washing can’t remove all chemical residues. These substances can make people seriously ill. Starting fresh with proper containers saves problems later and keeps your water clean and safe.
For more detailed preparation guidance, visit safe water storage tips. Your investment in the right container now prevents headaches later and ensures your water stays clean and safe.
How to Clean Water Storage Containers
Learning to clean water storage containers is key to safe drinking water. Dirty containers can hold bacteria, algae, and harmful substances. The cleaning process includes draining, scrubbing, and rinsing. Each step is vital for clean and fresh water.

Draining Your Water Tank Completely
First, drain all old water from your container. This is essential because you can’t clean a tank full of water. For small containers, tilt them to pour out all water. Use the drain port at the bottom for large barrels, not the top outlet valve.
If water stays inside, a wet-dry vacuum can help. Always follow local rules for disposing of the water. Clean water is good for your garden or lawn, but contaminated water should go to storm drains.
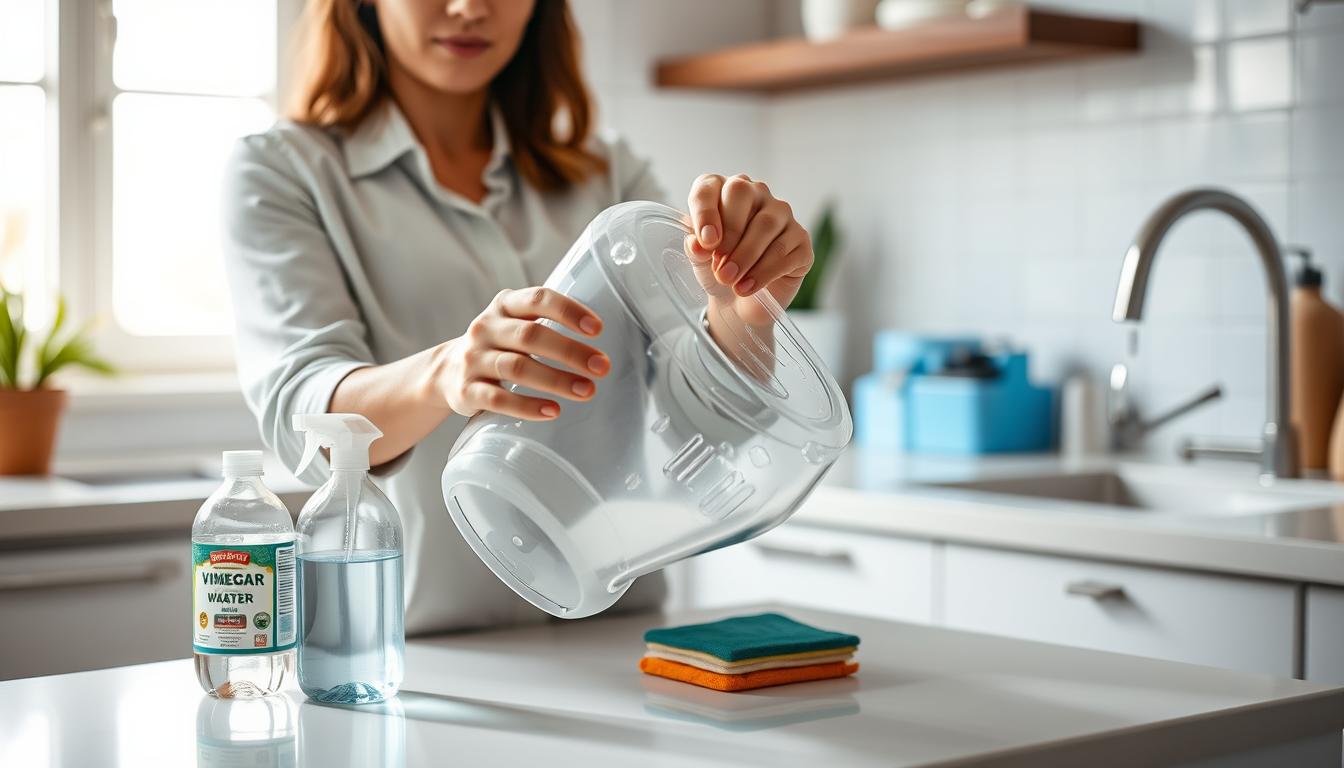
Scrubbing and Washing the Interior Surfaces
Now, it’s time for the hands-on part. Use a long-handled brush with non-metallic bristles to clean all surfaces. Metal brushes can scratch plastic and hide bacteria. For tight spots, bottle brushes are great. Extendable brushes with adjustable heads are best for big tanks.
Mix warm water with dish soap or mild detergent for cleaning. For algae or tough spots, you have two strong options:
- Baking soda paste for problem areas
- Diluted bleach solution for heavy buildup
To remove algae, clean the entire inside surface. Focus on corners, the bottom, and the area near the opening. Scrub with firm pressure but don’t overdo it. This part needs some effort but gets easier with practice.
| Cleaning Scenario | Best Solution | Application Method |
|---|---|---|
| Routine maintenance | Dish soap and warm water | Brush interior surfaces thoroughly |
| Visible algae growth | Baking soda paste | Apply to affected areas and scrub |
| Heavy biofilm or stubborn stains | Diluted bleach solution | Spray and scrub, rinse immediately |
| Silt or sediment buildup | Combination soap and baking soda | Scrub bottom and lower sides |
Rinsing to Remove All Cleaning Solution
Rinsing is as important as scrubbing. Soap or cleaning chemicals left behind can contaminate your water. Rinse your container two to three times with fresh water. Swirl the water around to reach all surfaces, focusing on corners and seams.
Drain completely after each rinse. This thorough rinsing removes all soap, bleach, or baking soda. When the water drains clear and smells clean, your container is ready. You’ve just finished the essential steps to clean your water storage containers properly.
Disinfecting Water Containers with Bleach Solution
After cleaning your water storage container, disinfection is the next step. Cleaning removes dirt and debris. Disinfection kills bacteria, viruses, and other harmful microorganisms. Together, they ensure your water is safe to drink.
To disinfect with bleach, use plain, unscented household bleach. Avoid splash-less or scented bleach as they are not safe for water containers. Make sure the bleach has 5-9% sodium hypochlorite.
- Mix your bleach solution in a separate container first
- Pour the bleach solution into your empty storage container
- Seal the lid tightly and shake the container thoroughly
- Rotate it so the solution touches all interior surfaces including the lid and opening
- Wait at least 30 seconds for the chlorine to work
- Pour out the bleach solution completely
The contact time is important. Chlorine needs seconds to destroy bacteria. Longer contact time is safe and effective.
| Container Size | Bleach Amount | Water Amount |
|---|---|---|
| 1 Liter (1 Quart) | 5 mL (1 teaspoon) | 1 Liter (1 Quart) |
| 1 Gallon | 19 mL (4 teaspoons) | 1 Gallon |
| 60 Gallons | 1 Ounce (30 mL) | 60 Gallons |
After disinfection, you have two options. Let your container air-dry completely. This allows chlorine to evaporate naturally. Or, rinse with clean, safe water that has already been treated.
When using bleach, ensure good ventilation. Never mix bleach with other cleaning products. Keep bleach away from children and pets. Used correctly, bleach is a safe disinfectant trusted for over a hundred years.
For maximum safety, let stored water stand at least 30 minutes before use if you used bleach solution.
Best Practices for Storing Clean Water Containers
After cleaning and disinfecting your water containers, you face the challenge of proper storage. It’s important to know where to store them, how to label them, and what conditions are best. These steps help keep your water safe and your family healthy, whether in emergencies or daily life.
Proper Labeling and Dating
Labeling your water containers is key. It helps you know which ones are safe for drinking. Without labels, you might accidentally use contaminated water.
Here’s what to write on each container:
- “Drinking Water” in big, clear letters
- The date you filled it
- The expiration date (six months from fill date for home-treated water)
- A rotation number if you have many containers
Use permanent markers, waterproof labels, or tags on handles. Keep a log of your containers. This helps you use the oldest ones first and know when to replace them. It keeps your water storage organized and safe.
Ideal Storage Conditions and Temperature Control
Where you store your containers is very important. Temperature, light, and chemicals can affect the water’s quality. Cool temperatures slow down bacterial growth and keep the water fresh.
Store your containers in these ideal places:
| Storage Factor | Best Practice | Why It Matters |
|---|---|---|
| Temperature | Below 70°F (room temperature or cooler) | Cool water resists bacterial growth and algae formation |
| Light Exposure | Away from direct sunlight and windows | UV rays damage plastic containers; light enables algae growth |
| Chemical Safety | Away from gasoline, pesticides, and solvents | Chemicals permeate plastic and contaminate water through vapor exposure |
| Ideal Locations | Basements, interior closets, or under beds | These areas provide stable, cool, dark conditions |
| Maintenance Schedule | Dark tanks need cleaning every two years; light-exposed tanks need more frequent cleaning | Environmental conditions determine contamination risk |
Don’t store water containers in garages or attics. These places have temperature swings that encourage bacterial growth. Keep them away from windows and outdoor areas where sunlight reaches. Also, avoid storing near cleaning supplies, paints, or any toxic substances.
Check your containers every few months. Look for leaks, damage, or algae growth. Use the oldest containers first. These simple habits are key to keeping your family safe.
Conclusion
You now know how to keep your water storage safe and clean. It’s easy: choose food-grade containers, wash them with soap, and scrub the insides. Rinse everything and disinfect with bleach solution. Store them in cool, dark places, away from harmful substances.
Water storage maintenance is simple and doesn’t take much time. Cleaning each container can take just 15 to 30 minutes. This small effort ensures your emergency water is safe to drink.
Make cleaning a regular habit by setting reminders. Clean your containers at least once a year. If you use a rotation system, replace your water every six months. Keep your cleaning supplies in one place.
Store unscented bleach, a brush, measuring spoons, and labels in a kit. This way, you’re always ready to refresh your storage.
Clean water is key to your health and survival. By following these steps, you’re protecting your family. You’re ready to maintain safe drinking water for years. Start your maintenance plan today and feel prepared for anything.
FAQ
How often should I disinfect and sanitize water storage tanks?
For containers holding drinking water, clean and disinfect annually or every six months if you rotate your water. If you see algae, cloudiness, or contamination, disinfect right away. Regular maintenance removes bacteria and biofilm, keeping your water safe.
Can I use scented bleach or splash-less bleach to disinfect my water containers?
No, use only plain, unscented bleach. Scented or splash-less bleach is not safe for drinking water containers. Look for bleach with sodium hypochlorite and 3-6% chlorine. Make sure it’s right for water disinfection.
What is “food-grade” plastic, and why does it matter for water storage containers?
Food-grade plastic is safe for storing food and water. It doesn’t leach harmful chemicals. Non-food-grade containers can contaminate your water. Always choose containers labeled “NSF approved” or “food grade” for water storage.
How do I remove algae from water tanks effectively?
For light algae, make a paste of baking soda and water. Apply it and scrub with a brush. For tough algae, use a diluted bleach solution. Keep containers cool and dark to prevent algae.
What’s the difference between cleaning and disinfecting a water storage container?
Cleaning removes dirt and debris. Disinfecting kills bacteria and viruses. Both steps are needed for safe water. Disinfecting with bleach kills harmful microorganisms.
How much bleach solution do I need to sanitize an empty water container?
Use 1 teaspoon of bleach per quart of water. For a 5-gallon container, use 5 teaspoons of bleach. Mix the solution, then pour it into your container. Seal it and shake well to cover all surfaces.
Can I reuse containers that previously held pesticides, motor oil, or other chemicals?
No, you can’t reuse containers for drinking water. Chemicals like pesticides and motor oil can harm you. Use only containers for food or water, or get new ones.
What’s the best way to clean plastic water barrels for long-term storage?
Drain the barrel first, then scrub it with a brush. Rinse it 2-3 times. Apply a bleach solution, shake, and let it sit for 30 seconds. Air-dry or rinse with treated water.
How long can I safely store water in properly cleaned and disinfected containers?
You can store water for about six months. After that, the disinfectant fades. Rotate your water every six months for freshness.
What are the ideal storage conditions and temperature for maintaining clean water containers?
Store containers in cool, dark places. Basements or closets are good. Avoid garages and attics. Keep them away from chemicals and sunlight.
How should I label my water storage containers for emergency preparedness?
Use waterproof labels to mark containers. Include “Drinking Water,” the storage date, and replacement date. Number containers and keep a rotation log for easy identification.
Is it necessary to rinse out bleach solution after the disinfection contact time?
You can air-dry or rinse with treated water. Never rinse with untreated water. Air-drying is best for ongoing protection.
What tools do I need for effective water tank cleaning and maintenance?
You’ll need long-handled brushes, bottle brushes, and extendable brushes. Also, a measuring spoon, bleach, labels, and a wet-dry vacuum. Keep all tools in a “water maintenance kit” for easy access.
How do I prevent biofilm formation in my water storage containers?
Disinfect containers before first use. Store them in cool, dark places. Check containers regularly for signs of biofilm. Rotate your water supply every six months.
What should I do if my water storage container shows signs of algae growth or discoloration?
Empty and inspect the container. For light discoloration, scrub with a diluted bleach solution. Rinse and disinfect as usual. Replace containers with persistent problems.
Can I use household cleaning products other than bleach to disinfect water containers?
Bleach is the best choice for drinking water. Other cleaners may not kill all pathogens. Use bleach for effective disinfection.
How do I know if my stored water has become contaminated?
Look for cloudiness, unusual odors, algae, sediment, or slime. If you see any, don’t drink the water. Regular maintenance and proper storage are key.
What’s the proper disposal method for water drained from storage containers?
Clear water can water plants. Contaminated water should go down storm drains or be disposed of properly. Dilute bleach solution before disposal.
How do I clean narrow-necked water containers or bottles effectively?
Use a long bottle brush to clean narrow containers. Scrub with soap and water, then disinfect with bleach. Use a funnel to pour bleach solution.
Should I treat stored water with additional chlorine over time, or is the initial disinfection enough?
Initial disinfection protects for six months. Don’t add more bleach unless you’re sure of the dosage. Rotate your water every six months for freshness.
Is it safe to store water in clear plastic containers, or should I use opaque containers?
Opaque containers are better because they block light. Light can cause algae and degrade plastic. If you only have clear containers, store them in the dark.
How do I check my water storage containers during routine maintenance without opening them?
Check containers visually for cloudiness, leaks, or loose seals. Make sure they’re stored in a cool, dark place. If you notice problems, open the container to inspect.