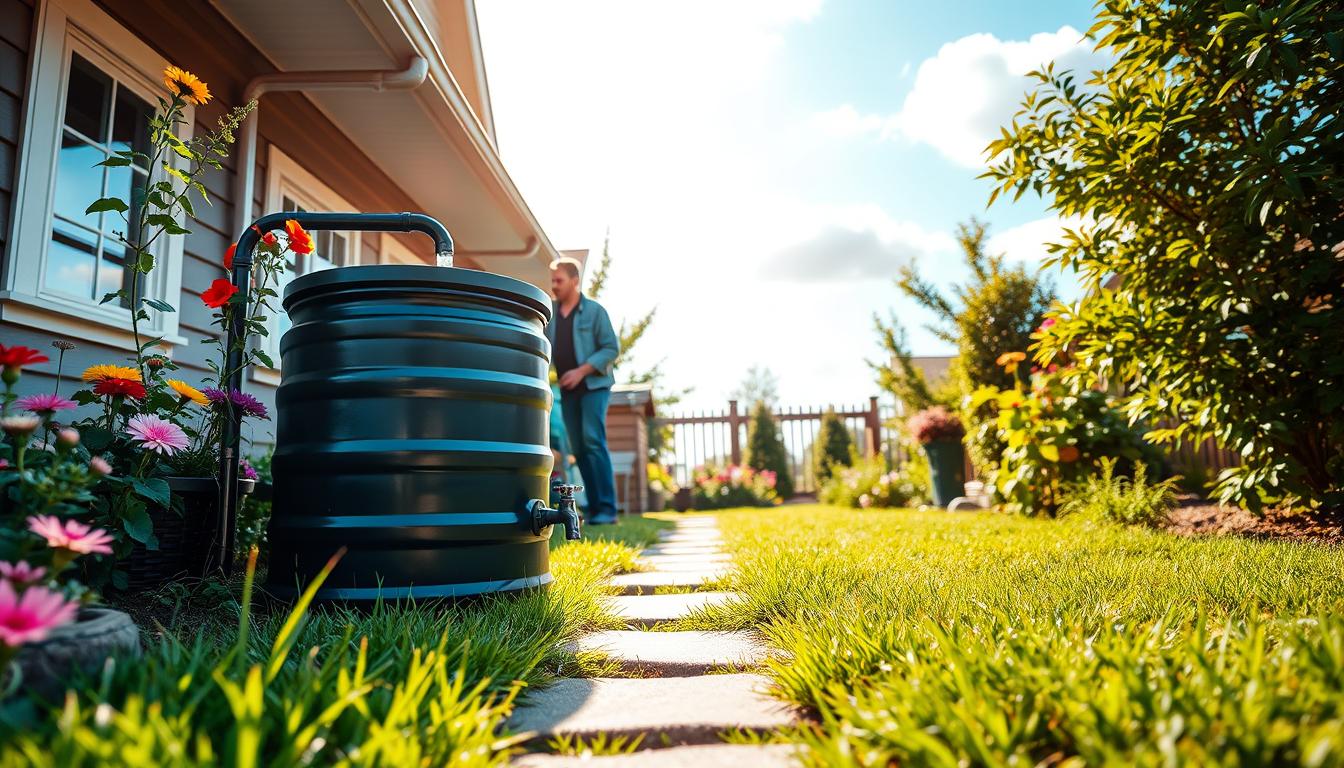
Setting up a rain barrel is a simple way to start harvesting rainwater at home. You can use it to water plants, wash your car, or fill your pool. This project is easy and can be done in just an afternoon with basic tools.
Rain barrels collect water from your roof. One barrel can save up to 1,300 gallons of water in a growing season. This saves money on water bills and helps the environment.
This guide will show you how to set up a rain barrel. You’ll learn about choosing the right barrel, where to place it, and how to connect it to your downspout. It also covers keeping it clean. These instructions are for everyone, whether you’re new to DIY or have done many projects before.
Rainwater harvesting at home is becoming more popular. Homeowners like it because it saves money and helps the planet. By the end of this guide, you’ll know how to install a rain barrel confidently. You can start collecting free water for your yard right away.
Table of Contents
Understanding Rain Barrels and Their Benefits
A rain barrel is more than just a bucket in your yard. It’s a smart way to collect and store rainwater. By using one, you can manage water at home easily. Homeowners like it for saving money and helping the environment.
What is a Rain Barrel and How Does it Work
A rain barrel is a container with a purpose. Water flows from your roof into it. A debris screen keeps leaves and dirt out.
The barrel sits on a level surface and holds 50 to 100 gallons of water. At the bottom, you’ll find a spigot or hose connection. This lets you use the water for your garden or lawn.
Environmental and Financial Advantages of Rainwater Harvesting
Rainwater is better for your plants than tap water. It’s soft, slightly acidic, and full of nitrates. Your garden will thrive on it.
Using a rainwater collection system saves money on your water bill. You’ll use less municipal water during dry seasons. It also protects our environment by stopping pollution in storm drains and waterways.
- Cut water bills by capturing free rainfall
- Reduce strain on municipal water systems
- Keep chemical pollutants out of storm sewers
- Protect local streams and water bodies
- Give your plants chemical-free water
How Rain Barrels Help Protect Your Home’s Foundation
Water pooling around your home’s foundation is a big problem. Without a rainwater collection system, it can soak into the soil. This moisture can seep into crawlspaces and basements, causing dampness and mold.
Over time, this excess water can cause cracks and damage to your foundation. A rain barrel stops this by capturing runoff. It protects your home’s foundation from expensive damage while giving you free water for your landscape.
| Foundation Threat | How Rain Barrels Help |
|---|---|
| Basement flooding | Diverts water before it pools near foundation |
| Crawlspace moisture | Reduces soil saturation around home |
| Foundation cracks | Prevents water pressure buildup |
| Mold growth | Keeps basement and crawlspace dry |
Planning Your Rain Barrel Installation
Before starting your DIY rain barrel project, plan where it will go and how much water you can collect. Good planning avoids future headaches and ensures your rain barrel works well from the start. Think about where you’ll use the water. A spot near your garden or landscaping saves time and effort.
Walk around your home and look at your downspouts. Each downspout drains water from one part of your roof. This is important because you’ll calculate how much rainwater you can capture based on that specific roof area, not your whole roof.
Calculating Your Water Collection
Knowing how much water you can gather helps you pick the right barrel size. Here’s a simple formula: one inch of rainfall produces a little more than half a gallon of water per square foot of roof.
For example, if your roof section above one downspout is 100 square feet, it will collect about 60 gallons of water during a one-inch rainfall. This helps you decide on the right size for your rain barrel.
| Roof Area (Square Feet) | Rainfall Amount (Inches) | Water Collected (Gallons) |
|---|---|---|
| 50 | 1 | 30 |
| 75 | 1 | 45 |
| 100 | 1 | 60 |
| 150 | 1 | 90 |
Choosing the Best Location
Your barrel’s location should balance several needs. Elevation is key because water flows downhill. A raised barrel improves water pressure and flow rate for watering. A barrel on a stand or slight slope works better than one on flat ground.
Consider these location factors:
- Easy access for filling watering cans or attaching hoses
- Close to areas where you’ll use the water
- Level ground that can support the barrel’s weight when full
- Away from direct sunlight to prevent algae growth
- Near the downspout you’ve selected
Planning for Overflow Water
Rain barrels fill quickly during heavy storms. You need a plan for overflow water. Plan your overflow route before you install your barrel. Water must flow away from your home’s foundation to prevent flooding and damage.
Direct overflow toward a garden, dry well, or storm drain. Never let overflow water collect near your foundation.
Checking Local Rules and Regulations
Your location and local rules affect your rain barrel installation. Some areas restrict rainwater harvesting or require permits. Others limit how you can use collected rainwater for watering. Check with your city or county before buying your supplies.
Contact your local water department or building department to ask about rainwater harvesting rules in your area. This simple step saves time and prevents problems later.
Take time to sketch your plan on paper. Mark your downspout location, barrel placement, water use areas, and overflow path. Measure the distance from your downspout to where you want the barrel. This preparation makes your DIY rain barrel setup smoother and more successful.
Choosing the Right Rain Barrel for Your Home
Choosing the right rain barrel is important. It affects how well it works for you. You need to think about size, features, and style to fit your yard.
Size and Capacity Considerations
Rain barrels vary in size, from 40 to 80 gallons. Most homes prefer 50 to 60-gallon barrels. They collect enough water and fit well in yards.
Weight is key when picking a barrel. A 50-gallon barrel is light when empty but heavy when full. This is because water is heavy. Make sure your yard can handle the weight.
Consider your roof size and local rain. Larger roofs collect more water. Dry areas need bigger barrels.
| Barrel Size (Gallons) | Empty Weight (Pounds) | Full Weight (Pounds) | Best For |
|---|---|---|---|
| 40 | 15 | 343 | Small yards, light watering |
| 50 | 19 | 433 | Average homes, standard use |
| 60 | 23 | 523 | Larger gardens, frequent watering |
| 80 | 30 | 695 | Large properties, commercial use |
Essential Features to Look For
Good rain barrels have useful features. A debris screen keeps out leaves and insects. This means cleaner water for your plants.
Think about the barrel’s shape. Flat-back barrels save space. Round ones are decorative but take up more room.
The lid is important for safety and ease. An open lid lets you use a watering can. A closed or latching lid keeps kids and pets out and stops mosquitoes. Some barrels have planter tops for growing plants.
Water outlets are also key. Most barrels have a spigot for a hose. Some have a higher outlet for easier filling without bending.
- Debris screen for clean water
- Flat-back design for space efficiency
- Secure lid with latch option
- Bottom spigot for hose connection
- Optional higher outlet for easy filling
- Collapsible design for winter storage
Design Options That Complement Your Landscape
Your rain barrel can be stylish. Modern barrels come in designs like terra cotta urns or whiskey barrels. They fit well with gardens or modern homes.
Choose colors that match your house. Decorative barrels with planter tops collect water and grow plants.
Match your barrel to your home’s style. Wooden barrels fit rustic homes, while modern ones suit contemporary ones. Your rain barrel should enhance your yard, not clash with it.
Preparing the Foundation and Location
Getting your rain barrel foundation right is key. A full barrel weighs over 400 pounds. It needs a solid base to avoid sinking or tipping.
Start by checking your location. Choose between placing it on a patio or concrete, or on bare ground. Each spot needs different prep for safety and stability.

Ground Installation Steps
For bare ground, follow these steps:
- Excavate the area to a depth of 1 to 2 inches
- Add a 1-inch layer of gravel for drainage
- Top with 1 inch of sand to create a level surface
- Finish with patio pavers for stability and support
This method helps water drain and keeps the ground stable under the barrel’s weight.
Elevation and Support Options
Elevating your barrel has benefits. It improves water pressure and makes filling cans easier. Use bricks, cinder blocks, or a stand for elevation. The support must handle over 400 pounds safely.
| Elevation Method | Height Range | Best For | Weight Capacity |
|---|---|---|---|
| Bricks or Pavers | 4-12 inches | Small elevation, easy access | 400+ pounds |
| Cinder Blocks | 8-16 inches | Moderate elevation, simple setup | 500+ pounds |
| Purpose-Built Stand | 12-24 inches | Maximum elevation, professional look | 600+ pounds |
| Concrete Pad | Ground level | No elevation needed, maximum stability | 800+ pounds |
Leveling and Final Positioning
Use a level tool to ensure your barrel is flat. An unlevel barrel can tip over and won’t drain well. Place it near your downspout for easy connection, but leave space for maintenance.
Make sure the overflow directs water away from your home’s foundation. This prevents water damage and protects your landscaping. Proper positioning saves you from future problems.
How to Set Up a Rain Barrel
Setting up a rain barrel system makes your backyard a water-saving hero. You’ll need to put together parts, connect the downspout, and make sure it’s safe. With the right tools and a plan, you can do it in a few hours. Let’s go through each step to get your system working well.
Assembling Your Rain Barrel Components
First, get all the tools and materials you need. Here’s what you’ll require:
- Hacksaw for cutting downspouts
- Drill with hole saw attachment
- Shovel for preparing the ground
- Level to ensure proper positioning
- Tape measure for accurate measurements
- Safety glasses and work gloves
Unpack your rain barrel and read the manufacturer’s specific instructions. Assembling can vary, so this is key. You’ll install the spigot near the base. Then, attach the overflow valve at the top and connect the overflow hose. Make sure the debris screen is in place to block leaves and insects. Take your time with these steps—they’re vital for your system’s success.
Modifying Your Downspout for Connection
The downspout connection is the most critical part. Place your barrel next to the downspout before cutting. This ensures the right measurements and flow. Always check for heating cables or electrical wiring inside the downspout before cutting.
- Cut the downspout short and attach an elbow to direct water into the barrel opening
- Install a diverter kit that taps into the existing downspout
- Use a flexible downspout extension for easier water redirection
Mark your cut line carefully with a marker. Protect your home’s exterior by placing plywood behind the downspout area. Wear safety glasses while cutting with a hacksaw. Save the cut piece—you’ll reattach it in winter. Attach a flexible elbow to the spout end to guide water precisely into your barrel.
Securing and Leveling Your Rain Barrel
Place your barrel on a stable, level foundation. Use your level to check that it sits completely flat. An uneven barrel can overflow unevenly and become unstable. Adjust sand or gravel beneath the barrel until it’s perfectly level. Many manufacturers recommend keeping some water in the barrel to maintain stability and prevent tipping.
Secure your barrel according to manufacturer guidelines. Some models need straps attached to your home’s foundation. Position your overflow hose to direct excess water away from your home’s foundation. Or, place a splash block underneath the overflow outlet. Your rain barrel system is now ready to catch and store water efficiently.
Managing Overflow and Water Distribution
Rain barrels fill up fast when it rains a lot. A downspout can send more water than a big barrel can hold. So, managing overflow is key to keep your home’s foundation safe.
When your barrel is full, you need to send the extra water somewhere. If you don’t, it can pool near your foundation and cause damage.
But, managing overflow is easy. Most rain barrels have an overflow valve or outlet. You just need to make sure the water goes away from your house.
- Attach an overflow hose to the barrel’s overflow valve and direct it toward a rain garden or drainage area
- Position a splash block under the overflow outlet to channel water away from your foundation
- Connect multiple barrels in series so overflow from the first barrel fills a second barrel
For water distribution, you have several practical options:
- Attach a standard garden hose to the spigot for watering distant garden beds
- Connect a soaker hose for efficient irrigation of vegetable gardens
- Use a watering can filled directly from the spigot for container plants
Important tip: When your barrel is full or during dry spells, leave the spigot open with a hose attached. This keeps water from overflowing near your foundation and prevents erosion.
Maintenance Tips and Seasonal Care
Keeping your rain barrel in good shape needs regular care and seasonal changes. After setting up your rain barrel, the real work starts with upkeep. These tasks keep your investment safe and ensure clean water all year. Regular maintenance prevents expensive fixes and makes your system last longer.
Preventing Mosquitoes and Debris Buildup
Mosquitoes are attracted to standing water, turning your rain barrel into a breeding spot in days. These pests lay eggs in calm water, and their larvae grow fast in warm weather. It’s easier to prevent mosquitoes than to deal with them later.
First, check your debris screen often. Make sure it fits well and caulk any gaps to keep mosquitoes out. Also, clean your gutters often to stop leaves and twigs from getting into the barrel during heavy rain.
Use the water you collect quickly, within one to two weeks. The quicker you use it, the less time mosquito eggs have to hatch. Adding anti-larval tablets with Bacillus thuringiensis (Bt) can also help. This biological control kills mosquito larvae without harming plants or helpful insects.
Regularly clean sediment from the barrel. Drain it at summer’s end and scrub the inside with a long brush. This removes debris and keeps the water quality high.
Winter Storage and Barrel Preparation
In cold areas, your rain barrel needs special care in winter. Freezing water can expand and damage your barrel.
Drain all water before the first freeze. Open the spigot fully to drain every drop. Then, rinse the barrel to remove sediment and disconnect it from the downspout.
- Drain and disconnect your barrel before freezing weather
- Reattach the downspout using the flexible elbow connector
- Store the barrel in a shed or garage, or turn it upside down outdoors
- Inspect for cracks and damage before spring reinstallation
Reconnect your downspout section with the flexible elbow in spring. This keeps your gutter system working all winter. In spring, check your barrel for any damage before setting it up again.
Important safety note: Never drink rainwater or use it for cooking, washing hands, or food prep. Use collected water only for watering plants, not on leaves or fruit. Always wash vegetables and fruit with tap water before eating. If your roof has copper gutters or chemical treatments, avoid using that water on edible plants.
Conclusion
Setting up a rain barrel is a simple weekend project that really works. You now know how to start your DIY rain barrel. From understanding how they work to picking the right size, you’re ready to go.
Preparing a level foundation and connecting your downspout are easy tasks. They only take a few hours to do. This means you can enjoy the benefits of your rain barrel right away.
Having a rain barrel saves a lot of water, up to 1,300 gallons in the growing season. This saves you money on water bills and helps your plants grow better. It also reduces the strain on local water systems.
Your garden, wallet, and the environment all benefit. This DIY project lets you control your home’s water use. It’s a win-win situation.
Don’t be afraid to start small. Begin with one barrel and add more later if you want. Many people find setting up a rain barrel easier than they thought. Even a small system can make a big difference for your garden and the planet.
So, grab your tools, choose your barrel, and join the thousands who harvest rainwater at home. It’s a simple yet powerful step towards a greener future.
FAQ
How much water can a rain barrel actually save during a growing season?
A single rain barrel can save up to 1,300 gallons of water during a growing season. This depends on your local rainfall and roof size. A 1-inch rainfall can fill about half a gallon per square foot of roof area.
If you have 100 square feet of roof, a 1-inch rain event can fill about 60 gallons. Over a season, these gallons add up, saving you money and water for your garden.
Can I really complete a DIY rain barrel setup in an afternoon?
Yes, most homeowners can set up a basic rain barrel in an afternoon. You don’t need special plumbing skills or expensive tools. You’ll need a hacksaw, drill, shovel, level, and safety glasses.
Prepare your spot, gather all materials, and follow the barrel’s instructions. Adding features like multiple barrels might take longer, but a single barrel is a weekend project.
What’s the difference between treated tap water and rainwater for my plants?
Rainwater is superior to treated tap water for plants. Tap water has chemicals that can harm plants over time. Rainwater is free from these and has beneficial nitrates for plant growth.
Many gardeners prefer rainwater for its health benefits. This makes your rainwater harvesting project good for your garden and the environment.
How much does a full rain barrel weigh?
An empty 50-gallon barrel weighs about 19 pounds. But when full, it weighs over 430 pounds. This weight is why you need a strong base for your barrel.
Soft ground or unsupported soil won’t hold a full barrel. Use a rain barrel stand or a leveled base for stability.
What size rain barrel do I actually need?
Most people find 50-60 gallon barrels work best. Your ideal size depends on your roof area, rainfall, and watering needs. Use a formula to calculate your needs: a 1-inch rainfall generates about half a gallon per square foot.
For example, 100 square feet of roof can collect about 60 gallons from a 1-inch rain. Over a season, these gallons add up, saving you water and money.
Can I make my rain barrel look attractive in my landscape?
Absolutely! Decorative rain barrel options abound. You can find models that look like terra cotta urns or modern designs. Some even have planter tops for growing flowers or herbs.
Choose a barrel that looks good and works well. Don’t sacrifice function for appearance.
What foundation preparation is needed before positioning my rain barrel?
Proper foundation preparation is key because full barrels weigh over 400 pounds. For ground installations, dig 1-2 inches deep and create a stable base with gravel, sand, and patio pavers.
Or, elevate your barrel on bricks or a stand. Make sure it’s level to prevent tipping and ensure proper drainage.
Why is barrel elevation important for my rainwater collection system?
A: Elevation improves water pressure and flow rate. Even a small elevation of 12-24 inches can make a big difference. It also makes watering easier and prevents water pooling.
Purpose-built stands provide safe elevation while looking intentional in your landscape.
Do I need to check local regulations before installing a rain barrel?
Yes, checking local regulations is important. Some areas have rules on rainwater harvesting or specific installation requirements. Contact your local water utility or city hall to confirm if it’s allowed and what the rules are.
How do I calculate the water collection capacity for my roof?
Use this formula: a 1-inch rainfall generates about half a gallon per square foot of roof area. Measure your roof area and multiply it by the rainfall amount to find your collection capacity. For example, 100 square feet can collect about 60 gallons from a 1-inch rain.
Over a season, these collections add up, saving you water and money.
What tools and materials do I need to assemble my rain barrel components?
A: Tools you’ll need include: hacksaw, drill, shovel, level, tape measure, safety glasses, and work gloves. Materials include: the barrel, sand, gravel, patio pavers, hoses, and a splash block. You may also need caulk and downspout extensions.
Follow your barrel’s instructions for assembly. Gathering everything before starting saves you trips to the hardware store.
What’s the safest way to cut and modify my downspout for rain barrel connection?
Safety is key when modifying your downspout. Follow these steps in order: position your barrel, inspect the downspout, mark your cut line, protect your siding, and wear safety glasses.
Use a hacksaw to cut the downspout. Save the cut piece for winter. You have three connection methods: cutting and adding an elbow, using a diverter kit, or a flexible extension.
How do I ensure my rain barrel stays level and stable after installation?
Use a level to ensure your barrel sits perfectly flat. Place the level in multiple directions and adjust your foundation until it’s level. An unlevel barrel may tip over or not drain properly.
Secure the barrel according to the manufacturer’s instructions. This ensures stability and prevents water from pooling.
Why is overflow management so critical for my home’s foundation?
A: Overflow management is essential for protecting your foundation. Rain barrels fill quickly, and excess water can harm your foundation. Proper overflow management prevents basement flooding and structural damage.
What are the three main overflow management strategies?
A: Strategy One: Use an overflow hose to direct excess water away from your foundation. Strategy Two: Position a splash block under the barrel to channel water away. Strategy Three: Link multiple barrels together to increase storage capacity. Choose the best strategy for your landscape and needs.
How do I use collected rainwater most efficiently?
A: Use multiple water distribution methods to maximize your rainwater collection. Attach a garden hose for distant watering, a soaker hose for efficient irrigation, or open the spigot for container plants. Leave the spigot open during dry spells to prevent overflow.
How do I prevent mosquitoes from breeding in my rain barrel?
A: Prevent mosquito breeding with multiple strategies. Ensure a tight debris screen and caulk any gaps. Use water promptly and add anti-larval tablets for biological control. Regularly inspect and clean the debris screen and gutters to prevent debris entry.
What water safety precautions should I take when using collected rainwater?
A: Important safety guidelines for rainwater use: Never drink or cook with rainwater. Use it only for irrigation. If you have copper gutters or chemically treated roofing, avoid using the water on edibles.
How do I prepare my rain barrel for winter in cold climates?
A: Winterization is key in freezing climates to prevent barrel damage. Drain the barrel before the first hard freeze. Disconnect the barrel from the downspout and rinse it to remove sediment.
Store the barrel in a garage or shed, or turn it upside down outdoors. Reattach the downspout section in spring for proper gutter function. Clean and inspect the barrel before reinstalling.
Should I clean my rain barrel before spring reinstallation?
Yes, thorough cleaning and inspection before spring reinstallation is essential. Rinse the barrel to remove sediment and algae. Inspect for cracks and ensure all connections and seals are intact.
Verify that the spigot, overflow valve, and debris screen are working properly. This ensures your system is ready for the season.
Can I link multiple rain barrels together for expanded water storage?
Yes, linking multiple barrels together in series is an excellent way to multiply your storage capacity. When connected, overflow from one barrel fills the next, increasing your total storage. This is great for large roofs or frequent rainfall.
Connecting barrels requires additional hoses and