Clean drinking water is key for survival. It’s vital in emergencies, off-grid living, or outdoor adventures. Without treated municipal water, water safety becomes a big worry.
A gravity water filter uses gravity to filter water. It doesn’t need electricity or complex parts. Its simple design makes it easy for anyone to build.
Building your own gravity water filter lets you control your water quality. Commercial systems like Berkey filters are expensive. But, you can make a bucket-based system for much less, without losing quality.
This guide shows two ways to make a gravity water filter. The first uses a bucket to filter gallons of water. It’s great for creek water, rainwater, or stored water. The second is a lightweight version perfect for camping and hiking.
You don’t need advanced DIY skills to follow these steps. Each step is easy to follow, even for beginners. By the end, you’ll know how to make your own water filter.
Table of Contents
Why a DIY Gravity Water Filter Is Your Best Emergency Water Solution
Creating your own water filter is smart for emergencies and daily use. A DIY gravity water filter is better than commercial ones. It gives you clean water without needing electricity or complicated parts.
This is great for when the power goes out, camping, or when tap water is not safe. It’s a smart choice for keeping your family safe.
Cost-Effective Alternative to Commercial Filters
Building a DIY gravity water filter saves money. It costs between $60 and $80. This includes three food-grade buckets and a ceramic filter kit for $40 to $60.
Commercial filters can cost over $200. With a DIY filter, you save money over time. Replacement filters cost about $20 and last a year, depending on use.
| Filter System Type | Initial Cost | Annual Filter Replacement | Total Year One Cost |
|---|---|---|---|
| DIY Gravity Water Filter (Bucket) | $60-$80 | $20 | $80-$100 |
| Commercial Gravity Filter | $200+ | $30-$50 | $230-$250 |
| Portable Backpacking DIY Filter | $60-$70 | $15-$20 | $75-$90 |
| Commercial Backpacking Filter | $100+ | $20-$35 | $120-$135 |
Reliable Filtration Without Electricity or Moving Parts
A homemade gravity water filter is simple. It has no pumps or batteries that can fail. Gravity flows water through the filter without any help.
Commercial filters are complicated. They need to be placed over water and have many parts. These parts can break, leaving you without water.
Your DIY filter works without electricity. It’s perfect for emergencies, camping, or off-grid living. It can filter creek water, giving you peace of mind in the wilderness.
- No electricity needed—gravity powers the filtration
- Zero moving parts means zero mechanical failures
- Works anywhere, anytime without external power sources
- Handles contaminated water from natural sources
- Simple design anyone can understand and maintain
Choosing a DIY gravity water filter is a smart choice. It’s cheaper and more reliable than commercial options.
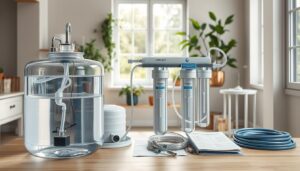
Essential Materials and Components for Your Gravity Water Filtration System
Starting a gravity water filter project requires the right materials and components. You don’t need expensive or hard-to-find items. Most parts can be found at local hardware stores or online.
Choosing the right components ensures your filter works well for a long time. The materials are affordable and easy to find. This makes the project great for those interested in emergency preparedness or off-grid living.
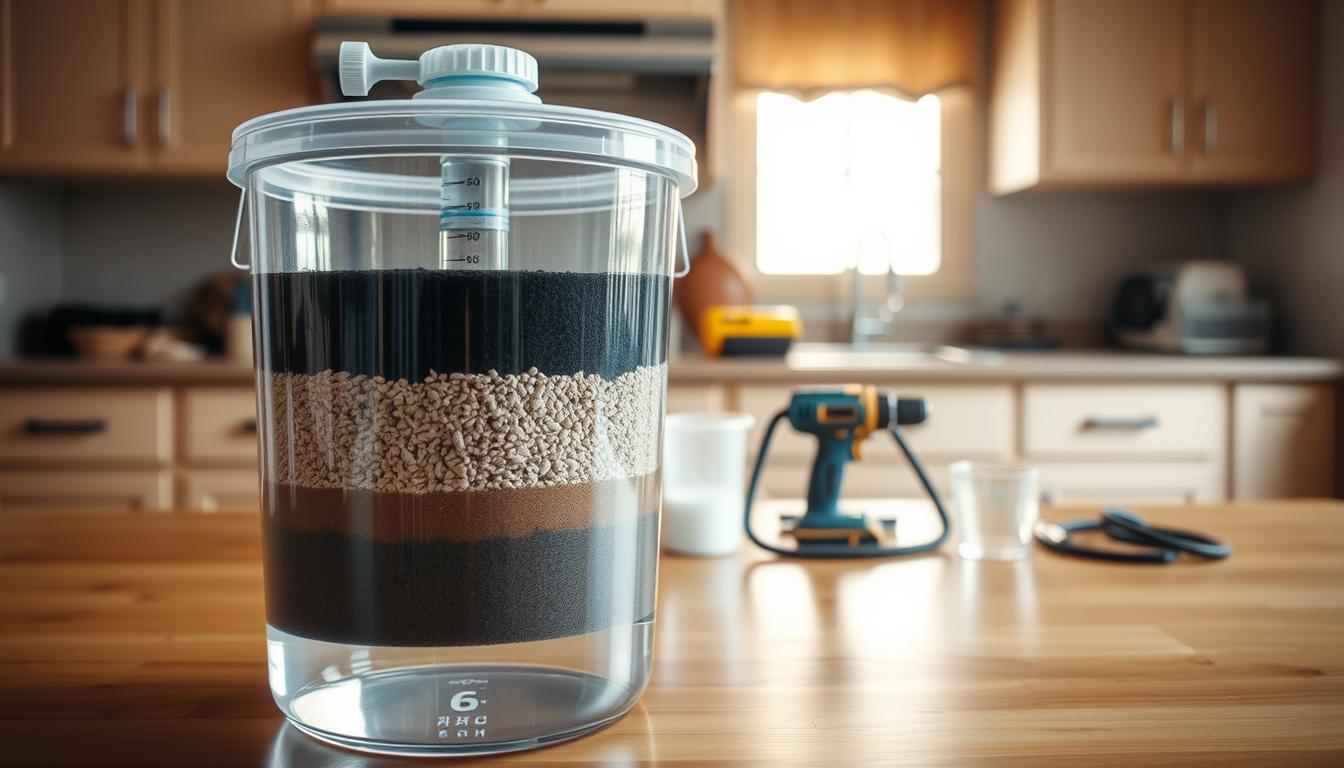
Bucket System Materials
The bucket design uses simple, durable materials. Start with three food-grade 5-gallon buckets with lids. Make sure they are food-grade for safety—never use regular buckets. You’ll also need a ceramic water filter kit with these components:
- One spigot for water dispensing
- Rubber washers (multiple sizes)
- Plastic nuts and wing nuts
- Ceramic fine water filter element
- Pre-filter sock for sediment removal
You’ll also need basic tools. Get a tape measure, Sharpie marker, and a drill with three bit sizes: 3/4″, 5/8″, and 1/16″. These bits are for making holes for your spigot and equalization system.
Portable System Materials
The portable design needs different components. It includes a 30-inch circle of silicone-nylon fabric and eight polypropylene straps for hanging. A Platypus filter ($40-59 on Amazon) is your main filtration unit.
| Component | Specification | Purpose |
|---|---|---|
| Silicone rubber tubing | 1/4″ ID, 3/8″ OD, 10 feet | Water flow and connection |
| Quick-disconnect couplings | Female and male pairs | Easy assembly and disassembly |
| Mesh strainer | Size 60 mesh preferred | Pre-filtration of debris |
| Silicone sealant | Food-safe grade | Waterproof sealing |
| Hanging cord | 2-3mm diameter | Secure suspension |
Both filter designs are affordable. The bucket system costs $75-150. The portable version is $100-180. All parts are available online or at hardware stores, making assembly easy for beginners.
How to Build a Gravity Water Filter: Step-by-Step Assembly Instructions
Building a gravity water filter needs careful attention. This guide will help you assemble two popular designs: the bucket system and the portable bag system. Both use gravity to filter water without electricity or pumps.
Follow these steps to make sure your filter works well and keeps your water clean.
Drilling and Installing the Spigot
The spigot is where water comes out. It needs to be placed just right. Measure 2 inches from the bottom rim of your first bucket and mark the center. This spot keeps sediment from clogging the spigot.
Drill a 3/4-inch hole at this mark. Be careful not to crack the bucket. Once the hole is ready, put your spigot together by following these steps:
- Place a rubber washer on the spigot threads
- Insert the spigot through the hole from outside the bucket
- Add a second washer on the inside
- Screw the plastic nut onto the threads finger-tight
- Straighten the spigot before final tightening
- Avoid over-tightening to prevent bucket damage

Mounting the Ceramic Filter Element
The ceramic filter is key. Start by drilling a 5/8-inch hole through the center of one bucket lid. Then, drill another 5/8-inch hole through the center of the bottom of a second bucket (not your spigot bucket).
This step requires extra care. Here’s how to mount the filter correctly:
- Align the drilled lid with the second bucket bottom
- Insert the ceramic filter element from inside the bucket
- Ensure the pre-filter sock attaches to the element
- Push threads through both the bucket bottom and lid
- Place rubber washers on each side of the holes
- Tighten the wing nut as tight as possible (extra hands help here)
- Never drop the ceramic element, as it cracks easily
Your filter should hang inside the upper bucket. Place the lid on your spigot bucket to create a two-bucket stack.
Creating Pressure Equalization Holes
Pressure equalization holes stop airlocks. These small openings let air out as water flows. This keeps water moving smoothly.
Drill four small 1/16-inch holes around the top rim of both buckets. Here’s how:
- Mark four points evenly spaced around each bucket’s top rim
- Use a 1/16-inch drill bit for precise sizing
- Remove all plastic shards after drilling
- Test that holes allow air to pass through
| System Type | Key Measurements | Hole Quantity | Critical Component |
|---|---|---|---|
| Bucket System | 3/4″ spigot hole (2″ from bottom), 5/8″ filter holes | 4 equalization holes per bucket | Ceramic filter element |
| Portable Bag System | 1/2″ center hole, 6″ and 6-foot tubing | 8 strap positions | Silicone-sealed coupling |
For the portable system, the instructions are a bit different. Cut a 1/2-inch hole in the bag’s center. Apply silicone sealant around both sides. Screw the strainer coupling through without over-tightening PVC threads.
Sew eight straps around the bag’s edge and thread cord through them for hanging. Attach tubing with the 6-inch tube on one side and 6-foot tube on the other. The long tube should bend downward before entering your collection bottle to prevent contamination.
Testing Your Homemade Gravity Water Purifier for Optimal Performance
Congratulations on building your gravity water purifier system. Now, it’s time to test it. This ensures it works safely and effectively. Testing is important to protect you and your family from contaminated water.
Begin by preparing your water source. Use a third bucket to collect water from your creek, stored rainwater, or other non-potable water. Place a lid on your haul bucket during transport. This keeps water from sloshing and debris out of your collection bucket.
Fill your top bucket slowly and watch for leaks. Position the pre-filter sock over the ceramic filter element before pouring. If air gets trapped, gently squeeze it out and push the sock back down. Fill the bucket halfway for your initial test run.
Initial Flow Rate and Leak Detection
Your gravity water purifier should flow steadily without leaking. If you notice leaks, tighten the connections right away. A good system fills a one-quart bottle in under one minute when assembled correctly. Slower flow rates mean you need to plan ahead for enough filtered water.
Typical gravity water filtration systems filter between 2-4 liters per minute. So, be patient.
Critical Safety Step: Boiling Your Filtered Water
Here’s the essential truth: your gravity water purifier removes sediment, improves taste and odor, and eliminates many contaminants. Ceramic filters catch protozoa, bacteria, and some chemicals. Boiling filtered water afterward is non-negotiable for complete safety.
- Boil water at a rolling boil for 1 minute at standard elevations
- Boil for 3 minutes at elevations above 6,500 feet
- Alternately, use UV exposure or chemical disinfection methods
Filter first to improve clarity, then boil to kill any remaining microbes. This two-step approach gives you the safest drinking water possible from your homemade system.
Maintenance Tips and Safety Considerations for Long-Term Use
To keep your gravity water filtration system working well, you need to take care of it regularly. A well-kept system can last for years, but ignoring maintenance shortens its life. Knowing what your system can and cannot do helps keep you safe when using filtered water.
Cleaning and Replacing Filter Components
Your ceramic filter element is key to your system. Most ceramic elements last about a year, but dirty water or heavy use can shorten this. Write the installation date directly on your bucket with a permanent marker to remember when to replace it.
If your filtered water flows slower, it’s time to clean your ceramic element. Gently scrub the outer surface under running water with a soft brush or ScotchBrite pad. This removes sediment and biofilm without damaging the ceramic. Replacing elements costs about $20 and fits right into your system.
Don’t forget about your pre-filter sock. Check it often and rinse it when it gets dirty. A clogged pre-filter can stress your ceramic element and slow down water flow. Replace it when rinsing no longer helps.
Storage and seasonal care matter:
- Never let your system freeze while wet, as ice can crack ceramic elements
- Keep it indoors during winter
- Remove and dry filter elements before cold storage
- Check silicone tubing for cracks or degradation every quarter
- Inspect quick-disconnect couplings for proper sealing
- Clean mesh strainers when you see sediment
Understanding Filtration Limitations and Water Sterilization
Your DIY gravity water filtration system does a great job removing visible particles and improving taste. It reduces sediment, removes many bacteria, and filters protozoan parasites like giardia. It also reduces chlorine flavor when activated carbon is included.
But, your system has limits. It can’t remove all viruses, dissolved salts, PFAS chemicals, or every trace of heavy metals and contaminants. Water sterilization is absolutely essential for safety. Boil your water at a rolling boil for one minute (three minutes above 6,500 feet elevation) to kill microbes. UV purification or chemical treatments like iodine tablets are alternatives.
Critical material safety rules:
- Use only food-grade activated carbon designed for water treatment
- Never use charcoal from grills or barbecues
- Choose clean aquarium sand or filtration-grade sand only
- Avoid outdoor sand that introduces unknown contaminants
- Select food-grade buckets to prevent chemical leaching
Filtering and sterilizing work together. Your gravity water filtration system removes sediment and improves taste. Boiling kills microbes your filter can’t capture. For daily use with contaminated water sources, certified commercial systems offer better protection. Your DIY system is great for emergency preparedness, camping, and off-grid living.
Conclusion
You now know how to make a gravity water filter for any situation. You can pick the bucket design for home or the portable one for camping. This skill brings you peace of mind, letting you have safe water without needing store-bought systems or electricity.
Using your DIY filter saves money, costing $60 to $80 compared to $200 for commercial ones. It’s reliable, has no moving parts, and doesn’t need electricity. Plus, the water tastes great and fresh. Your homemade filter is also lighter and simpler than many commercial ones.
Remember to keep your filter clean and replace it yearly. Always boil or sterilize your water after filtration to kill germs. Test your system with safe water first. Also, store extra filter elements in your emergency kit.
Your gravity water filter is now a key part of your emergency plan, off-grid setup, or outdoor gear. Making your own filter shows you can solve real problems with smart solutions. Start using it today and feel confident about having clean water anytime. Share your experience and join others who value self-reliance and preparedness.
FAQ
What is a gravity water filter and how does it work?
A gravity water filter uses gravity to filter water without electricity. It has an upper chamber and a lower chamber. Water flows from the top to the bottom through a filter.
This makes it great for emergencies, off-grid living, and outdoor adventures.
How much does it cost to build a DIY gravity water filter compared to commercial units?
A DIY filter costs -80. This includes three food-grade buckets and a ceramic filter kit. Commercial units like the Berkey system cost 0 or more.
The portable version costs -70. This is cheaper than commercial backpacking filters. Ceramic filter elements cost about and last a year.
What materials do I need to build a bucket-based gravity water filtration system?
You need three food-grade 5-gallon buckets and a ceramic water filter kit. You also need basic tools like a tape measure and a Sharpie marker.
These materials are available online or at hardware stores.
What materials are needed for a lightweight portable gravity water filter?
For the portable system, you need a silicone-nylon fabric circle and eight straps. You also need a Platypus filter, silicone tubing, quick-disconnect couplings, and a mesh strainer.
Use silicone sealant and 2-3mm cord for hanging.
How do I drill and install the spigot on my gravity water filter?
Measure and mark a point 2 inches above the bottom rim of your first bucket. Drill a 3/4″ hole carefully to avoid cracking the bucket.
Assemble the spigot by placing a rubber washer on the threads. Insert the spigot through the hole and add the second washer on the inside. Screw the plastic nut finger-tight.
What is the proper way to mount the ceramic filter element?
Drill a 5/8″ hole through the center of one lid and the bottom of a second bucket. Place the lid against the bucket bottom to align the holes.
Insert the ceramic filter element from inside the bucket. Place rubber washers on each side of the holes and tighten the wing nut as much as possible.
Why do I need to create pressure equalization holes in my gravity water filter?
Pressure equalization holes allow air to escape as water flows. This prevents airlock that would stop water flow. Drill four small holes using a 1/16″ bit around the top rim of both buckets.
How do I test my homemade gravity water purifier to ensure it works correctly?
Use a third bucket to collect water from your source. Pour water slowly into the top bucket. Squeeze out any trapped air in the sock and fill the top bucket about halfway for the initial test.
Watch carefully for leaks around the spigot, filter mounting points, or bucket seams. For the portable system, hang the bag from an elevated point, fill it with water, then connect the male coupling to start filtration.
What flow rate can I expect from a bucket-based gravity water filter?
The bucket system with ceramic filter has a slower filtration rate of less than 1 gallon per hour. You need to plan ahead to ensure adequate filtered water supply.
Do gravity water filters make water completely safe to drink?
While DIY gravity filters improve water clarity and remove many contaminants, they don’t make untreated water universally safe. For complete microbial safety, water must be boiled at a rolling boil for 1 minute after filtering.
How long does a ceramic filter element last?
A ceramic filter element typically lasts about one year. Write the installation date with a Sharpie marker directly on one of the buckets as a reminder. When flow rate decreases, gently scrub the outer surface of the ceramic element with a soft brush or ScotchBrite pad under running water.
How should I store my gravity water filter during winter months?
The filter cannot tolerate freezing temperatures when wet. Store the system indoors during winter, or remove the filter element and dry it completely before storing.
What can a DIY gravity water filter remove from water?
DIY gravity filters can dramatically improve water clarity. They remove sediment and visible particles. They also reduce chlorine taste and odor when activated carbon is used.
They filter out protozoan parasites like giardia and cryptosporidium. They remove many bacteria and reduce some heavy metals and organic compounds.
What can a DIY gravity water filter NOT remove from water?
DIY gravity filters cannot reliably remove all viruses. They cannot eliminate dissolved salts and minerals. They cannot remove PFAS (forever chemicals).
They cannot eliminate all heavy metals or remove all chemical contaminants. This is why water sterilization after filtering is absolutely essential for safety.
What type of sand and activated carbon should I use in my gravity water filter?
Never use charcoal from grills as it contains additives and chemicals that contaminate water. Only use food-grade activated carbon designed for water treatment. For sand layers, use clean aquarium sand or filtration-grade sand—never sand from outside that could introduce contaminants.
Why is the pre-filter sock important in a gravity water filtration system?
The pre-filter sock is critical because it filters out large particles, dirt, and organic matter. It must be properly positioned over the ceramic filter. When it becomes visibly dirty or clogged, it should be rinsed thoroughly or replaced to prevent reduced flow rate and protect the ceramic element from premature clogging.
How do I assemble a portable gravity water filter bag?
Cut a 0.5″ diameter hole in the center of your silicone-nylon fabric bag. Apply silicone sealant generously around both sides of the hole. Then pass the coupling through and screw in the strainer (being careful not to over-tighten the PVC threads).
Sew eight straps around the bag’s edge (straps folded in half, straddling the fabric). Thread cord through the straps for hanging. Cut tubing to proper lengths (6 inches for one side, 6 feet for the other) and attach the quick-disconnect couplings.
What is the importance of the long tube extending downward in a portable gravity water filter?
The long tube should bend downward before entering the collection bottle. This prevents leaks from contaminating clean water. It ensures that any contamination doesn’t return to the filtered water supply.
Can I use regular plastic buckets instead of food-grade buckets for my gravity water filter?
No, you must use food-grade buckets to avoid chemical leaching into your drinking water. Regular plastic buckets may contain chemicals that can leach into water, making it unsafe to drink. Always verify that buckets are specificially labeled as food-grade.
What should I do if my gravity water filter develops a leak?
If leaks appear around the spigot, filter mounting points, or bucket seams, tighten the appropriate connections. Check that the rubber washers are properly positioned, the plastic nut is secured, and the wing nut holding the ceramic filter element is tightened as much as possible without over-tightening the spigot assembly.
How often should I replace the pre-filter sock?
Replace the pre-filter sock when it becomes visibly dirty or clogged. Regular inspection and cleaning extend its life, but replacement frequency depends on how dirty your source water is. Keeping the pre-filter clean prevents it from reducing water flow rate and protects the ceramic element from premature clogging.
Is boiling water after gravity filtration really necessary?
Yes, boiling is absolutely necessary for complete safety. While gravity filters remove many contaminants and reduce microbes, they cannot eliminate all viruses and some bacteria. Boiling filtered water at a rolling boil for at least 1 minute (3 minutes above 6,500 feet elevation) kills any remaining microbes. You can also use UV purification or chemical treatment like bleach or iodine tablets.
What is the difference between filtering and sterilizing water?
Filtering removes sediment, visible particles, many bacteria, some protozoa, and various contaminants while improving taste and clarity. Sterilizing (through boiling, UV, or chemicals) kills microbes for complete safety. Together, they provide complete water purification: filtering improves water quality, and sterilizing ensures any remaining microbes are eliminated.
Can I rely on a DIY gravity water filter alone for emergency water supply?
While DIY gravity filters are excellent for emergency preparedness and off-grid living, they should always be used with proper water sterilization (boiling, UV, or chemical treatment) for complete safety. For long-term daily use or when dealing with known contaminants, certified commercial systems (reverse osmosis, UV purification, or professional-grade filters) are recommended, but DIY gravity filters excel when combined with sterilization methods.
How do I know which gravity water filter design to build—bucket or portable?
Choose the bucket-based system if you need a household gravity water filtration system for filtering several gallons at a time from sources like creeks or stored water for emergency preparedness or off-grid living. Choose the lightweight portable version (weighing just 7.5 ounces) if you’re planning camping trips, hiking adventures, or need a system that eliminates the hassle of pump filters while on the go.
What tools do I need to build a bucket-based gravity water filter?
You’ll need a tape measure for accurate measurements, a Sharpie marker for marking drilling locations, and a drill with three specific bits: 3/4″ for the spigot hole, 5/8″ for the filter element mounting holes, and 1/16″ for the pressure equalization holes.
Where can I purchase the ceramic filter kit for my DIY gravity water filter?
Ceramic filter kits are available from direct suppliers and can also be purchased on Amazon. Search for food-grade ceramic water filter kits that include the spigot, washers, nut, ceramic element, and pre-filter sock.
How should I transport water from my source to my gravity water filter bucket?
Use the third bucket to collect water from your source, and put a lid on the haul bucket to prevent water from sloshing during transport and to keep out leaves and debris. This ensures your source water is as clean as possible before it enters your filtration system.
What is the weight and portability advantage of a DIY portable gravity water filter?
The portable DIY gravity water filter weighs just 7.5 ounces, making it incredibly lightweight for backpacking and camping. It’s lighter, simpler, less expensive, and easier to use than commercial alternatives, requiring no siphoning or priming—just hang it, fill it, and water begins flowing immediately.
Can I build a gravity water filter if I have no DIY experience?
Yes! This guide provides complete, step-by-step instructions that anyone can follow, regardless of their DIY experience level. The friendly, practical approach makes building your own gravity water filter achievable, cost-effective, and rewarding for beginners.
Should I keep replacement filter elements on hand for emergency preparedness?
Yes, keeping replacement ceramic filter elements (costing about each) on hand is an excellent emergency preparedness practice. Having backups ensures you won’t be without filtration if your element needs replacement during an emergency situation.
What is the best practice for testing my gravity water filter before relying on it in emergencies?
Test your system with safe water sources first to build confidence before relying on it in emergency situations. This allows you to identify any leaks, understand the flow rate, practice the assembly and disassembly process, and become familiar with proper maintenance and operation.
Can I use my DIY gravity water filter for filtering creek water that might contain giardia?
Yes, the bucket system can filter creek water suspected of containing giardia, as ceramic filters remove protozoan parasites like giardia and cryptosporidium. For complete safety, you must follow up the filtration with water sterilization by boiling, UV exposure, or chemical disinfection to eliminate any remaining microbes.
How does a DIY gravity water filter compare to pump filters for water filtration?
Unlike pump filters that require uncomfortable positioning over water sources while juggling multiple components, gravity systems simply hang and work—water flows naturally without any mechanical assistance. Gravity systems have no pumps, batteries, or complex mechanisms to fail, making them more reliable in the field during emergencies when equipment failures could be dangerous.
What are the advantages of building your own gravity water filter system?
Building your own gravity water filter offers significant cost savings (-80 instead of 0+). It requires no electricity and no complex moving parts to maintain or fail. It gives you the satisfaction of creating a potentially life-saving tool with your own hands and allows customization for your specific needs and situation.